User Manual
What’s new ?
Endless Paper 2.1 is here!
The Eraser now has two new modes to make editing your canvas easier than ever:
- Erase entire strokes in a single gesture using the new Stroke Eraser mode.
- Change the eraser’s width on the go with a simple tilt of your stylus.
And if you missed the last update...
Endless Paper 2.0 introduced a whole new set of powerful ways to create, edit, and share your work.
Bring your canvas to life by creating smooth, mesmerizing zooms between any areas of your work and exporting them as videos, perfect for sharing your ideas in a whole new way.
You can also publish your entire canvas as a web page with the new WebXP export, letting others explore your work online.
Working with imported assets is more powerful than ever:
- Vectorize imported images so they stay perfectly crisp, no matter how far you zoom in.
- Stay organized with new grouping and ungrouping feature, making complex compositions easier to manage.
- Import PDFs directly into your canvas and annotate them freely, just like any other element.
- Add links to open websites directly from your canvas, build interactive buttons that open other apps, or jump to bookmarks.
Enjoy a brand-new toolbar with easier access to the Ruler and Eyedropper, and fill large areas in just a few taps with the new Paint Bucket tool.
Get inspired without leaving the app. Explore canvases created by professional artists in the Featured Gallery and see what’s possible with Endless Paper.
And best of all, you can try it all right now with the brand-new free trial.
Introduction
Presentation
Introducing Endless Paper; an all-new kind of app featuring infinite canvases! This lets you take handwritten notes, sketch diagrams, explore and grow ideas visually, brainstorm with your team, organize your thoughts spatially, and so much more… We really advise you to read the chapter about bookmarks to learn how to keep track of all your content and avoid losing any of your work!
To use Endless Paper we recommend you to use an iPad and an Apple Pencil or a Logitech Crayon.
Interface
Endless Paper (UI) tries to be as distraction-free and low cognitive as possible. As a convention, destructive actions are signaled using either an orange or red color screen.
You’ll see that Endless Paper has also divided its controls between hand gestures for navigating the canvas and stylus actions for interacting with your project.
Endless Paper's minimal interface consists of three main areas, designed to keep your focus on your artwork.
1 - Bookmarks
Bookmarks are used to save locations on your canvas so that you can move from one to another quickly or to make presentations .
2 - Undo and Redo
Here you can undo or redo your actions without limits, however you cannot undo or redo actions after closing the app and ending your session.
Depending on your stylus, you might be able to configure the double-tap and squeeze behaviors of your Apple Pencil to undo or redo actions on your canvas.
Please note that double-tap functionality is only compatible with the second generation Apple Pencil and above, while squeeze functionality is only compatible with the Apple Pencil Pro.
3 - Export
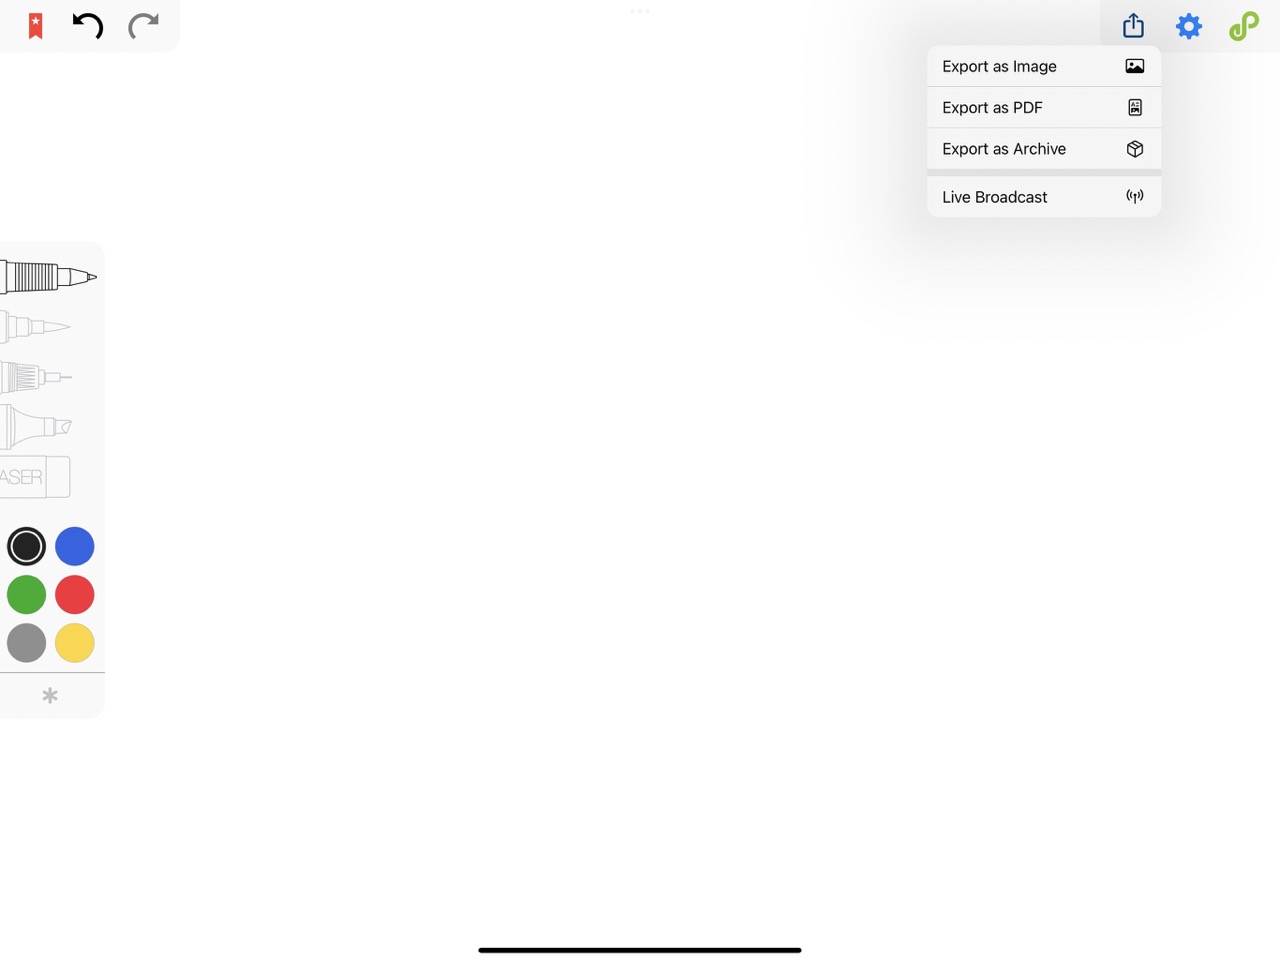
You can export your canvases as archives to store them wherever you want, share them as a website page with the WebXP export and create live broadcasts to show your surface to other people on the internet.
You can also export parts of your canvas as images, as PDF files, and as videos.
4 - Settings
There you can access useful informations about your app, adjust some settings to perfect your experience on Endless Paper, and see your Account .
5 - Canvas gallery
You can access your canvas gallery to create new canvases, quickly switch from one to another, or browse artworks made by professional artists for inspiration.
6 - Toolbar
Here you can find your brushes, lasso, eraser and color palettes.
You can hide your toolbar and enter full screen mode by putting your finger on the toolbar and swiping it quickly to the left. (If you wish to hide your toolbar while still being able to see the other buttons, you can disable the full screen mode in the Option Tab .)
You can make your toolbar appear by swiping right from the left edge of the screen.
The “extended toolbar” allows you to modify your brushes and colors in more detail. You can make the extended toolbar appear like a drawer: simply put your finger on the already visible toolbar and swipe it to the right.
Brushes
You can draw and write on your canvas with your stylus the same way you use a regular pencil, or use your finger by simply touching your device’s screen and selecting a brush in the Toolbar.
The brushes work the same way as writing on paper does with a pen or a pencil. This means that when drawing/writing, your scribbles will accumulate on top of other things already on the canvas.
Depending on your stylus, you might be able to configure the double-tap and squeeze behaviors of your Apple Pencil to switch back (or briefly switch back) to the previous tool you used.
Please note that double-tap functionality is only compatible with the second generation Apple Pencil and above, while squeeze functionality is only compatible with the Apple Pencil Pro.
There are 4 types of brushes in Endless Paper:
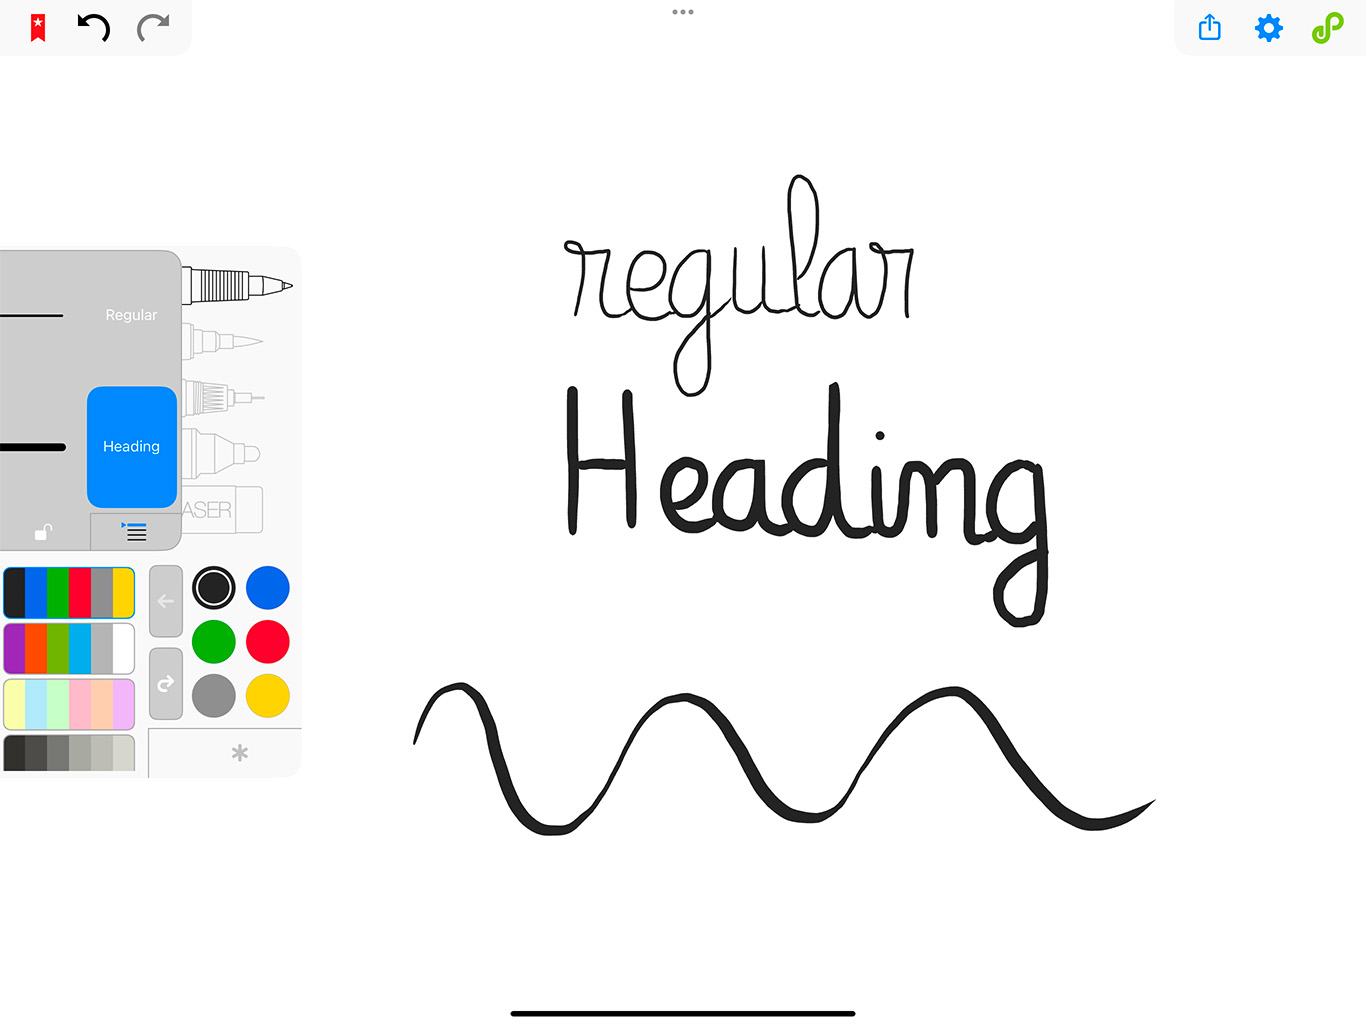
Pen
The “pen” is the best choice for note taking. It moderately reacts to pressure like a ballpoint pen, allowing you to keep a fairly uniform line. To select the pen, simply tap on it in the toolbar.
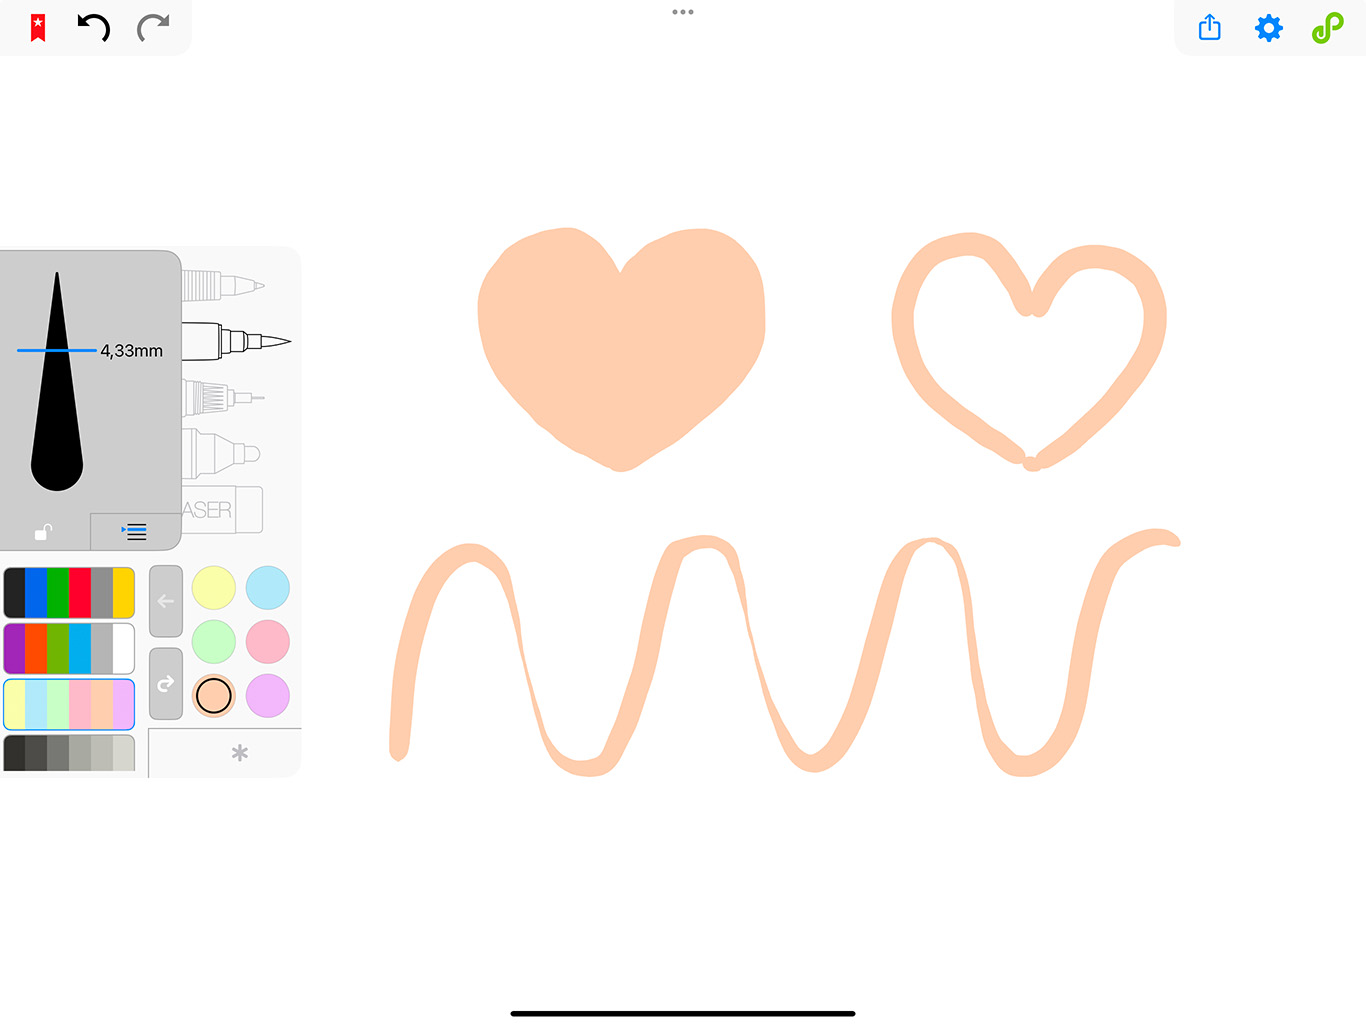
Paint brush
This brush is the perfect choice for drawings and gives you extra creative control over your stroke thickness.
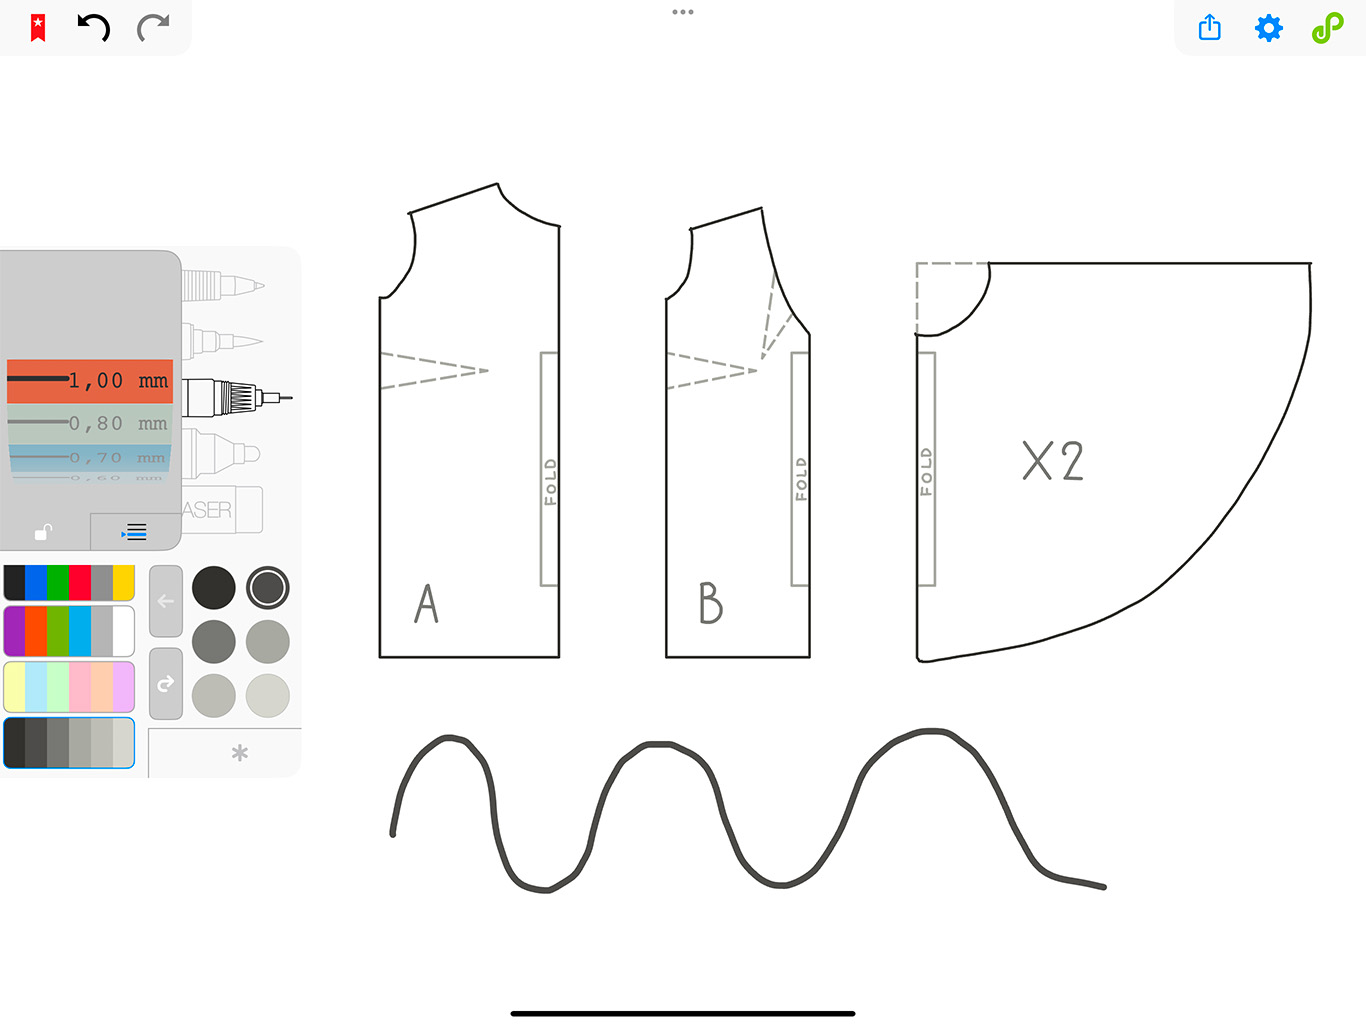
Technical pen
The “technical pen” is the best brush to draw a quick scheme. It is the most stable option. Its line size doesn’t vary no matter the pressure and the size range in the extended toolbar is as stable as the pen, and at the same time has more than just a large or a small option.
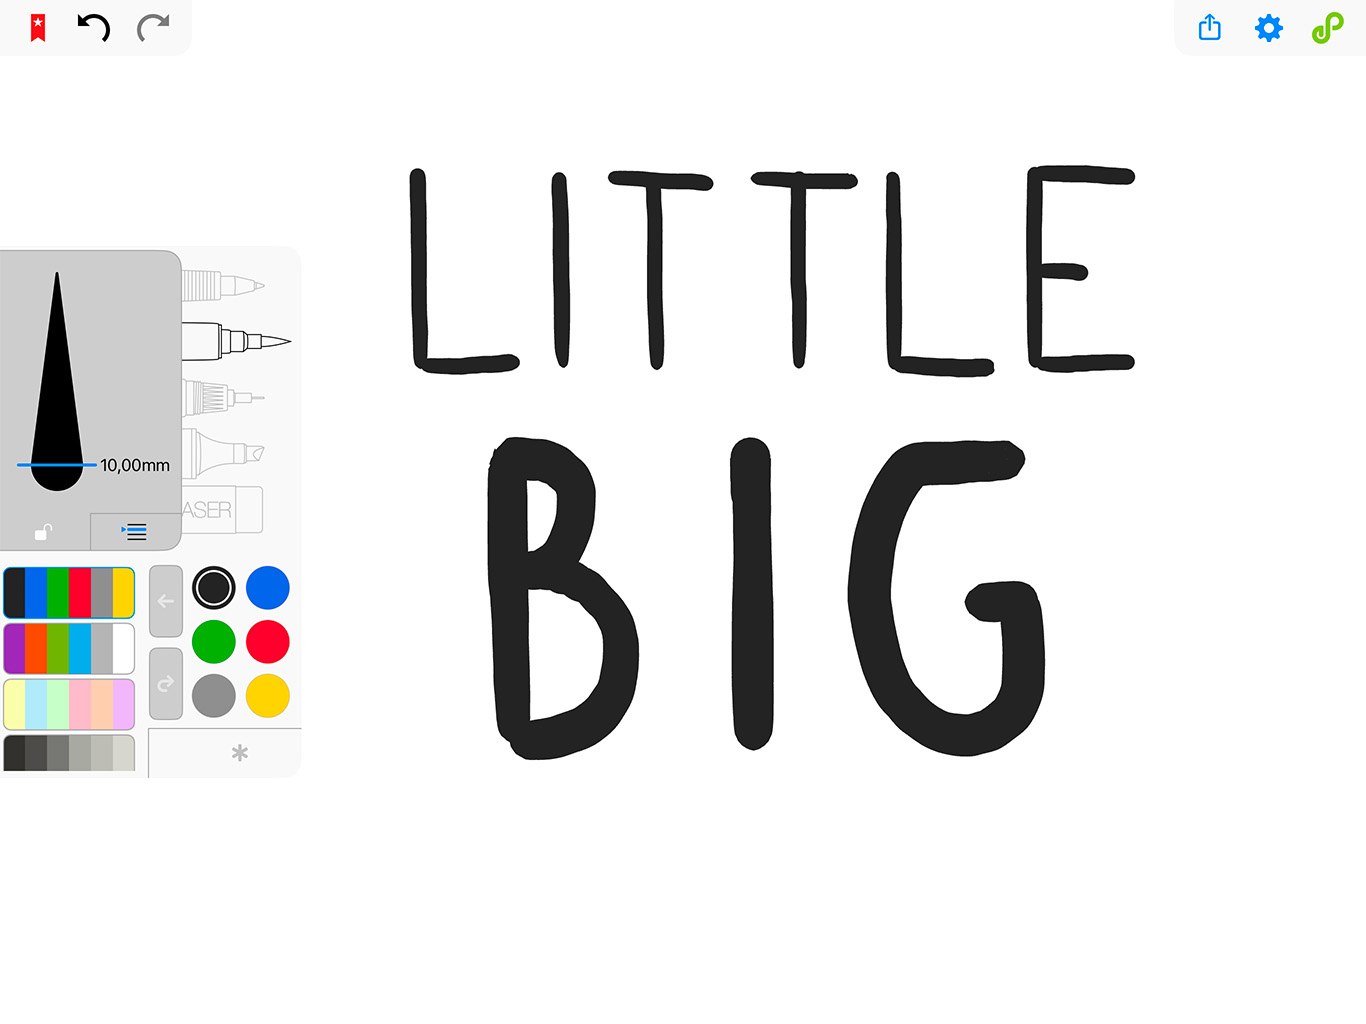
Highlighter
The “highlighter” is the perfect option to make your ideas pop out! Its strokes are more regular and allow you to highlight areas of your canvas when combined with the right layer.
You can customize the end caps of highlighter strokes, switching between straight and rounded styles by using the button above the layer selector
Size
In the extended toolbar, you can select a different size for each brush. The size menu will vary depending on the selected tool.
The pen and the “technical pen” are the most stable ones. The pen allows only two sizes (regular and heading) while the “technical pen” offers you 13 different sizes.
Meanwhile the paint brush and the highlighter (and the eraser) all offer a more precise size menu. In the extended toolbar, just drag the cursor up or down the “size chooser” until you reach your desired size.
Pressure
Your stylus reacts to pressure. This means that the harder you press on your stylus while scribbling, the larger your stroke will be. This can be useful if you wish to create beautiful artwork or try to add a calligraphic quality to your notes.
However, not all brushes respond to pressure. The sensibility of the brushes can vary, the “technical pen” and the highlighter are designed to offer constant thickness.
Thickness lock
Endless Paper has an infinite canvas, which means that the size of your brush won't always be the same: the brush will maintain the same size from the point of view of your screen which means that zooming-in will make your line appear smaller from your canvas’s point of view.
To avoid that, tap on the lock button in the extended toolbar when you start drawing, or at least before zooming in or out. Your stroke will stay the same whatever you do!
You can take this a step further and save your original location with a bookmark to easily retrieve your stroke thickness whenever you want.
Layers
Near the lock thickness button is the layer button. There are four different layers that you can choose from: bottom, lower, upper and top. To select a layer, tap the layer button and pick the one you want to write or draw on from the list.
In the Option Tab you can choose to hide or show each layer. By default the four layers are visible.
Ruler
When you’re using a brush you can use the ruler to turn your strokes into straight lines. You can connect these lines to any other strokes thanks to its snapping feature. To go back to normal strokes, tap again on the ruler.
If you are using an Apple Pencil Pro, you can set up the squeeze action to quickly activate the ruler.
Paint Bucket
The paint bucket tool lets you fill enclosed areas with a single tap. Just tap the bucket icon , choose your color, then tap the area you want to fill using your stylus.
You can also use the bucket on areas that are already colored. In this case, it replaces the color and similar shades within that shape.
Paint bucket settings
You can fine tune the rules of the paint bucket by adjusting its parameters before filling, or by modifying smaller settings later on.
Color Tolerance
The color tolerance slider controls how similar a color must be to the one you tap for the paint bucket to fill it. A low tolerance fills only areas that closely match the selected color, while a higher tolerance includes a wider range of similar colors, making it easier to fill larger or more varied areas in one tap.
Space Tolerance
The space tolerance slider defines how large a gap in a shape can be while still being considered closed by the paint bucket. With a low value, even small openings will allow the fill to spread, while a higher value will prevent the fill from escaping and treat the shape as closed, even with wider gaps.
Expansion
The expansion slider widens the filled area to help achieve a seamless result. When filling a detailed shape while zoomed out, some fine details may be missed, which can create small gaps when you zoom back in. To automatically fill these gaps, increase the expansion value and place your fill on a layer below your line art. The filled area will slightly extend into the lines, but because it sits underneath, it remains invisible and gives the impression of a perfectly filled shape.
Layer
Below the three sliders, you can choose the layer where the fill will be applied using the layer button. It offers the four layers available in the app, as well as a fifth option, “Automatic ”. When set to “Automatic ”, the fill is applied to the lowest possible layer that keeps it visible.
If you set the expansion value to its maximum and select the layer directly beneath your strokes, you can produce a clean outline.
Fill's action menu
Once you’ve filled an area, the fill can be modified similarly to other assets.
To interact with a fill, you need to activate it then tap once again on it. Following this, a list of available commands will pop up.
- To put your fill in front of your scribbles and other pictures (in the top layer), just tap on the “Bring to Front” button.
- To move your fill behind your scribbles and other pictures (to the bottom layer) just tap on the “Send to Back” button.
- To change your fill's layer, tap on the "Layers" button.
- To change your fill's color, tap on the "Color" button.
- To erase a fill, tap on the “Remove” button.
Once satisfied you can lock again your fill with the "lock" button.
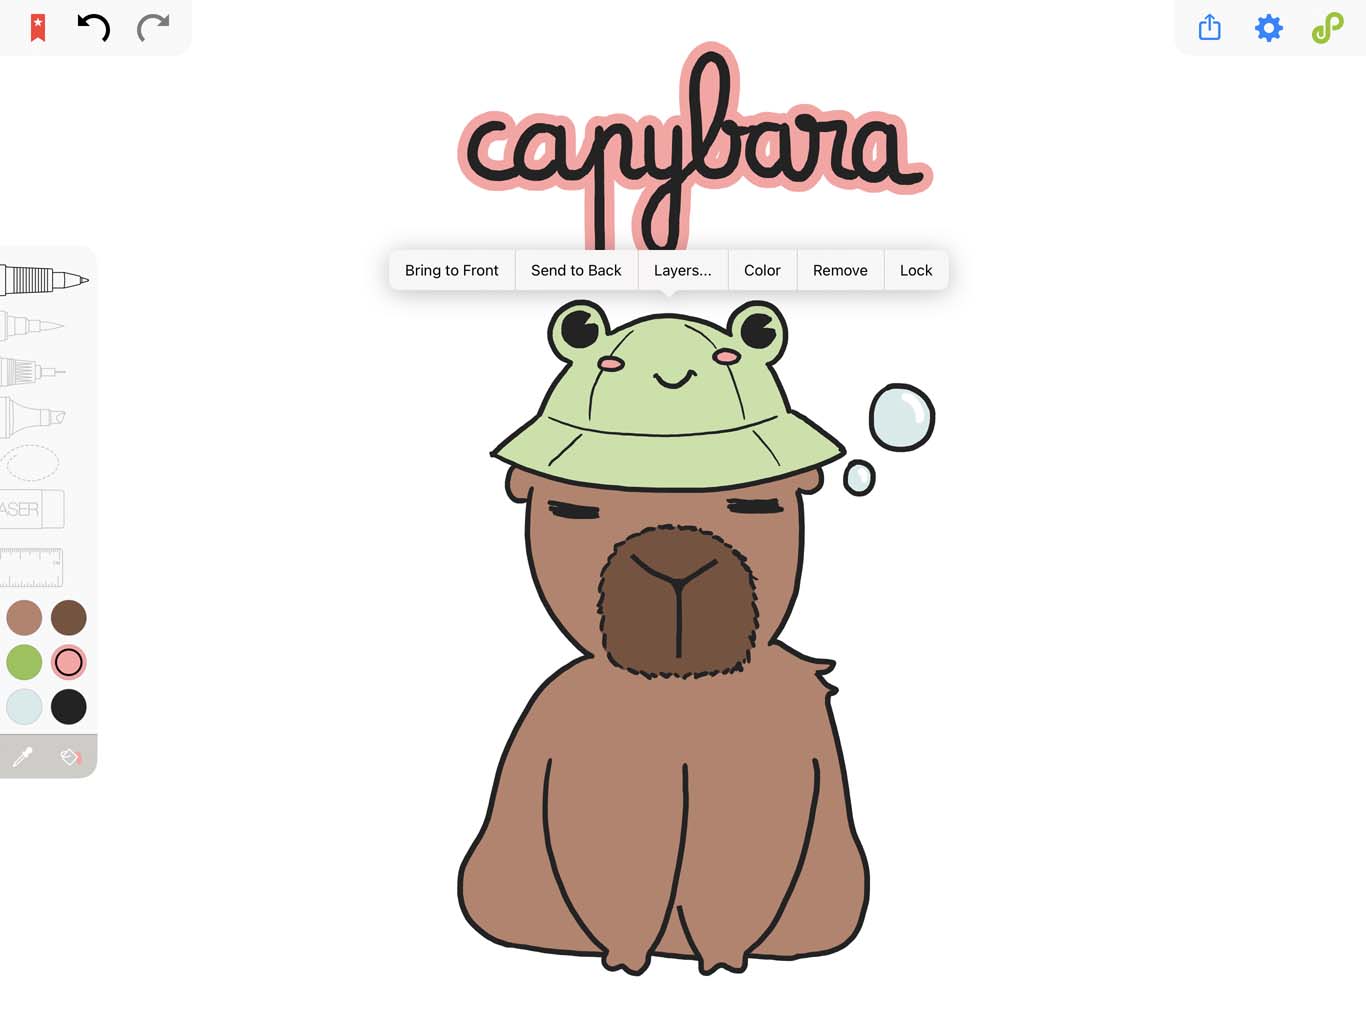
Change the fill's layer
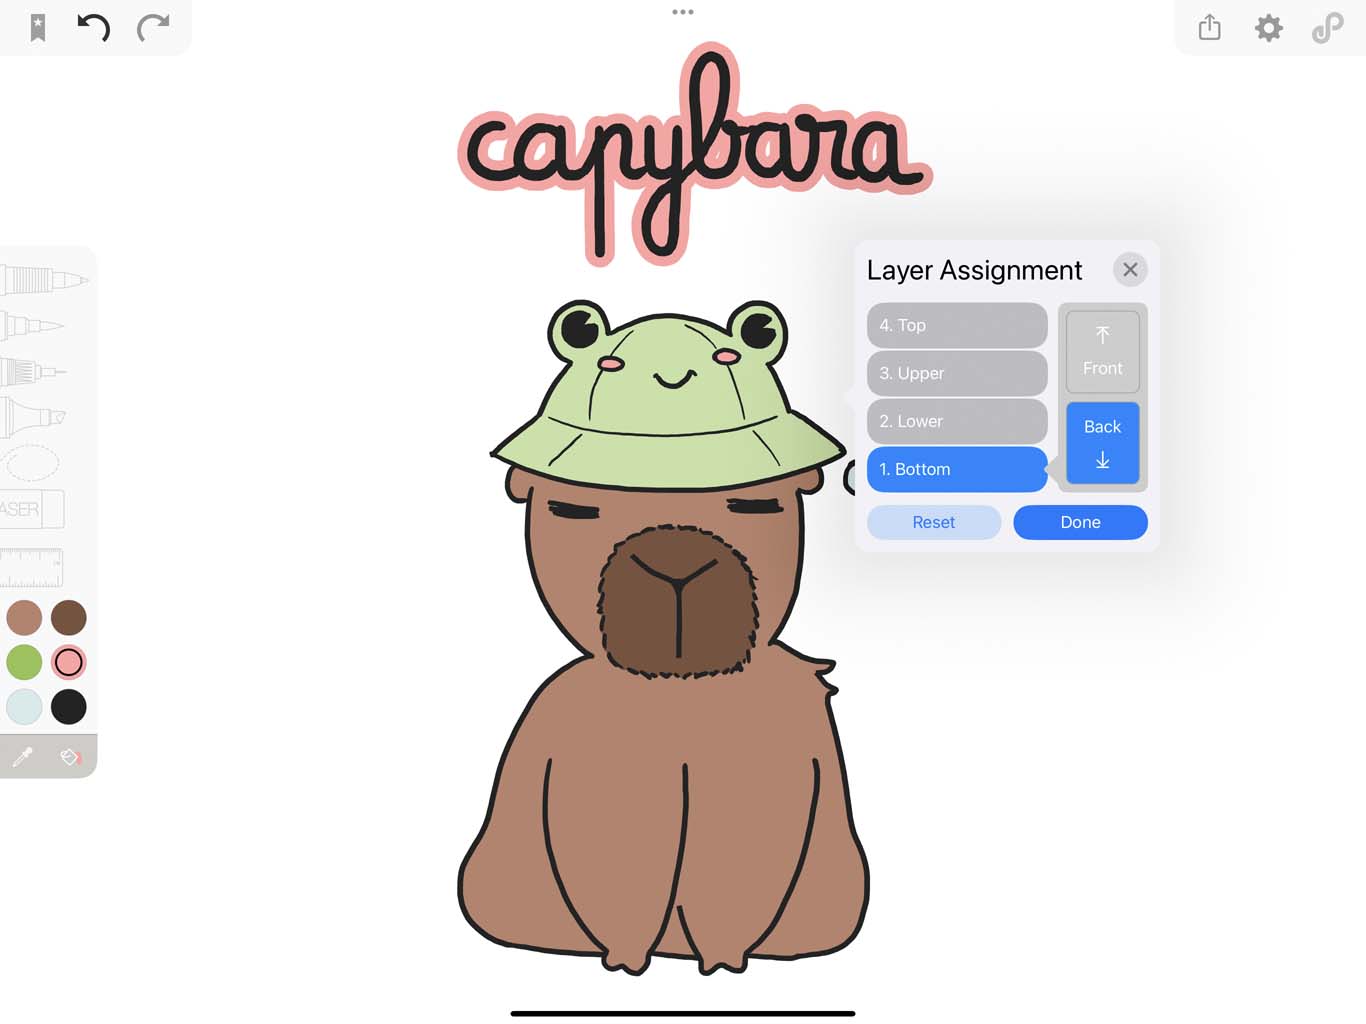
Tapping on the "Layers" button will lead you to a pop-over in which you can select the layer you wish your fill to be on.
Once you've selected your layer, you can then choose whether you want your fill to be in the front (above every other stroke and pictures in this layer) or the back (behind every other stroke and pictures in this layer).
Change the fill's color
Like a vectorized image, you can change the color of your fill and set its dark mode behavior.
Select your color in the interface and tap "Change Color" to open the color chooser. You can then modify the current color of your fill, or past a HSB value to change it into a specific color.
You can also toggle the dark mode setting for this specific fill.
- If it follows dark mode, the fill will automatically adjust its hue depending on whether your device is in dark or light mode. This is ideal for background colors and text.
- If it does not follow dark mode, the color will remain the same regardless of your device’s mode, which is useful for artworks.
Once you’re satisfied, tap "Confirm" to exit the interface and save your changes.
Lasso
The lasso tool lets you modify all the content on your canvas, whether by moving, duplicating, or erasing it.
To use it, tap the lasso icon in the toolbar, then trace a selection using your stylus. Everything inside the drawn shape will be included in the selection. Once the selection is complete, you enter the lasso interface, where you can edit the selection as needed.
There are three ways to exit the lasso interface: by applying your changes, by canceling the selection, or by clearing the selection, which deletes all content inside it.
Move
While in the lasso interface, you can move your selection just like an asset by dragging it with one finger. You can resize it by placing two fingers on the selection and pinching, or rotate it by moving your fingers in opposite directions. The Rotation Snapping setting also applies to this type of rotation.
You can also move your selection directly to the center of the screen by tapping the "Move to center " button on the side of the screen.
Move to a specific bookmark
In the top left corner, you will find the bookmark menu . Tapping it lets you navigate through your bookmarks, just as you would outside the lasso interface. When visiting a bookmark, you can move your selection there by tapping the appropriate button on the side.
To return to the area where you started the selection, tap the Recenter button. It acts as a temporary bookmark, allowing you to quickly return to your original location.
Temporarily lock your selection
You can lock your selection in place by tapping the lock button on the side of the screen. When locked, the selection and its duplicates cannot be moved or modified, which allows you to zoom in or out without affecting their placement.
Reset scale and position
If you rotate a selection, its size may change slightly. To restore its original size, tap the selection and choose “Reset Scale”. To restore the original position, rotation, and size, tap “Reset”.
Duplicate
There are several ways to duplicate a selection.
To duplicate it, tap the duplicate button on the side of the screen. The type of duplication depends on the context, and the current duplication mode is indicated by the icon shown on the button before duplication.
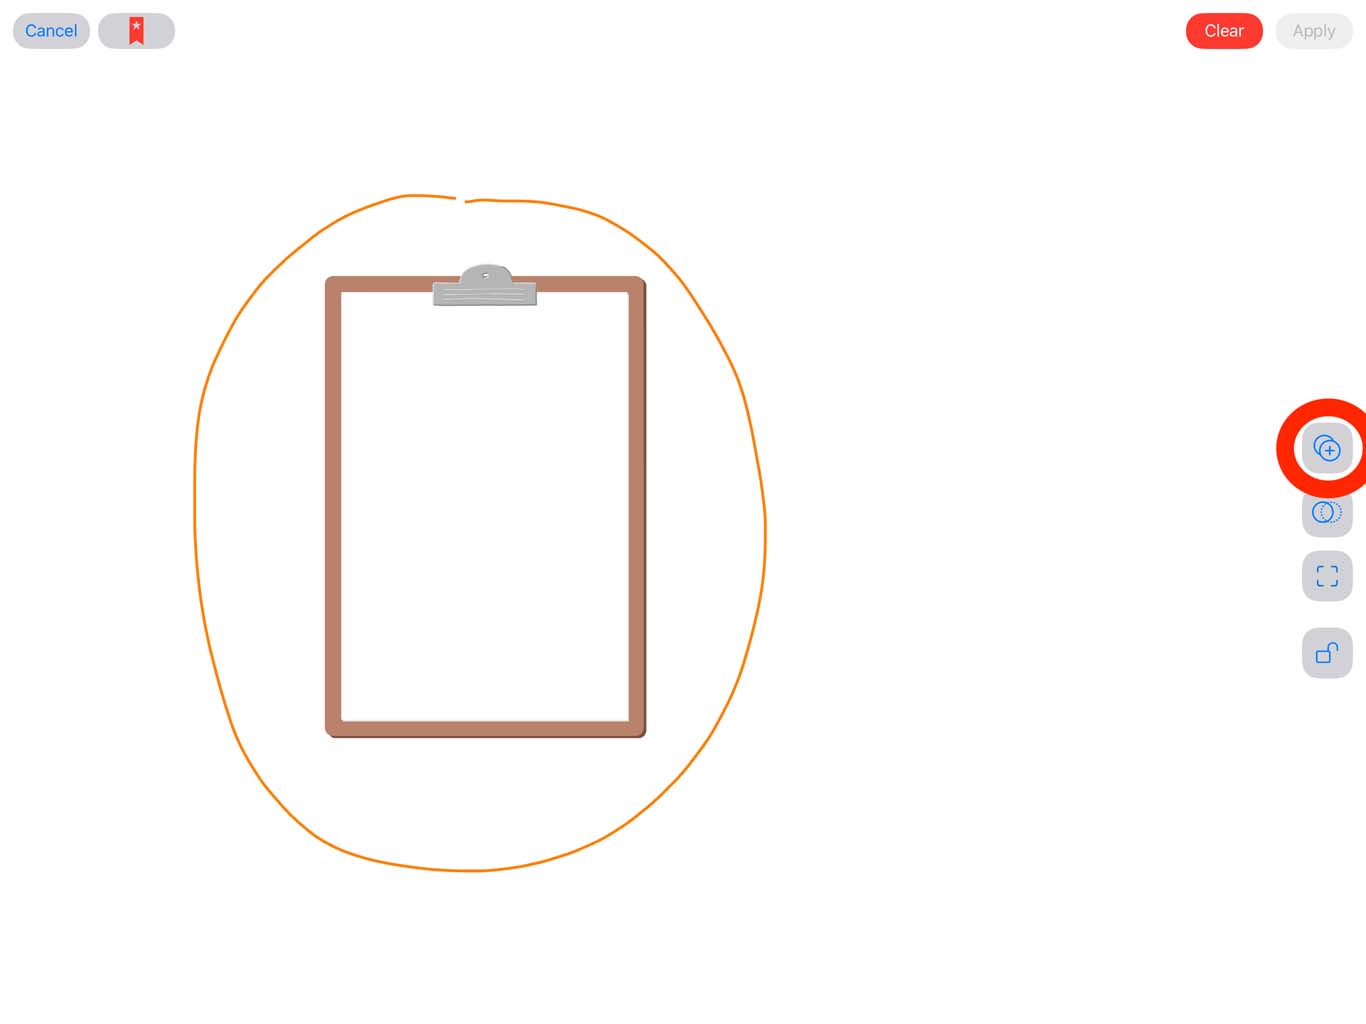
Diagonal duplication
Diagonal duplication places the duplicate diagonally from the original selection, or from the previous duplicate. This type of duplication only changes the position, keeping the same size and rotation.
It is triggered for the first duplication, or after a selection has been centered on the screen.
You can force diagonal duplication by tapping a selection and choosing “Duplicate”. In this case, the new duplicate appears diagonally relative to the selected one.
Recursive duplication
Recursive duplication repeats the transformation between the last two duplications, including movement, rotation, and resizing.
This mode is triggered when the last two selections are visible on screen and there is enough space to place another duplicate.
If you do not modify the first diagonal duplicate, subsequent duplicates will continue to appear diagonally. If you move, rotate, or resize a duplicate, the next one will apply the same transformation.
Centered duplication
Centered duplication places the duplicate in the center of the screen. This mode is used when there is not enough space on screen to fully display the next duplicate.
Eraser
To erase elements of your canvas, just tap on the eraser in the toolbar and then put your stylus (or your finger) over the undesired part.
Depending on your stylus, you might be able to configure the double-tap and squeeze behaviors of your Apple Pencil to activate (or briefly activate) the eraser.
Please note that double-tap functionality is only compatible with the second generation Apple Pencil and above, while squeeze functionality is only compatible with the Apple Pencil Pro.
Eraser options
The “eraser” shares most of its settings with the brushes like the size and the layer system. However it also has some specific features.
Eraser Modes
The Eraser offers different modes to suit your workflow and the type of edit you want to make.
Stroke Erasing
You can switch between the regular Eraser and the Stroke Eraser by tapping the Stroke button in the extended toolbar.
Unlike the regular Eraser, which lets you erase only the parts of a stroke you touch, the Stroke Eraser removes complete strokes at once. This is useful when you want to quickly clean up your work without having to erase small sections manually.
Width Behavior
You can choose between a fixed eraser width and a responsive width controlled by your stylus tilt. To switch between these options, tap the Width button in the top-left corner of the extended toolbar.
- With Fixed Width enabled , set the eraser width manually in the extended toolbar. The Eraser maintains that width as you draw.
- When Fixed Width is disabled , the Eraser responds to the tilt of your stylus. Tilt your stylus to increase or decrease the eraser size as you work.
Eraser Filters
Layer selector
This layer selector is very similar to the one for brushes. While it also allows you to erase on each specific layer, the eraser’s layer selector has another option to erase on all the visible layers. You can choose to hide or show each layer in the option tab .
Zoom level selector
In the extended toolbar you’ll find a zoom level selector button, which is very useful for those who keep zooming in and out.
By tapping on the "zoom level" button, you will be given the choice to erase strokes that were drawn on 3 levels of zoom.
You can choose to:
- Erase bigger notes or drawings located above your current level of zoom, represented by a Saturn icon.
- Erase what you wrote or drew on you current level of zoom, represented by a human icon.
- Erase smaller notes or drawings located under your current level of zoom, represented by a bacteria icon.
Colors
Color choosers
In the toolbar, you can see 6 little colored circles that make a palette - the palette in the toolbar is the “Quick Access Palette”. To select a color and use it, simply tap on it with your finger or your stylus.
You can swipe the toolbar to the right to access the extended toolbar. Here you can select different color palettes and set them as the Quick Access Palette.
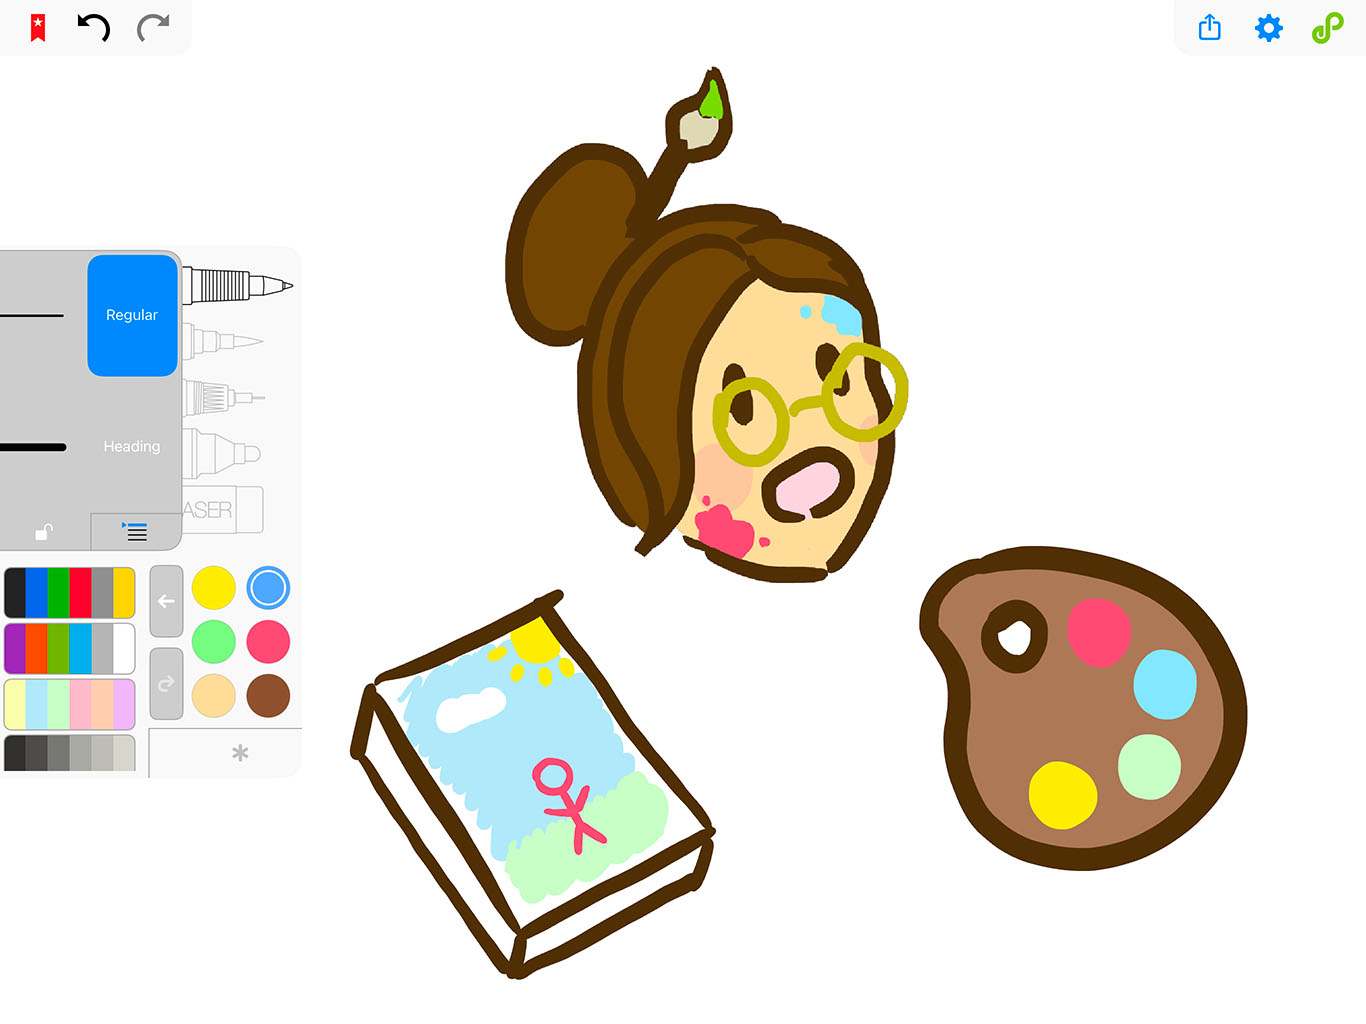
To modify the color from a palette, tap once on the color you wish to change and select the color you need in your color chooser.
The color wheel
By default, your color chooser will be a color wheel. The “color wheel” offers 119 colors to choose from.
We decided to choose shades with the highest contrast available, so this keeps everything very visible - even while working in sunny environments.
To change a color with the color wheel, simply tap on the new color you wish to use from it. You can rotate the wheel by dragging it up and down with your finger.
To close it, just tap anywhere on the canvas.
The advanced color chooser
You may want to use a specific color so you will need the “advanced color chooser”.
To unlock the advanced color chooser, tap on the Cog icon on the top right corner of your screen. Finally, tap on the “use advanced color chooser” switch.
The “advanced color chooser” is composed of a “hue ring” and 3 cursors (H, S and B) that respectively correspond to hue, saturation and brightness.
You will also find a hexadecimal code that can be copied or pasted to export/import a specific shade.
In the left corner you'll find two little colored squares. The one in the front is your current color while the one in the back is your previous one, to quickly perceive the actual difference between 2 shades.
To choose your own color, you can modify the different sliders or directly tap on the triangle by positioning the cursor to wherever you want it to go.
Eyedropper
The “eyedropper” is a tool to pick a color from a previous drawing or an existing picture.
To change a color, select it in the quick access palette, then tap the eyedropper button. Use your stylus to pick the desired color directly on the canvas, then tap the eyedropper button again to confirm your choice.
If you are using an Apple Pencil Pro, you can set up the squeeze action to quickly activate the eyedropper.
Palettes
Endless Paper has four default palettes designed for each brush.
To access your “palette library” you can open the extended toolbar. Here you can save palette, switch between them and manage them.
If you plan to reuse a set of colors in the future you may want to save your current 6 color selections. To save your selections to your palette library, tap on the button. It will automatically save your palette to the drop down menu on the left, and you’ll be able to access it later.
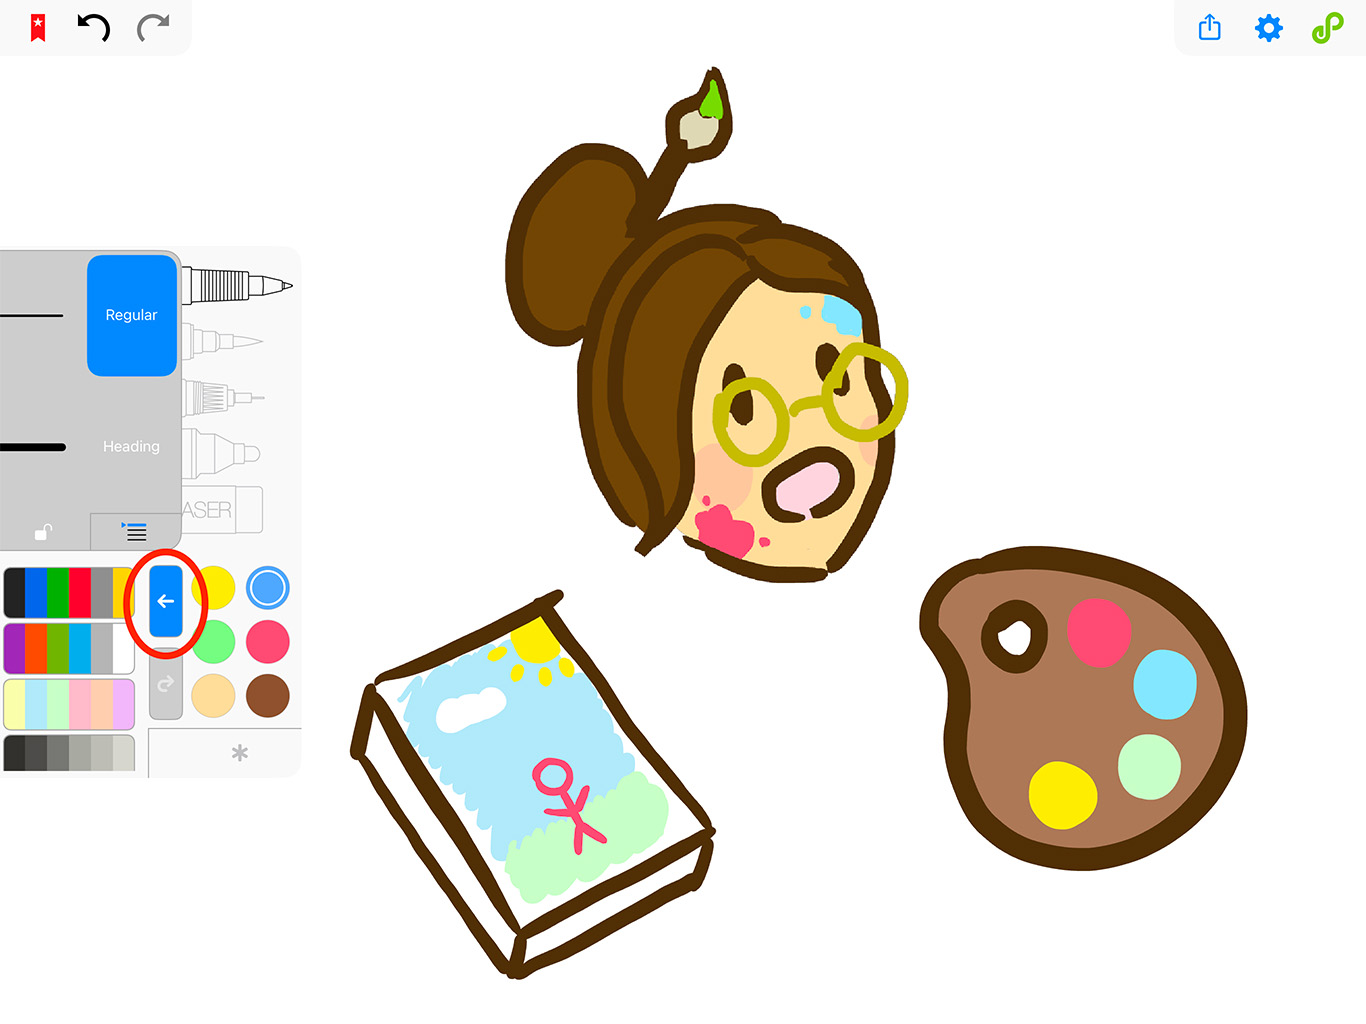
If you forgot to save the last palette that you were using, you can go back to it by tapping on the button, under the save button.
You can modify the position of one of your palettes in the drop down menu by pressing your finger on it until it raises slightly and then dragging it up or down.
To erase a palette, simply swipe it to the left and tap on the delete button, or continue swiping to the left.
To restore the default color palette, you simply need to tap on the gear button at the top right corner of the screen, then tap on the second gear button on the bottom left corner of the popover to access the Option Tab . You can then tap on the orange “restore default color palettes” button, under the “advanced color chooser” switch.
Restoring the default palettes won't erase any of your customized palettes.
Assets
You can drag and drop images, links, and PDFs directly onto your canvas from other apps.
To do this, you can use split screen mode: tap the three dots at the top of the screen while using Endless Paper. Then, tap the button in the middle with two rectangles and choose the other app containing the file you want to add.
On devices running iOS 26 or later, tap the orange point to access additional options for importing assets.
Moving your assets
To move an asset on your canvas, first activate it. Press and hold your finger on the asset for a few seconds until it becomes translucent.
Once activated, you can drag the asset to your desired position.
To rotate an asset, place two fingers on the selected asset and move them in opposite directions (for example, one up and one down).
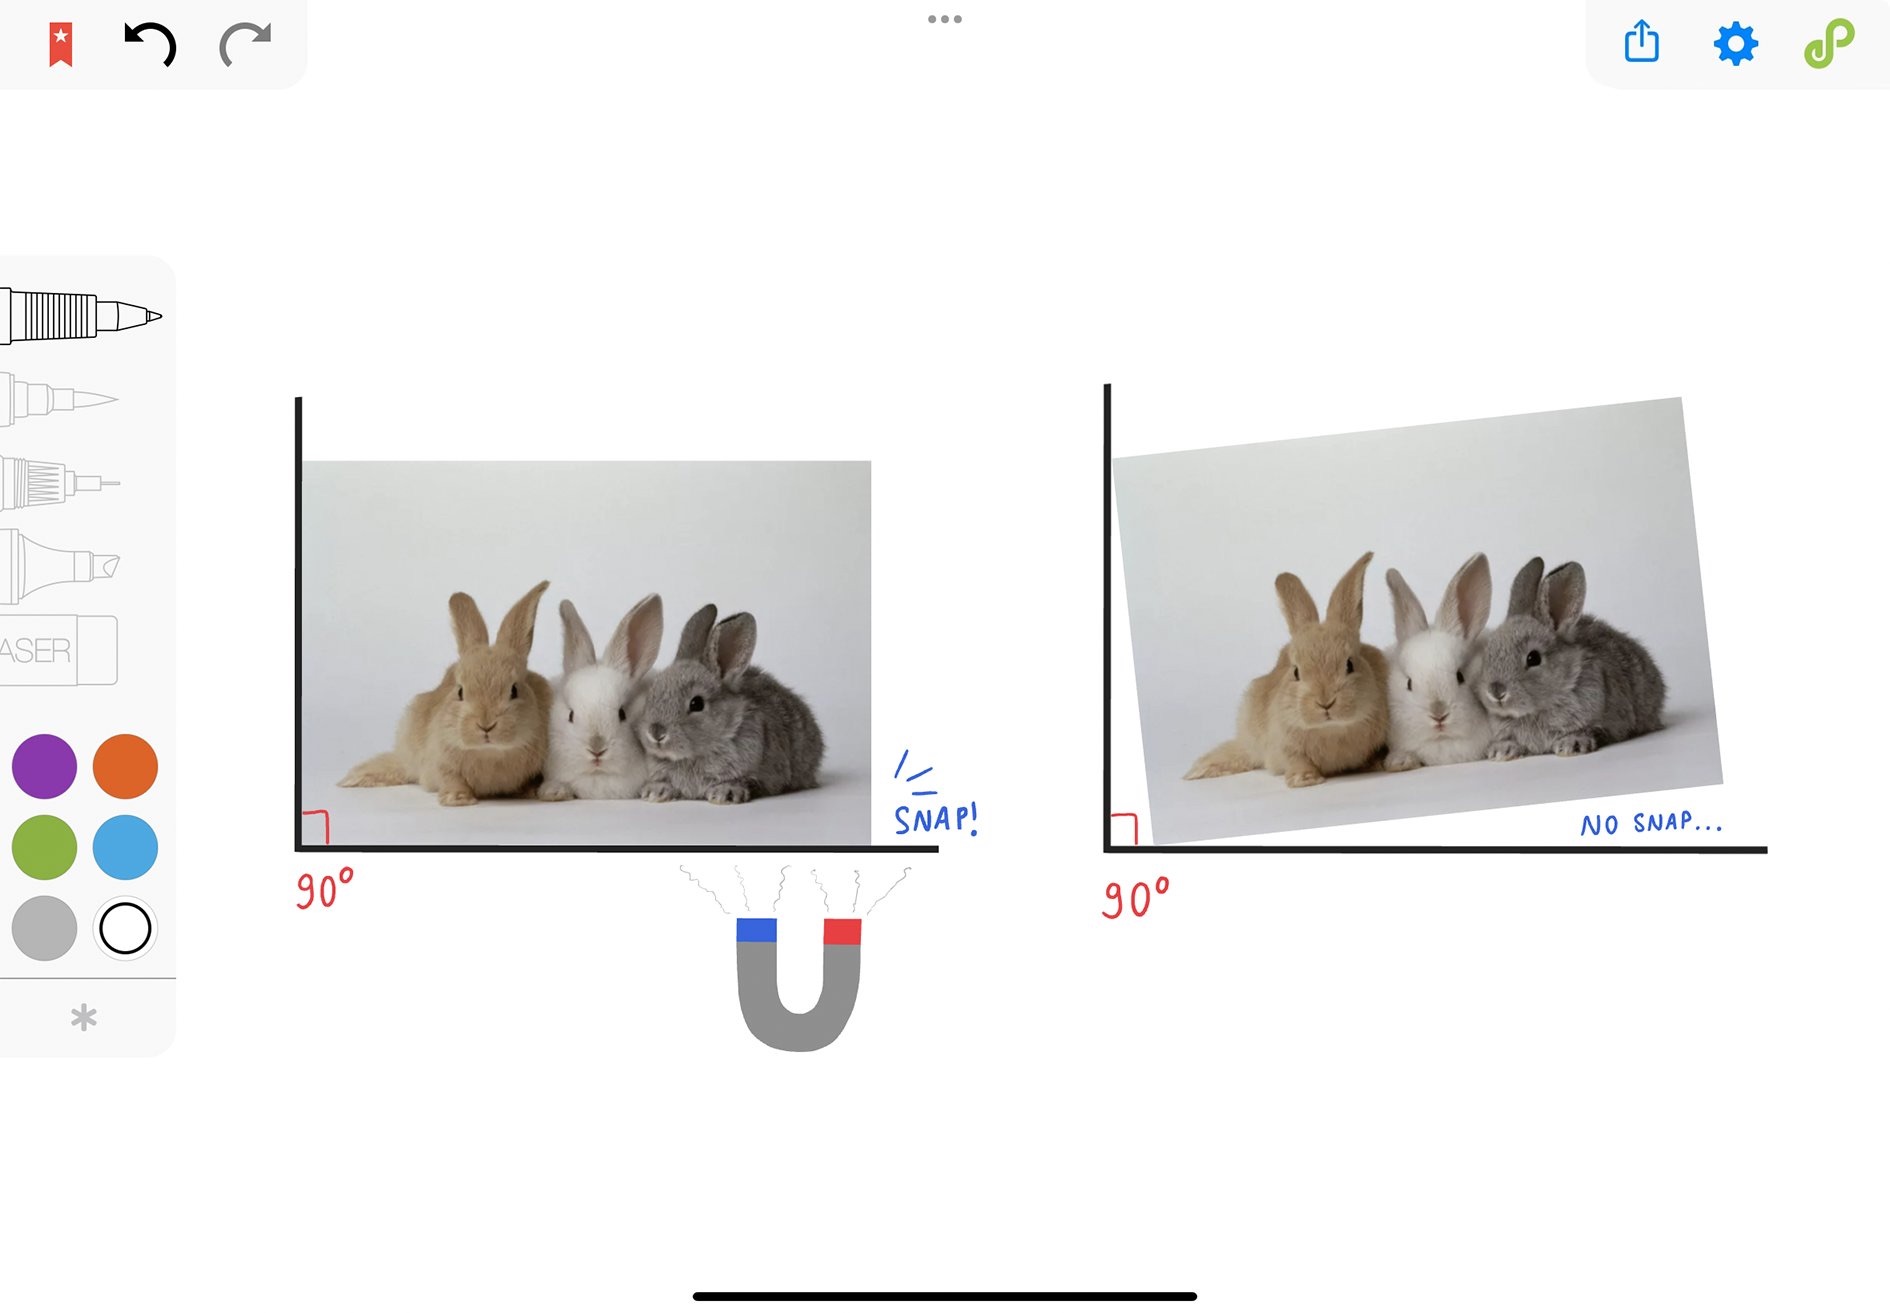
Rotation snapping
When you rotate an asset, it may snap to specific angles. This is called "Rotation Snapping". It helps keep your notes neat by automatically aligning assets straight or at multiples of 45 degrees.
You can turn off Rotation Snapping anytime in the Option Tab .
Transparency Aware picking
As you are able to import assets with transparent parts onto your canvas, this feature allows you to pick other assets placed under these transparent parts.
When the "Transparency Aware Picking" button is activated, pictures with transparent areas can be manipulated only by interacting with its visible (non-transparent) parts.
You can activate and disable this feature in the Option Tab .
By disabling the Transparency Aware Picking, you won't be able to pick images under transparent parts as the picture with transparent part will be selected instead.
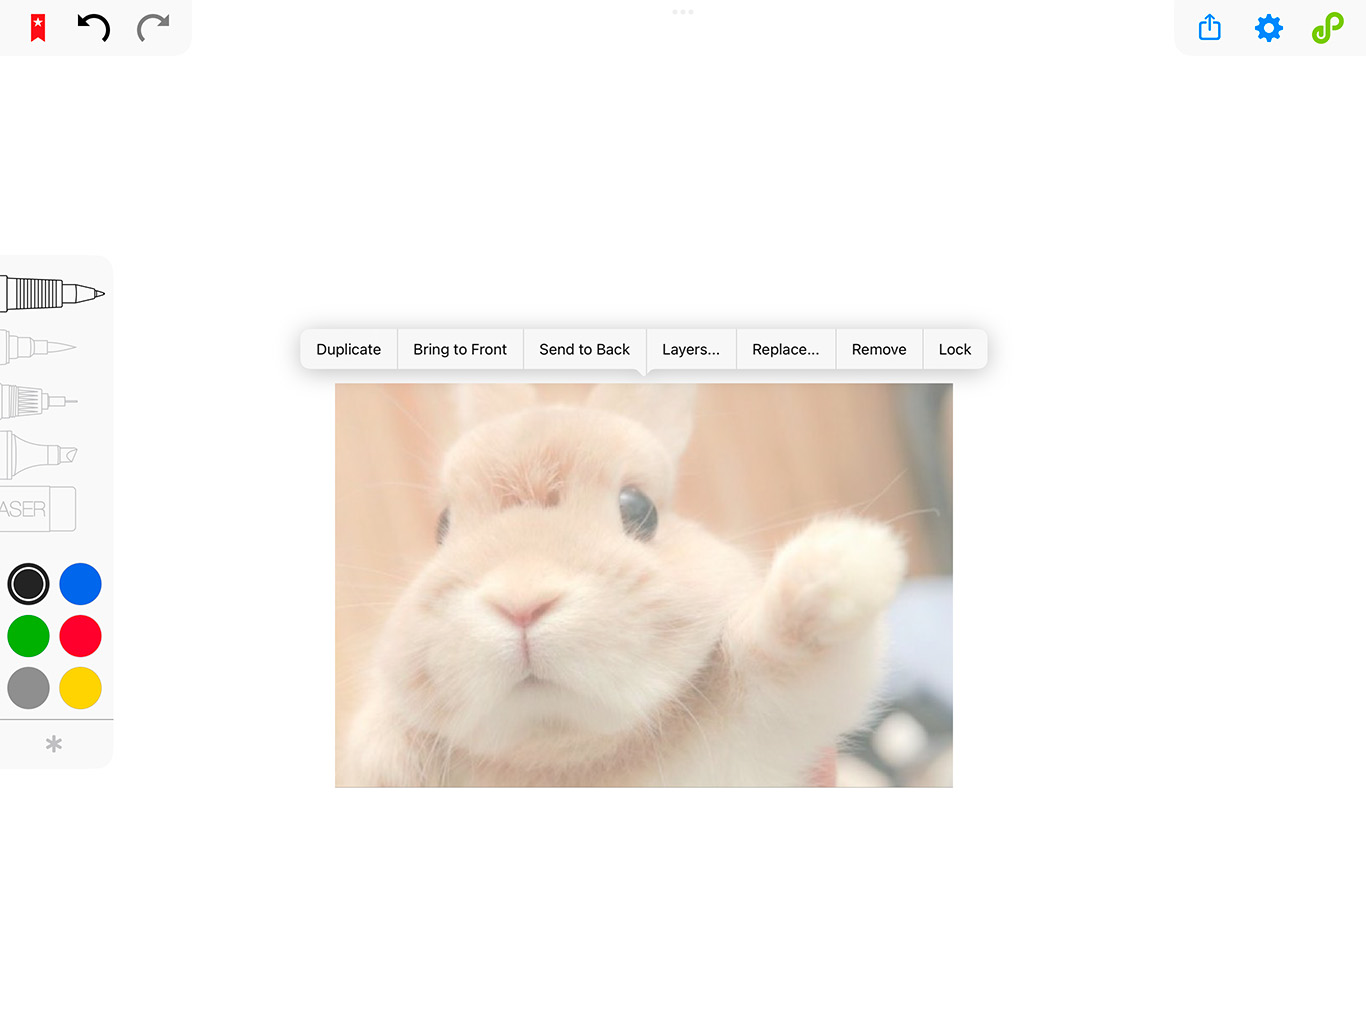
Action menu
To interact with a asset, you need to activate it then tap once again on it. Following this, a list of available commands will pop up.
- To put your asset in front of your scribbles and other assets (in the top layer), just tap on the “Bring to Front” button.
- To move your asset behind your scribbles and other assets (to the bottom layer) just tap on the “Send to Back” button.
- To change your asset's layer, tap on the "Layers" button.
- to group an asset with others, tap on "Group".
- To duplicate your selected asset, tap on the “Duplicate” button. The new asset will appear nearby, already activated.
- To erase a asset, tap on the “Remove” button.
- to desactivate your asset, tap on "lock". The asset will return to full opacity and remain fixed on your canvas.
Change the asset's layer
Tapping on the "Layers" button will lead you to a pop-over in which you can select the layer you wish your asset to be on.
Once you've selected your layer, you can then choose whether you want your asset to be in the front (above every other stroke and assets in this layer) or the back (behind every other stroke and assets in this layer).
Picture
You can import pictures into your canvas in multiple formats (JPEG, PNG, WEBP, and more). Images with transparency are also fully supported.
Pictures behave like any other asset in your canvas: they can be moved, rotated and resized. Once a picture is selected, two additional commands become available in the action menu:
- "Replace" lets you swap the selected picture with another image from your files.
- "Vectorize" Converts the picture into vectorized shapes, allowing the image to remain sharp and clear even when zooming in.
Vectorize your picture
Tapping "Vectorize" in the action menu opens the vectorization interface. This interface provides several settings that allow you to control and fine-tune the vectorization process of your picture.
You can tap on the eye button to toggle the visibility of the original image and compare it with the vectorized result.
Once you are satisfied with the outcome, tap "Confirm" to apply the vectorization. To discard the changes and restore the original image, tap "Cancel" instead.
Colors
By defaut the app select a number of colors for the vectorization of your picture. However you can adjust them to your liking. Use the slider to choose how many colors to include. The colors are automatically selected from your original picture.
For more a precise control, you can manually manage the color list:
- To add a color, tap the eye button, then use your stylus to pick a color directly from the original image.
- To change the order of the colors, drag them up or down in the list, or long press a color and select "Bring to Top " or "Bring to Bottom ".
- To remove a color, long press the color pill in the list and tap "Delete".
You can also edit the colors after the vectorization is complete. Change a color’s hue, remove shapes entirely, and adjust the order of colors in the color interface.
Detail
When tracing the shapes in your picture, the app uses the pixels of the imported image as a reference. This means that the more detailed your picture is, the more detailed the resulting vectorization can be.
You can also control the precision of the shapes using the "Detail" slider. Higher values simplify the shapes, resulting in a less detailed vectorization.
Fill gap
When the app draws the shapes of your vectorized picture, small gaps may appear between colors. To achieve a cleaner result, you can expand the shapes so they slightly overlap. This removes visible gaps between adjacent colors.
Modify your vectorized picture
Once a picture is vectorized, you cannot revert it to the original image. However, you can continue to move and manage it like any other asset. The vectorized image also gains two additional commands in the regular action menu.
Colors
The "Colors" button opens a color interface and allows you to modify each color in your vectorized picture. Select a color you can either use the eyedropper button or by tap the color directly in the list. To see where a color is in the image, press and hold its color pill, and it will highlight its location.
Once a color is selected, you can:
- Delete it from the picture,
- Delete all other colors, or
- Change its hue.
Deleted colors can be selected to be restored individually, and if all other colors were deleted, they can also be restored.
You can also enable the Dark Mode rule for your vectorized picture. When activated, the colors adapt to a dark environment just like regular strokes. This works well for color schemes, but it may sometimes make images look unusual.
Split Colors
If your vectorized picture contains multiple colors, you can split them so that each color becomes an individual asset. To do this, tap "Split Colors" in the action menu.
This allows you to move and edit each color independently.
Link
You can import links onto your canvas by dragging and dropping a website directly from your browser, or by dragging a link from a text.
Once added to the canvas, links behave like any other asset and can be moved, rotated and resized. The main difference is that tapping a link will also open it in your browser or in the app.
When a link is active, an additional command becomes available in the action menu: "Properties", which lets you view and edit the link’s details.
Types of imported links
You can import two types of links: external links that lead to websites on the internet and internal links that opens other apps or lead to other parts of your canvas.
External links
To import an external link, drag and drop it from a browser or from a text. The link’s thumbnail will either be its main picture if available (for example, a video's thumbnail) or a screenshot of the website.
Tapping the link will open it in your browser or directly in Endless Paper using the in-app browser.
Internal links
Internal links can open other apps or navigate to specific locations within your canvases. For example, :calshow opens your calendar app directly.
You can also link to specific bookmarks on your current canvas or on other canvases in your gallery. To do this:
- Open the bookmark menu and copy the internal link of your bookmark.
- Paste it into a text app (like Notes).
- Drag and drop the link from the text app onto your canvas.
Internal links rarely have a thumbnail and will not be opened in a browser.
Properties
In the action menu of an imported link, you will find a command specific to links: "Properties". This allows you to modify both the appearance of the link and its behavior when tapped.
Replace Thumbnail
The thumbnail is the image representing your link and can be modified in several ways.
By default, the thumbnail is either the main image of the link (such as the thumbnail of a video) or, if no image is available, a screenshot of the website. Internal links, like bookmarks, do not have a default image, so a blank thumbnail will be shown.
You can reload the thumbnail to update it with a current screenshot or the current main image. You can also replace the thumbnail with an image from your photo library or files.
Format
If you are using the default thumbnail, you can change its format to:
- Phone
- Portrait
- Landscape
- Square
If you replace the default thumbnail with a custom one, the format is fixed to match the new image and cannot be changed.
Browser
You can set how the link opens: either in your device’s browser as a new tab or directly in Endless Paper’s in-app browser.
Title
The link’s title is the same as the one shown on a browser tab. By default, it appears below the thumbnail. You can edit the title in the text field or hide it entirely using the eye button . To restore the original title, simply clear the text field.
You can import PDF files onto your canvas by dragging and dropping them directly from your Files app.
Once added, a PDF behaves like any other asset and can be moved, rotated, and resized. If the PDF contains multiple pages, they are automatically grouped.
After importing, you can annotate the PDF just like any other element on your canvas.
Groups
When multiple assets are selected at the same time, tapping "Group" in the action menu combines them into a single group and arranges them in a grid layout.
A group behaves like any other asset. It can be selected, moved, rotated, and resized. You can also reorganize the layout of its elements by dragging the edges of the group.
The action menu is similar to that of a single asset, with one additional command: "Ungroup". This separates the group and returns each element to an individual asset, keeping them in their current positions.
Ordering your group
The order of elements in the grid is determined by their position at the moment of grouping. The layout follows a reading order, from top to bottom and left to right. Elements placed higher and further to the left will appear earlier in the grid.
To change the order of an existing group, first ungroup the elements. Then manually reposition the assets in the desired order. While all elements are still active, tap "Group" in the action menu to create a new group with the updated layout.
Adding assets to your group
You can add elements to an existing group by activating the group, then activating the asset you want to add, and tapping "Group" in the action menu of either the group or the asset. You can add multiple assets at once.
The newly added assets will be placed at the beginning or the end of the group, depending on their position on the canvas at the time of grouping.
Removing assets from your group
To remove specific elements from a group, first activate the group and tap "Ungroup" in the action menu.
Lock the assets you want to remove from the group. Then select the remaining unlocked assets and tap "Group" in the action menu of any of them to create a new group.
Rotating assets in your group
When grouping rotated elements, they automatically snap to the nearest 90 degree angle. This means you cannot keep an element slightly rotated within a group, it will adjust to the closest right angle as soon as it is grouped.
If you want an element to have a different orientation, first ungroup the elements. Rotate the asset manually to the desired angle, then select all relevant elements and tap "Group" in the action menu. The rotated asset will snap to its new closest 90 degree position.
Bookmark Menu
On the top left corner of your screen there is a red bookmark button. Tapping on this button will let you access your bookmarks, folders and presentations.
Bookmarks
Bookmarks are shortcuts that take you directly to certain locations on your canvas. They are a great way to keep track of your work, and keep you from being lost.
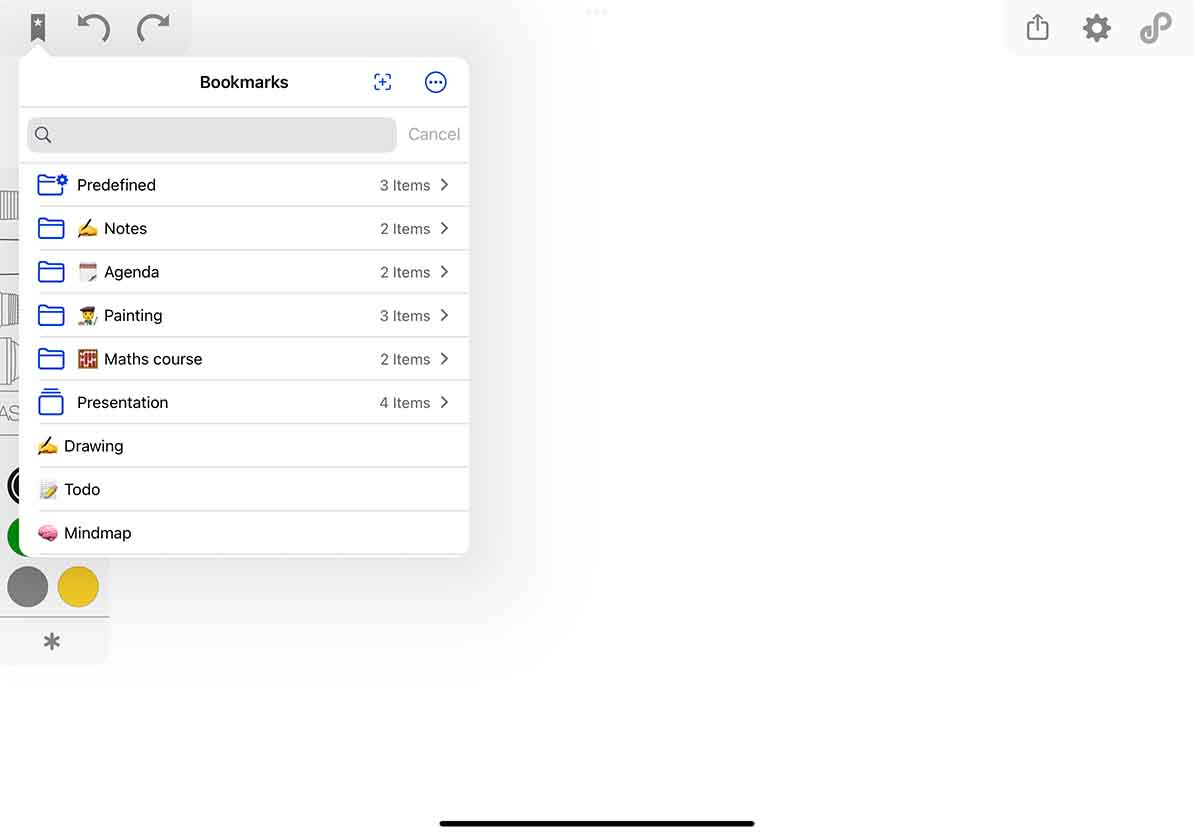
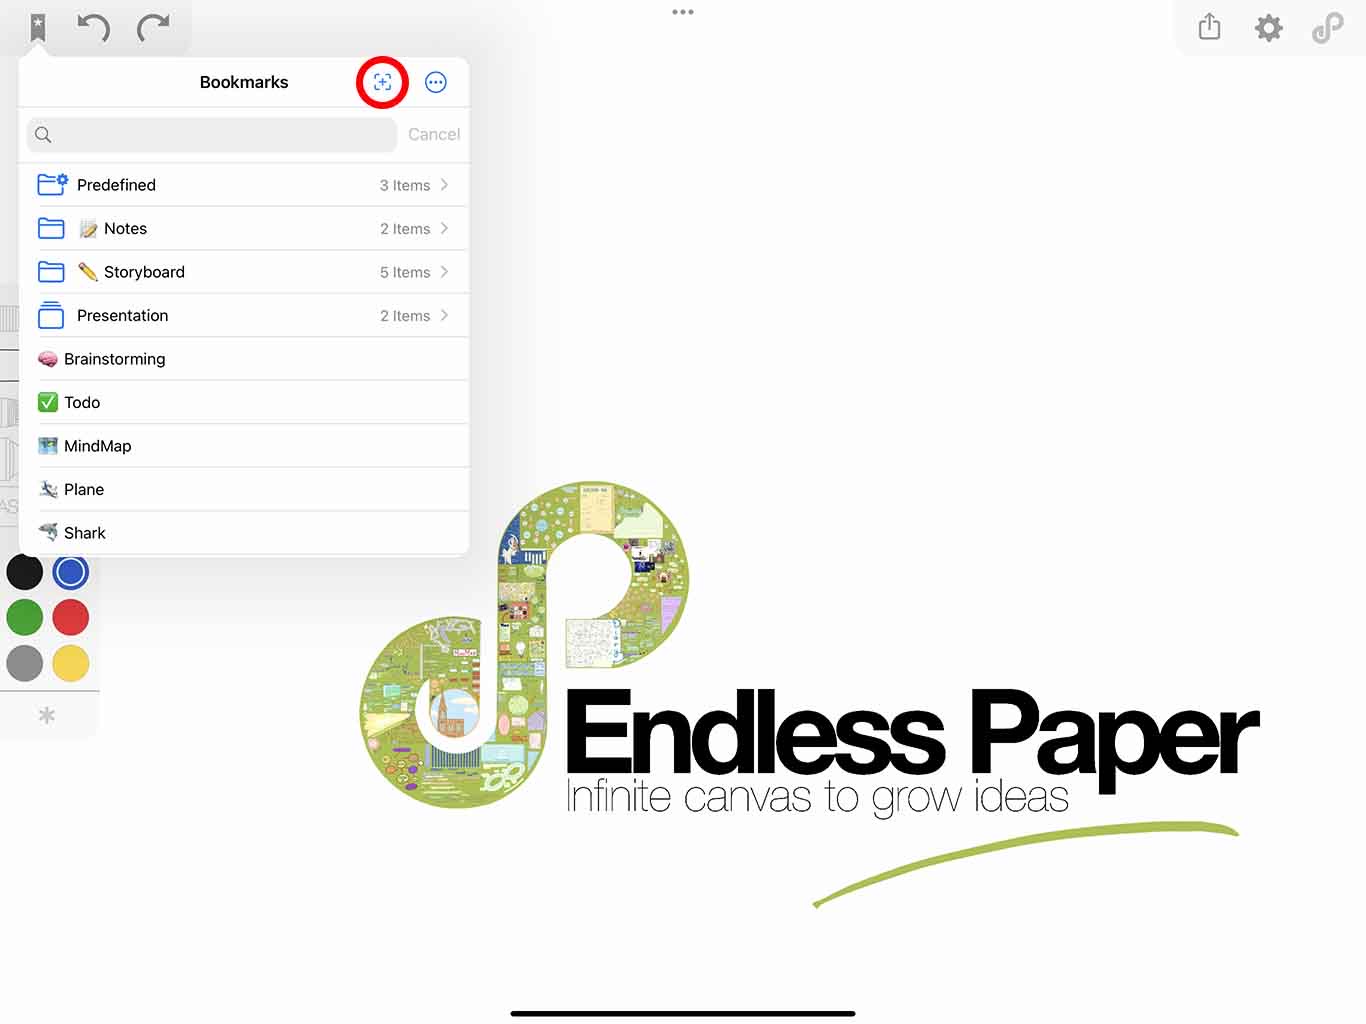
You can create your own bookmarks to help you stay organized in your notes. To create a bookmark, go directly to the bookmark popover and tap on the button. This will save your current location as a new bookmark.
Folders
You can organize your bookmarks in folders, and nest folders in folders. To create a folder, tap on the three dots at the top right corner of the bookmark menu. Then, tap on the "New Folder " button. This will create a new empty folder, that you will have to name.
To put a bookmark inside a folder you can either create a bookmark while the folder is open, or drag and drop existing bookmarks inside the new folder. In the same fashion, you can drag and drop a bookmark out of the folder by keeping it over the bookmark button until it flickers.
Predefined
In the Bookmark menu you have a folder with content that can't be erased. That's the Predefined bookmark folder. This folder contains three bookmarks to help you not lose your work.
🐣 Origin
This bookmark will lead you back to your first ever location on the canvas.
🏠 Session
This one is a temporary bookmark that leads you back to your first location on the canvas in this session.
A session starts the moment you open Endless Paper and ends when you close the app - this is not only to go back to the “home screen” of your device but to actually close it entirely.
🌍 Global View
This last bookmark will show you the entire area of the canvas that you have scribbled on and will give you a look at all the work you've done so far. There aren't any strokes or images outside of this bookmark.
Modify
You can modify any created folder , bookmark or presentation by doing a long press on the one you are trying to edit. After a few seconds you should see a drop down menu with diverse options like Rename , Copy Title and Delete .
Move to top and move to bottom are both options to change how organized your bookmark menu is.
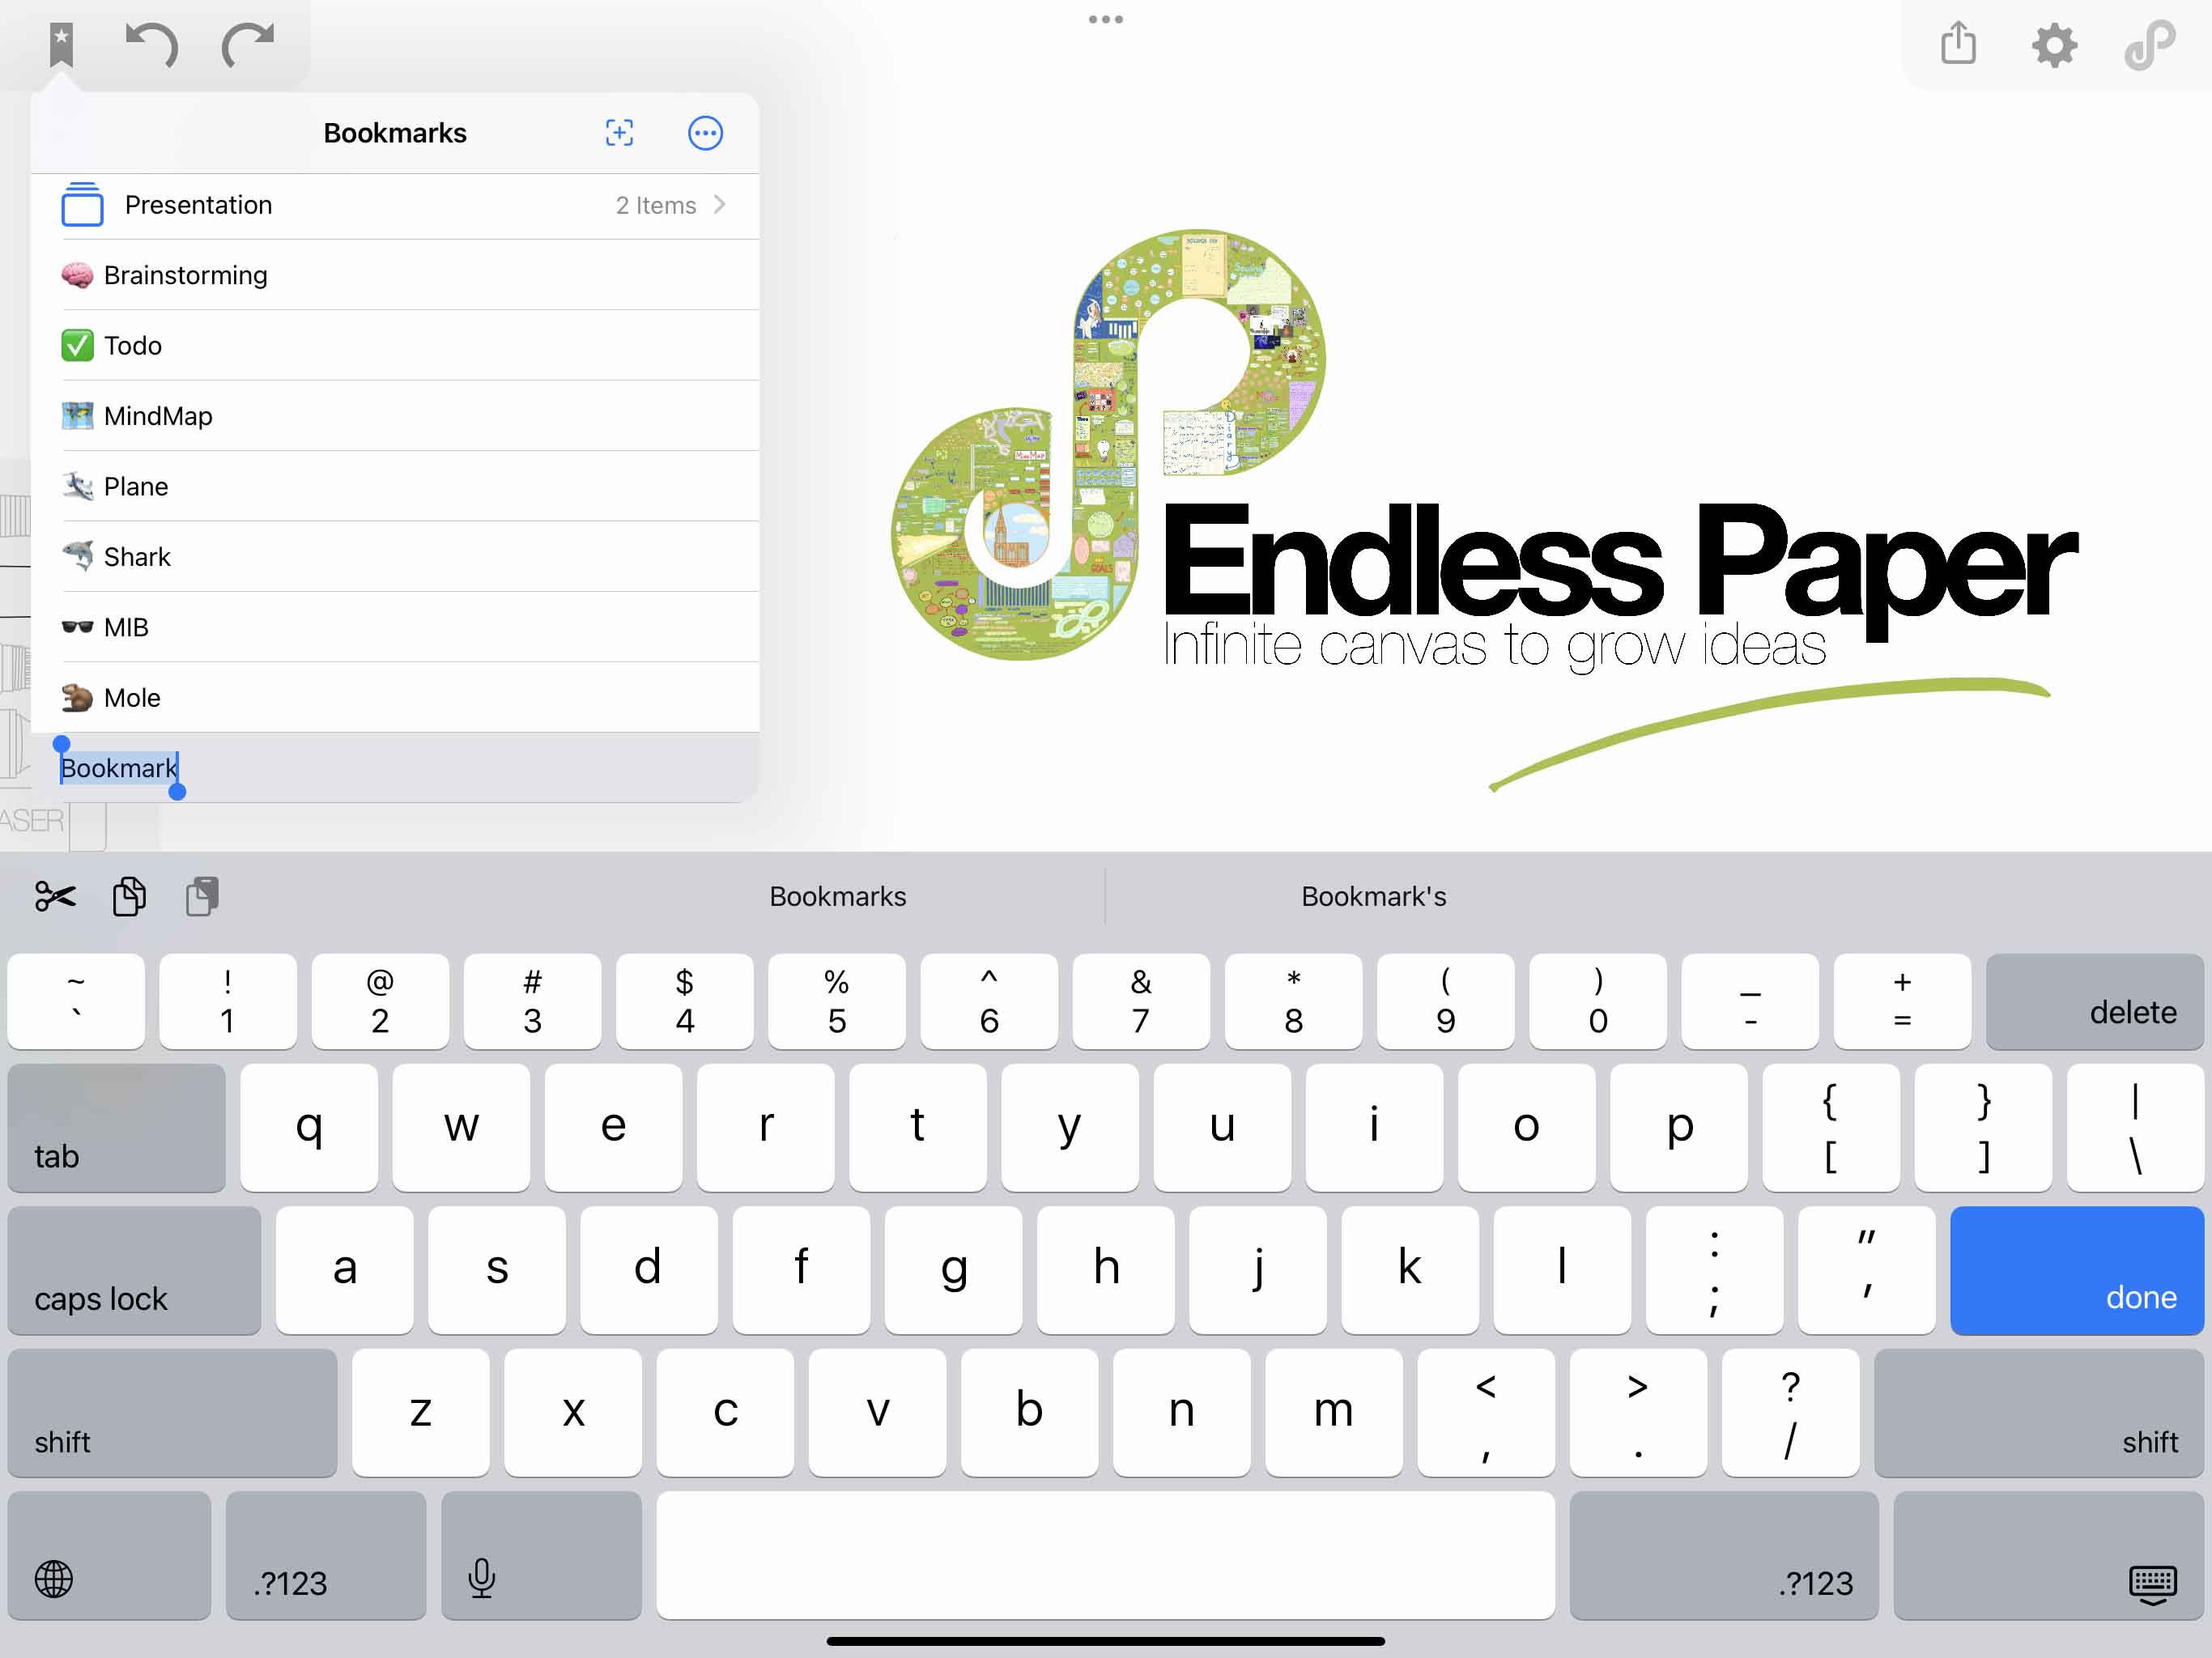
Recenter allows you to change the bookmark location without having to create a new one.
What is an internal link ?
An internal link is a link that can be used on your device to open your canvas on specific bookmarks.
Just tap on "copy Internal Link " in the options of your selected bookmark and paste it wherever you want to (in your notes, documents, etc. ) .
Export as PDF
You can quickly export a bookmark as a PDF file. This feature will keep the bookmark aspect ratio as frame for the export, and create a vector PDF.
If you export a folder (or a presentation) as a PDF file, all its bookmarks will be compiled in a single file where each bookmark is a page.
Menu
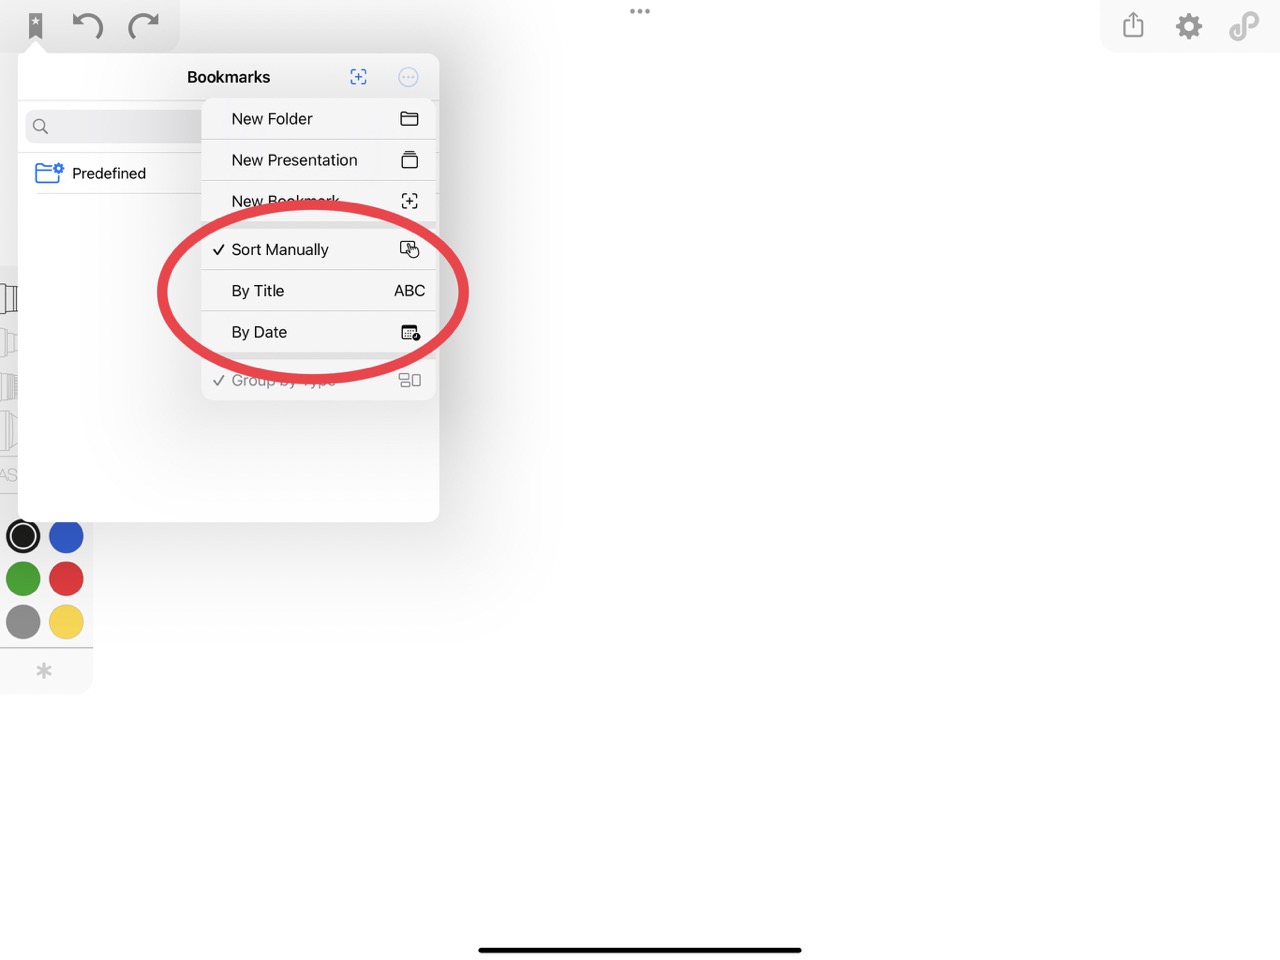
Your items are organized in a list. To modify the order in which your items appear, tap on the button at the top right corner of the bookmark menu.
You can either organize them by hand (by selecting "Sort Manually " and dragging your items up or down to your desired location) or organize them automatically.
- By title automatically rearranges your items to be displayed in an alphabetical order
- By date classes them in a chronological order, based on when you created them.
- By type allows you to apply a second rule for you menu's organization by grouping them depending on their type (bookmark, folder, presentation)
Canvas Gallery
You may have noticed the green Endless Paper logo at the top right corner of your screen. If you tap on it you will access your canvas gallery.
This interface lets you quickly switch between your canvases and manage them.
If you have recently updated the app, you may notice a colored dot on some canvases:
- Blue dot: The canvas was created in an older version of the app. Opening it will automatically update it to the latest version.
- Orange dot: The canvas was created in a newer version. Opening it may cause changes depending on the features introduced since your current version.
- Red dot: The canvas was created in a much newer version and cannot be opened until you update Endless Paper.
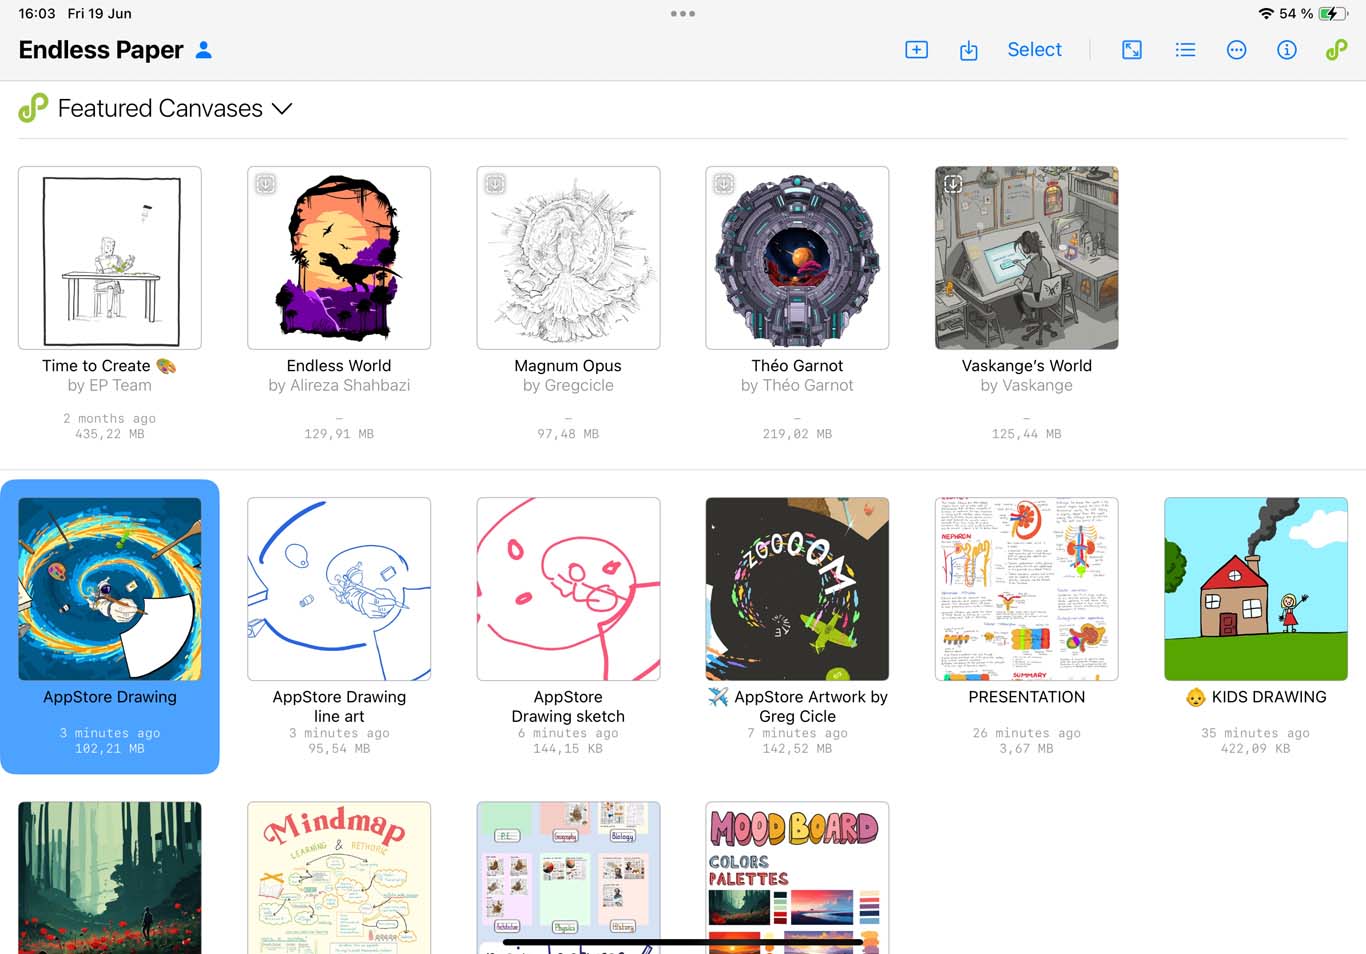
You can access your account profile by tapping the icon in the top-left corner of the screen.
A compact version of the Info tab is also available by tapping the icon in the top-right corner. From there, you can access the User Manual, visit our website, email us, or copy your diagnostic info to your clipboard.
Canvas's options
Giving a long press with your finger on a canvas opens its options tab. There you can rename the chosen canvas, copy its name, duplicate the whole canvas or export it as an archive . At the bottom you can delete the canvas from your gallery.
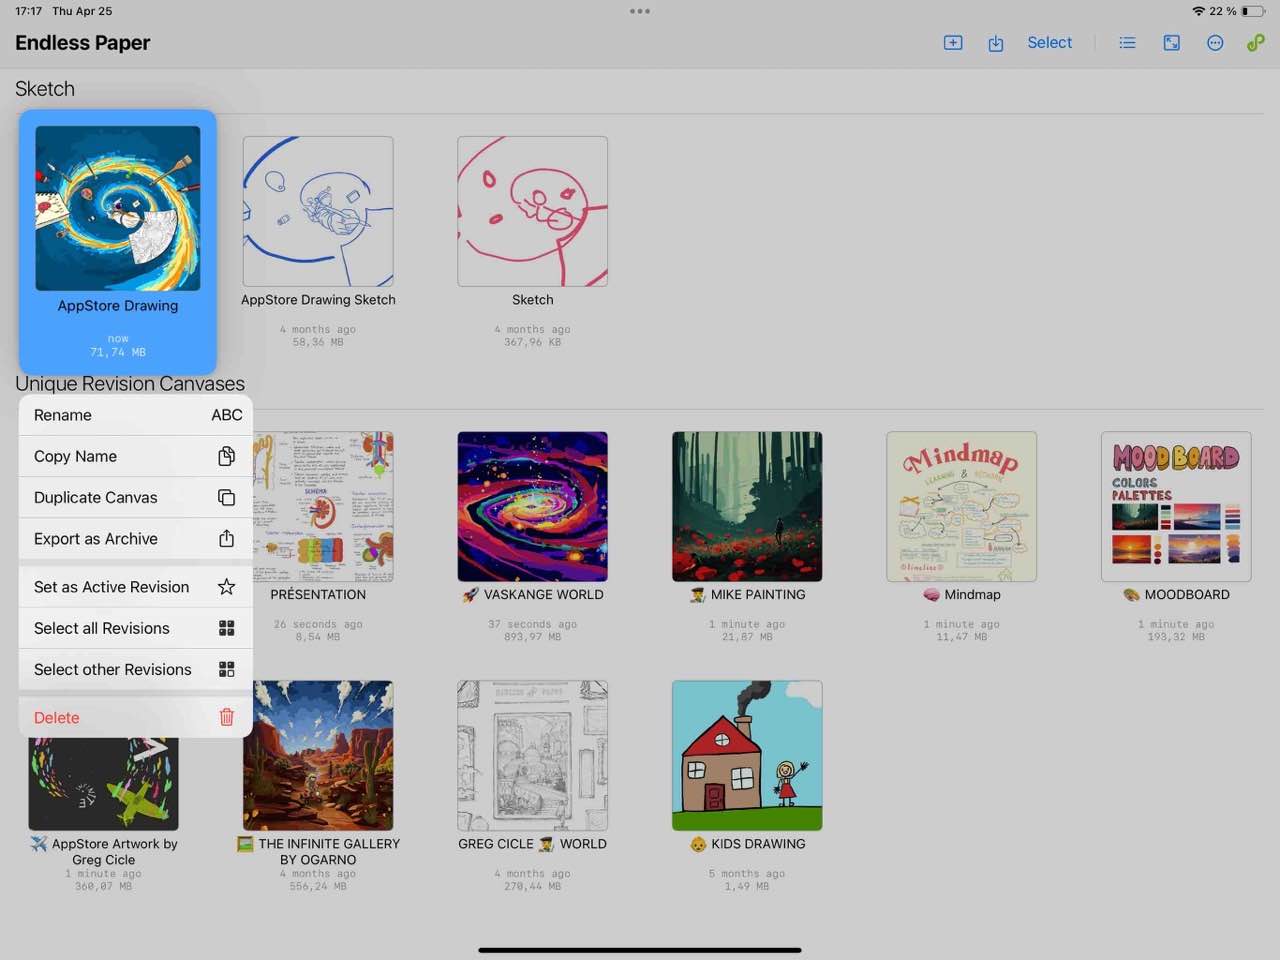
If your chosen canvas is part of a set of revisions, you can also set it as the active revision (which means that it will be considered the last version of the set), select all revisions of the set, or only select other revisions of the set.
You can also select canvases that are not part of a revision set to apply actions to multiple canvases at once.
Tap "Select" in the top-right corner of the Canvas Gallery to begin selecting multiple canvases. You can also choose "Select" or "Select All" in the library option pop-over .
Once you have completed your selection, you can delete or export the canvases using the buttons at the top of the screen, or by choosing "Delete Canvas " or "Export as Archive " in the library option pop-over .
To exit selection mode, tap "Done" at the top of the screen or in the library option pop-over .
Gallery's organization
Canvases in your gallery are organized according to multiple parameters, which you can adjust to suit your preferences.
Display
View
You can change the way your canvases are displayed to either a list or a grid of thumbnails by tapping on their respective icons in the top right corner of your screen (or selecting "List View " / "Grid View " in the library option pop-over ).
While in grid view, you can also adjust the size of the thumbnails by tapping the icon or selecting "Thumbnail Size " in the library option pop-over .
Order
Your canvases can be sorted in different ways. To choose a specific order, open the library option pop-over and select one of the following:
- By Name to sort canvases alphabetically,
- By Creation to sort canvases by their creation date,
- By Import to sort canvases by the date they were imported,
- By Modification to sort canvases from most recently modified to oldest,
- By Size to sort canvases from largest to smallest.
Revisions
Revisions are canvases that are linked by a common ancestor. To put it simply, all canvases that originate from the same canvas will be viewed as a group of revisions.
Revisions have additional options available in their option tab. You can set the chosen revision as the active one to chose which revision your are currently working on.
This feature is especially useful when using internal bookmark links. When a revision is set as active, any internal bookmark link will open that specific revision. If no revision is marked as active within a revision set, internal bookmark links associated with that set will not function.
Active revisions are identified by a star icon, making it easy to quickly locate the version you intend to edit.
You can also select every the revisions safe from your currently chosen one at once , or all the revisions .
You can group all your revisions together in your gallery by tapping on the "Group by Revision " button at the end of the library option pop-over .
Featured Canvases
At the top of the Canvas Gallery, you will find the Featured Canvases section. This area showcases a curated selection of canvases created by professional artists who use our app in their practice and whose work we truly admire.
These canvases can be downloaded and explored freely, even offline. They provide a great opportunity to discover different creative approaches, techniques, and workflows within the app. Browsing them can be a valuable source of inspiration and help you better understand how artists take full advantage of an infinite canvas.
Each featured canvas includes a dedicated section in the Info tab with details about the artist, including their name and social media links. We strongly encourage you to visit their profiles and explore more of their work!
Sharing
On the top right corner of your screen you’ll find a button. This button is called a “sharrow”. Tap on the “sharrow" button to access the share popover.
There, you can share your entire canvas as an archive or publish it as a website. You can also export a selected area as an image, a PDF file, or a video, and broadcast your canvas live on the internet.
Export as image
Tap on "Export as Image " to open the crop tool interface. There you will be able to frame precisely what part of your canvas you want to include in your image.
Exporting your canvas as an image won’t share your whole canvas. Think of it like a screenshot - showing only what’s visible on your screen.
Framing your picture
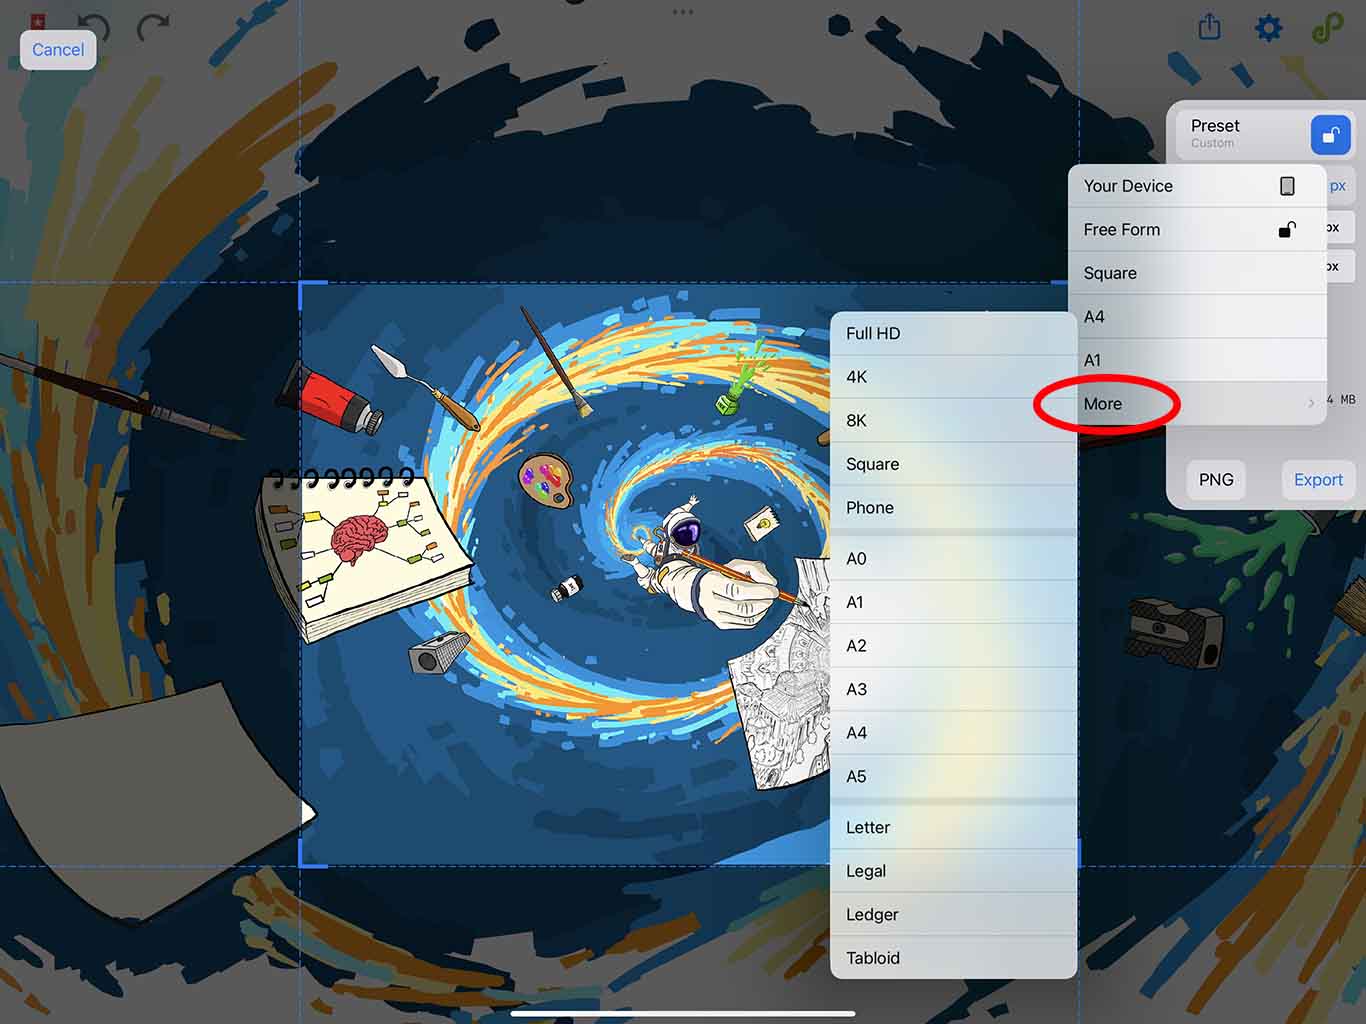
In the middle of your screen you will see a clear rectangle with blue corners. This is what your image will look like once exported. Drag the edges or corners of this rectangle to frame your surface to your liking. You can also rely on the preset ratio in the preset menu on the right side of your screen.
Freezing the aspect ratio
Preset ratios are automatically locked: if you drag the edges or corners of the rectangle it will keep its ratio. You can disable this and return to free form by tapping on the lock button . You can also lock a custom ratio by tapping on this lock button .
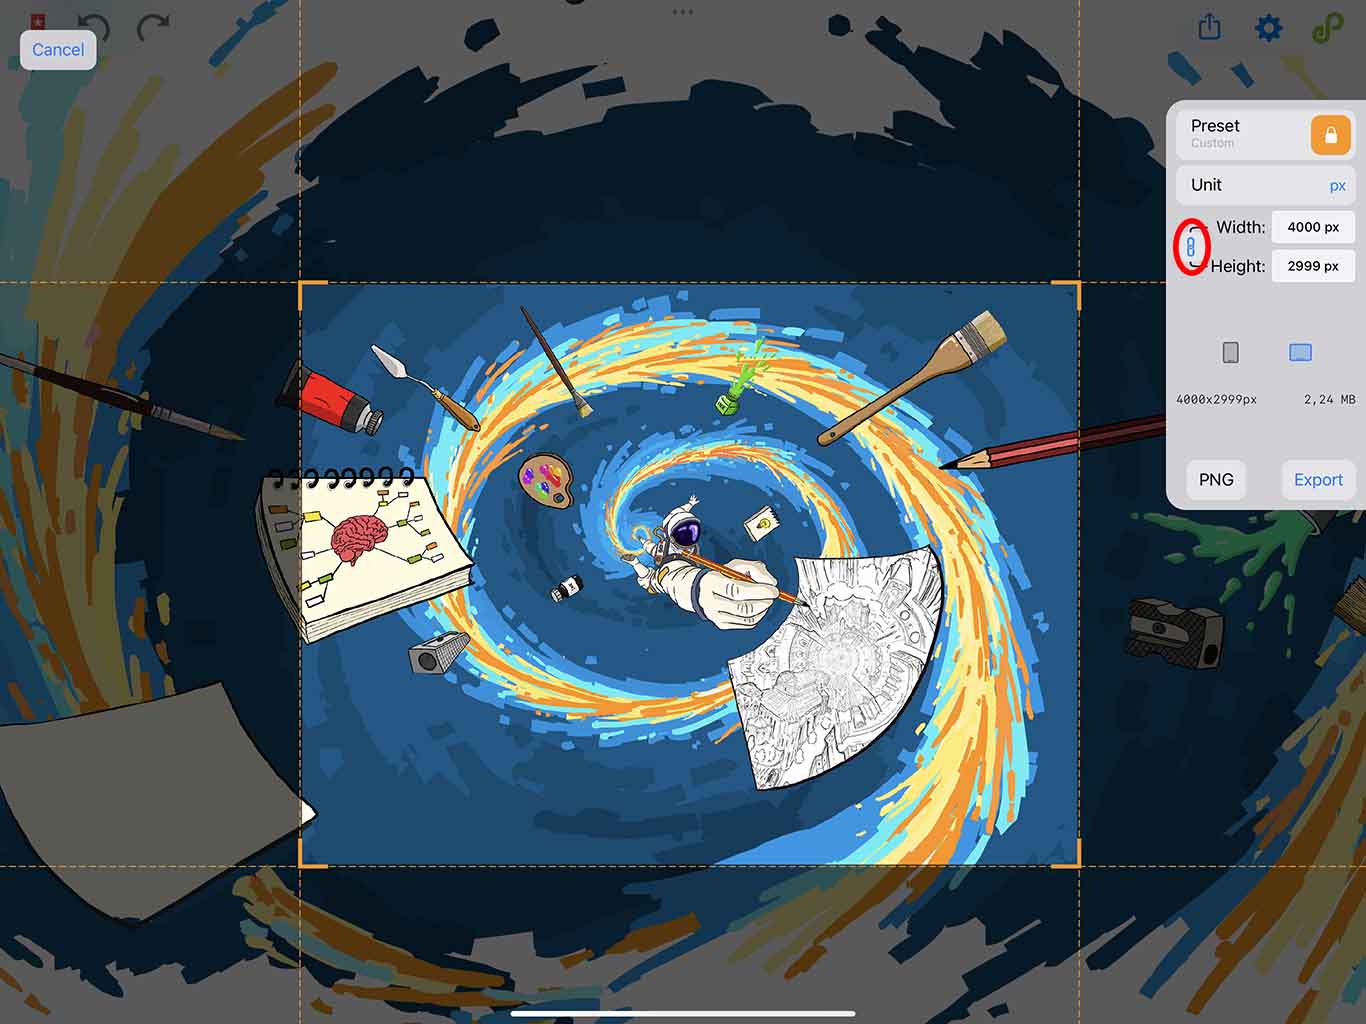
If you need a precise ratio, you can enter its value in the width and height boxes. Just like with the preset and manual ratio, you can choose to link or not the height and the width by tapping on the link button . If the link icon is crossed , then it means that you can change both values independently. Otherwise, modifying one of these values will automatically change the other one to keep the ratio.
Specifics of your image
You can choose the units to work with by tapping on the Unit button, above the width box. If you select a unit that isn't pixels, you can see a DPI box below the height box.
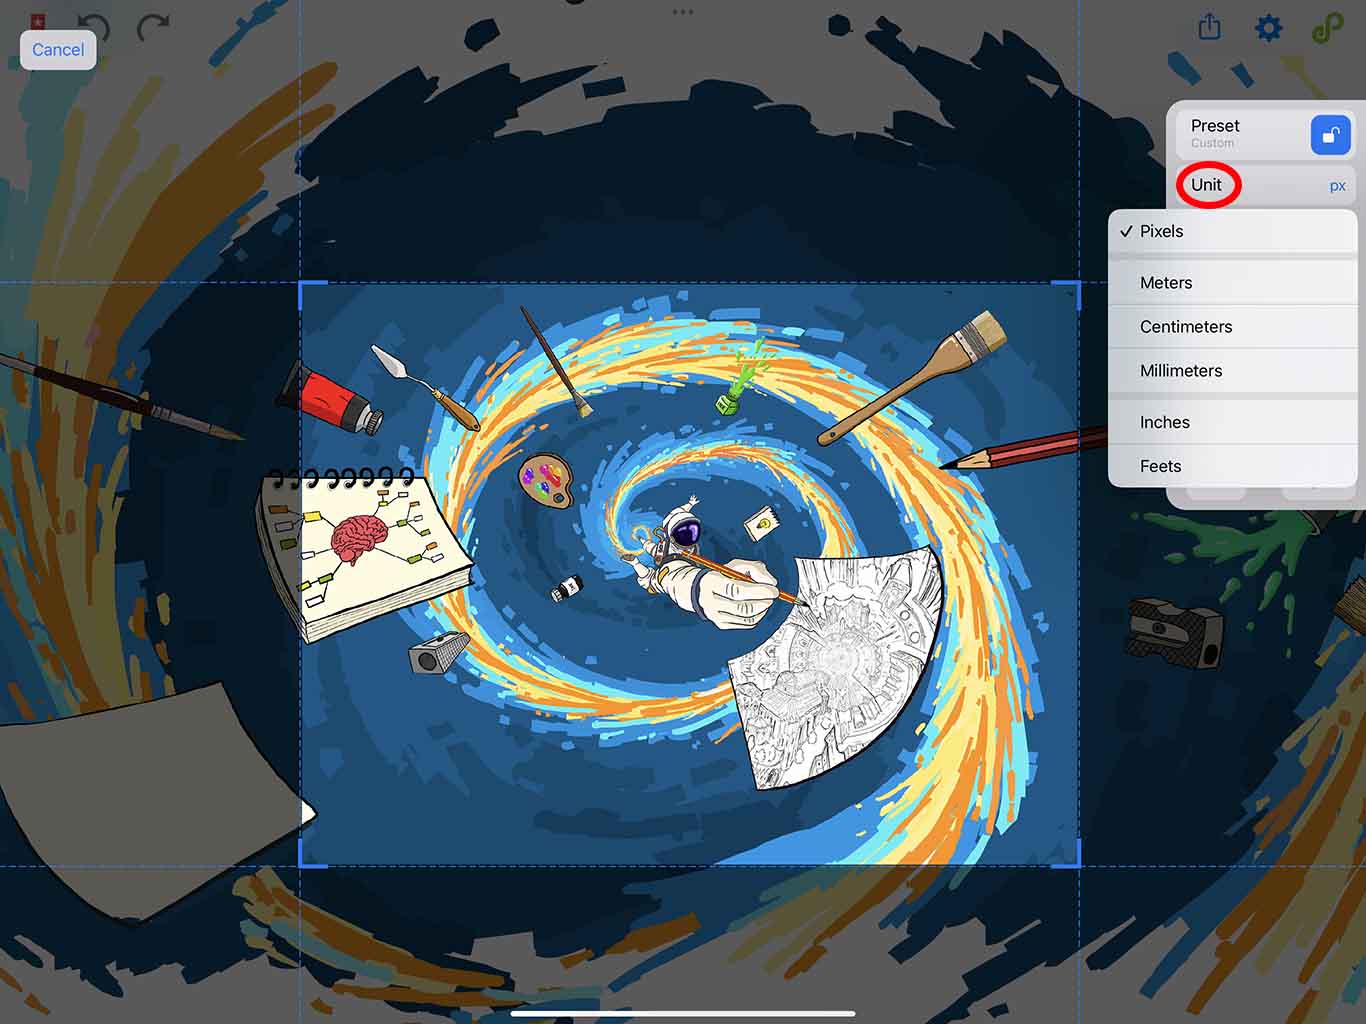
The DPI is the number of pixels per inch. In simple terms, it means that the higher the DPI, the more detailed your image will be. However high DPI also means a heavy file in the end.
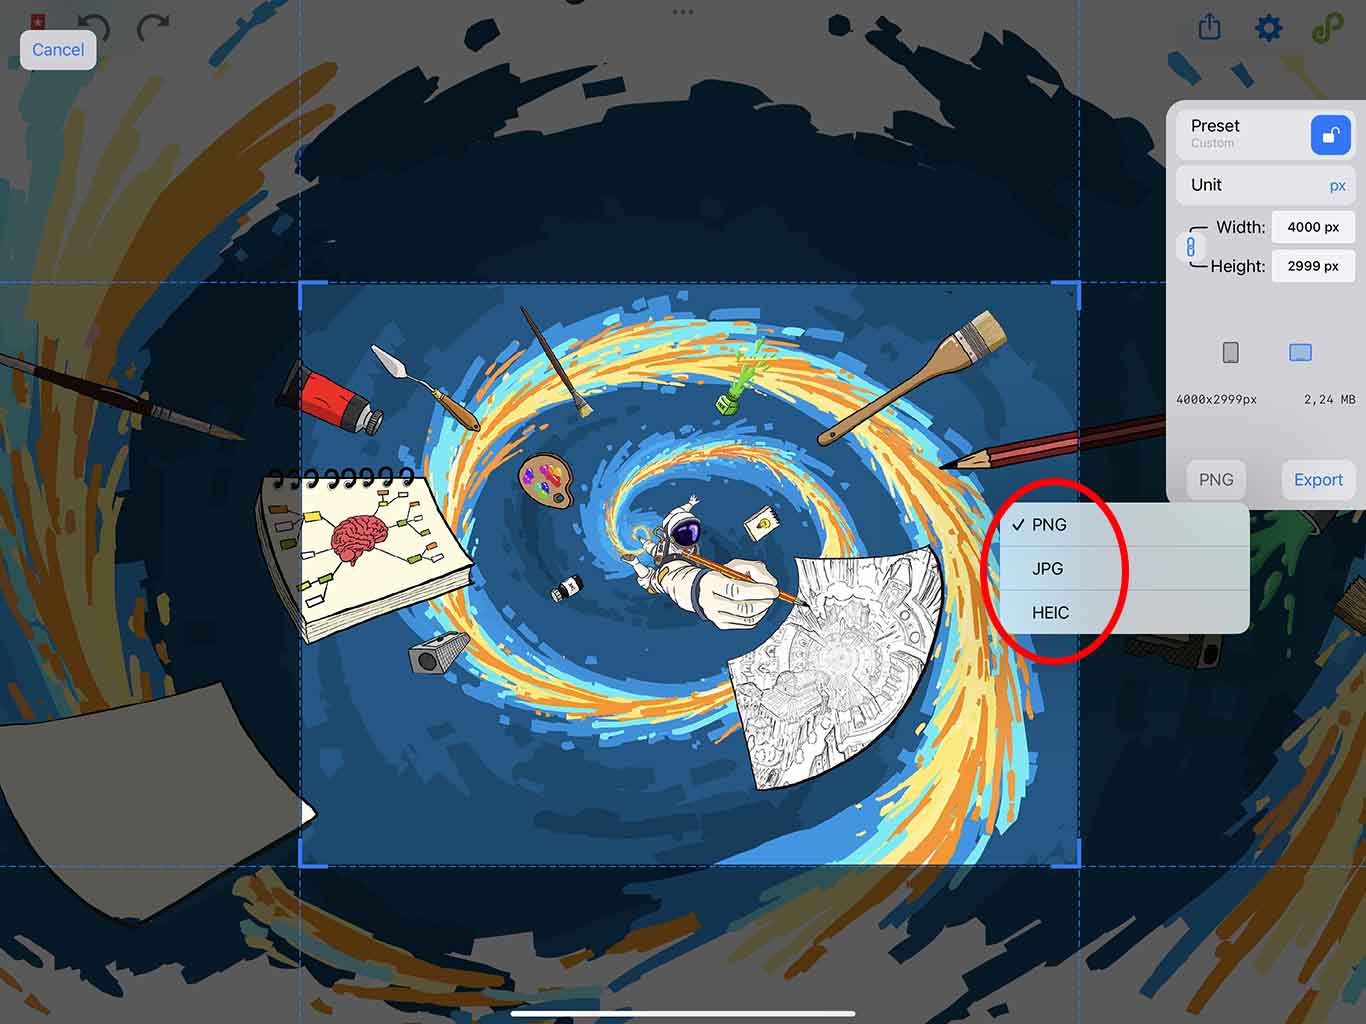
You can also choose the format of your resulting image by tapping on the button near the export button. You can either select .PNG, .JPG or .HEIC.
Background
If you've chosen to export your image as either HEIC or PNG, then you'll be able to chose wether you wish to have a background color for your image, or to have a transparent background .
Generate your image
You can tap on the export button to generate your image. If your device can't handle the size of the image you're trying to generate, then the button will be faded in a gray color and the main factor that needs to be changed will be highlighted in red.
Sharing options for your image
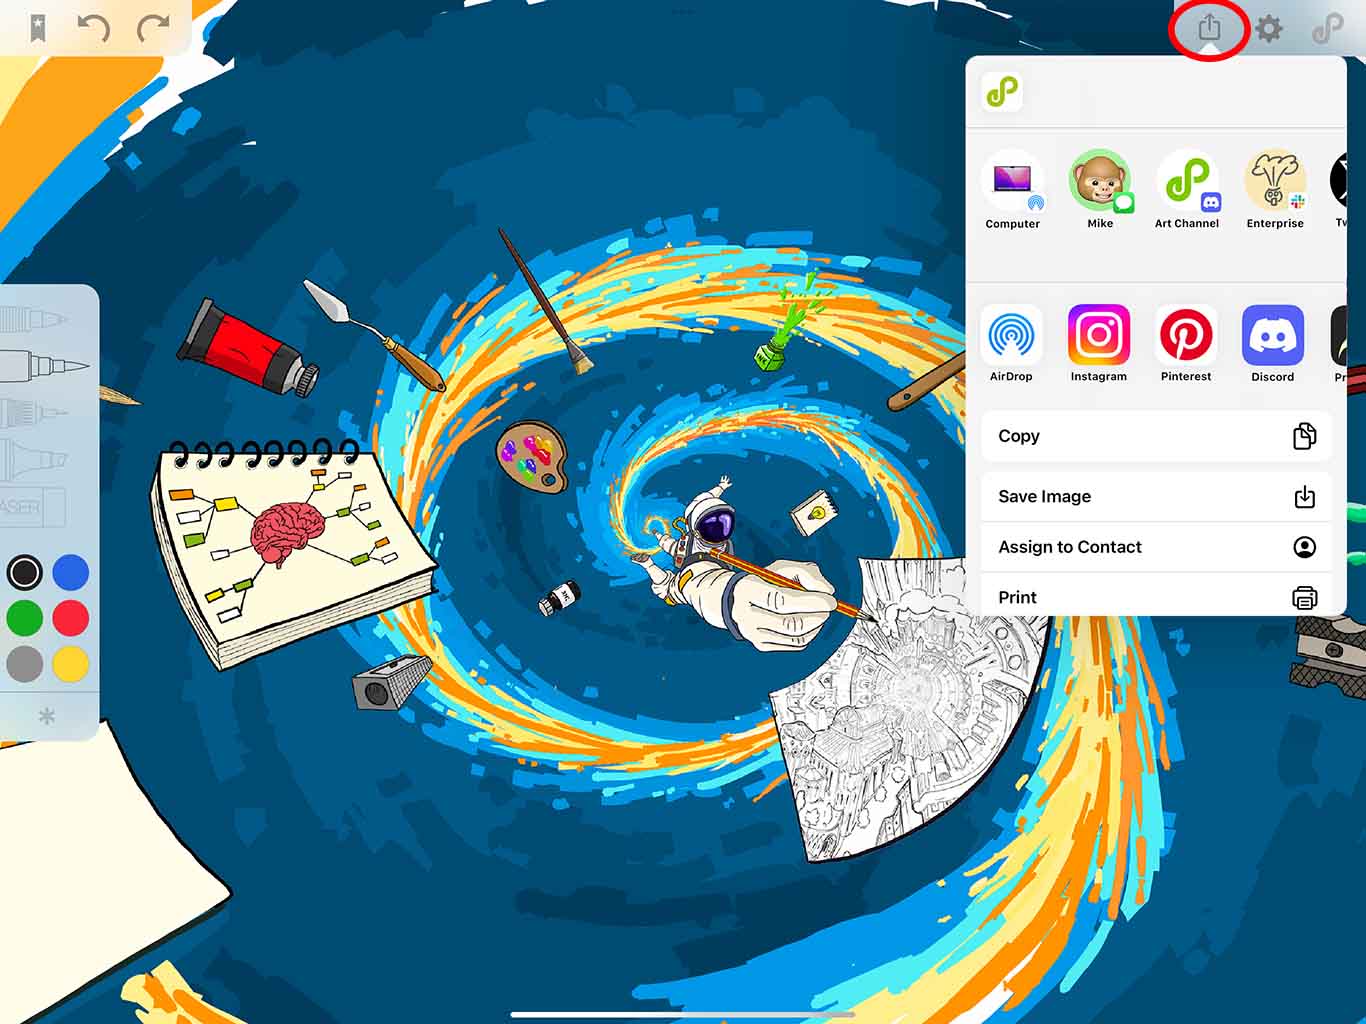
Once you've cropped your canvas you will be presented with a final popover to choose how to export your image. You'll have classic quick access to share it with your contacts or on some other app.
Modify list
You can also modify the list of actions and apps presented in the sharing popover by tapping on either ‘Edit action’ at the bottom of the popover (for the actions) or the three dots at the end of the apps icons (for the apps).
Export as PDF
You can export parts of your canvas as PDF files. While this format also won't let you zoom in indefinitely, its limitations are less important than the image export.
Tap on "Export as PDF in the sharing pop-over to open a crop tool interface similar to the image export's. There you will be able to frame precisely what part of your canvas you want to include in your pdf.
Exporting your canvas as a PDF file won’t share your whole canvas. Think of it like a screenshot - showing only what you've framed or what was visible in the bookmarks you've selected.
Framing your PDF
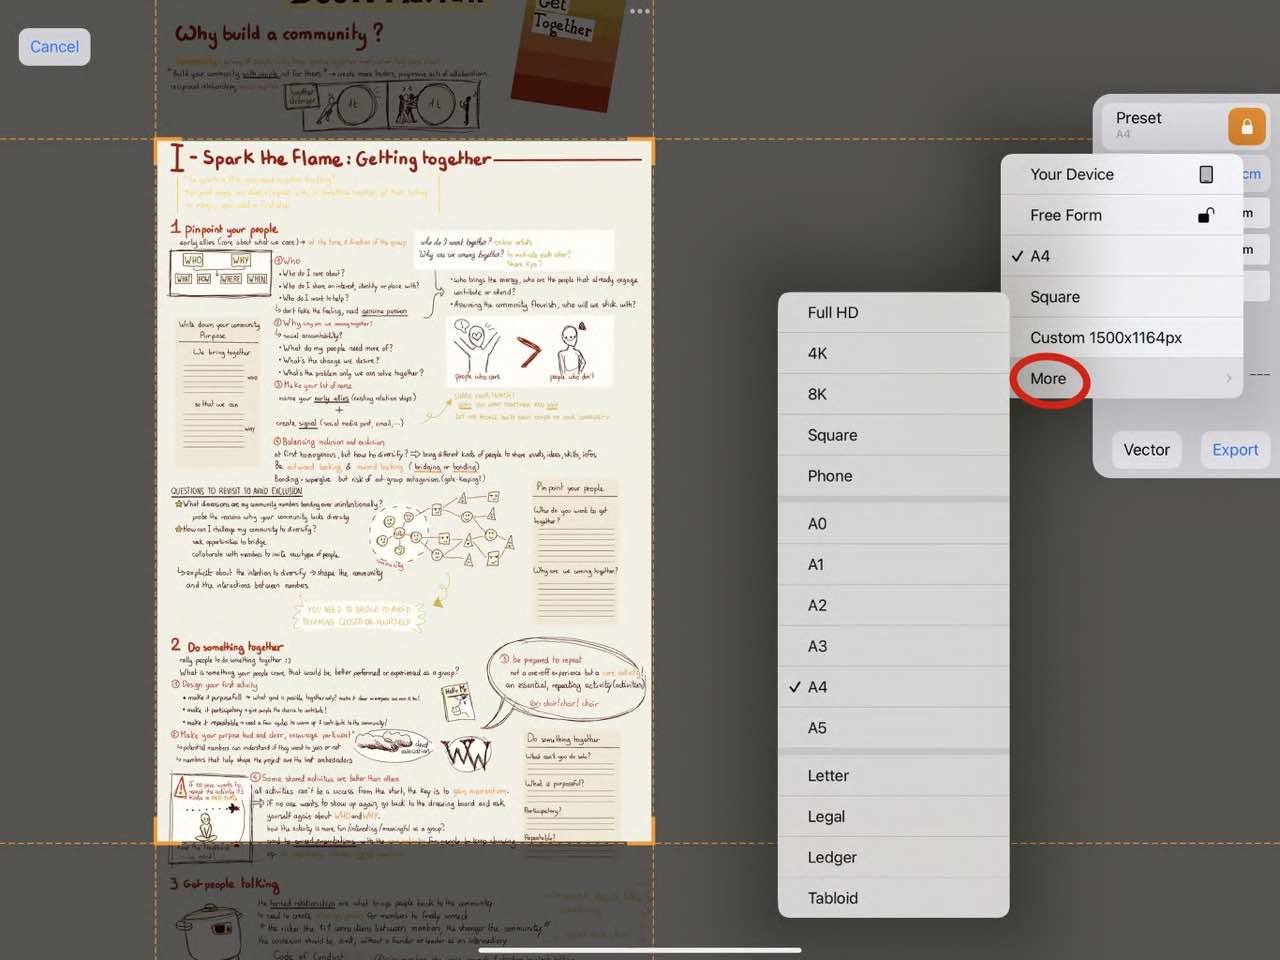
In the middle of your screen you will see a clear rectangle with blue corners. This is what your image will look like once exported. Drag the edges or corners of this rectangle to frame your surface to your liking. You can also rely on the preset ratio in the preset menu on the right side of your screen.
Freezing the aspect ratio
Preset ratios are automatically locked: if you drag the edges or corners of the rectangle it will keep its ratio. You can disable this and return to free form by tapping on the lock button . You can also lock a custom ratio by tapping on this lock button .
If you need a precise ratio, you can enter its value in the width and height boxes. Just like with the preset and manual ratio, you can choose to link or not the height and the width by tapping on the link button . If the link icon is crossed , then it means that you can change both values independently. Otherwise, modifying one of these values will automatically change the other one to keep the ratio.
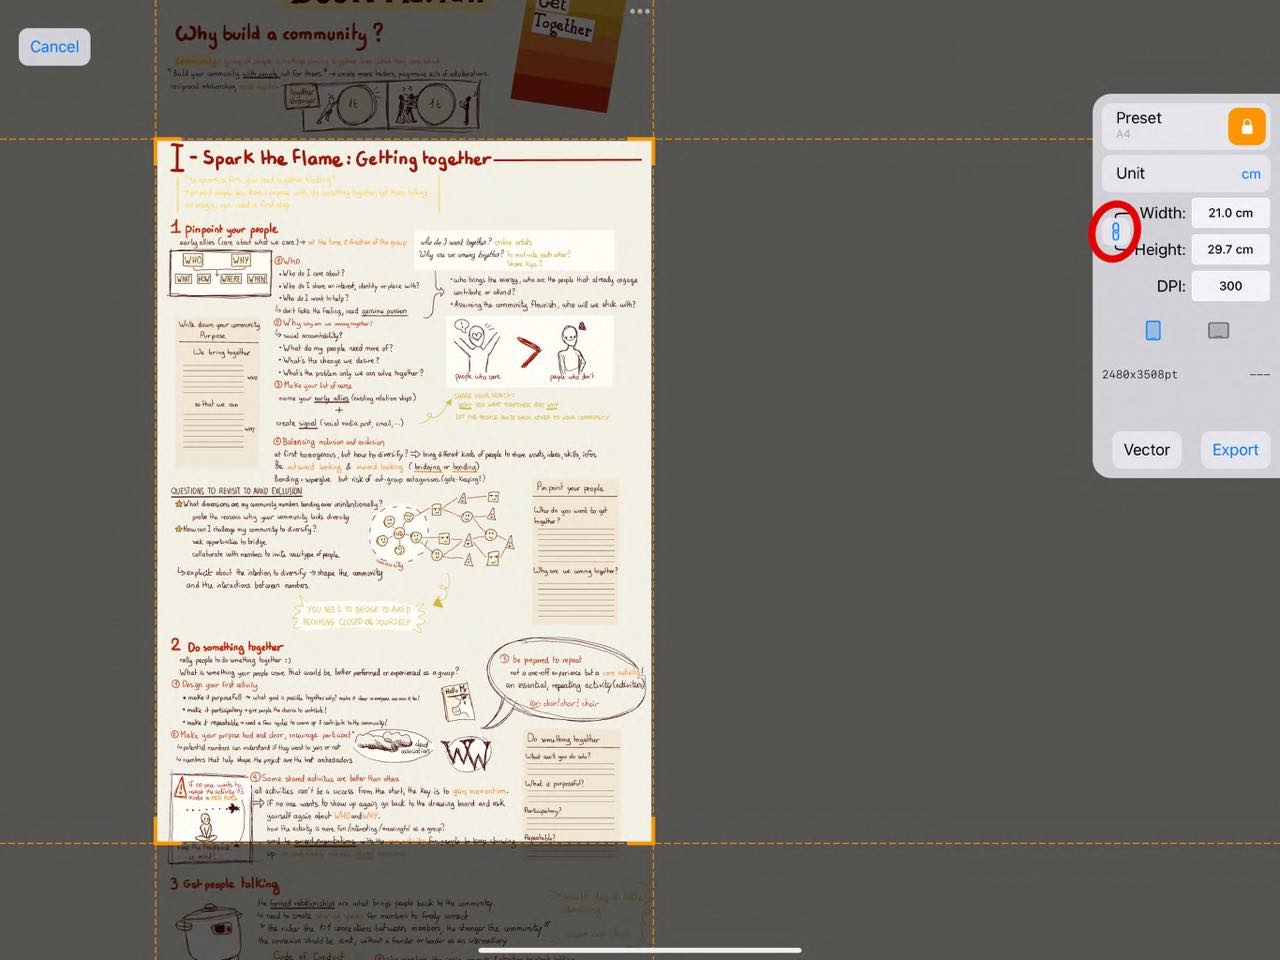
Specifics of your PDF
You can choose the units to work with by tapping on the Unit button, above the width box. If you select a unit that isn't pixels, you can see a DPI box below the height box.
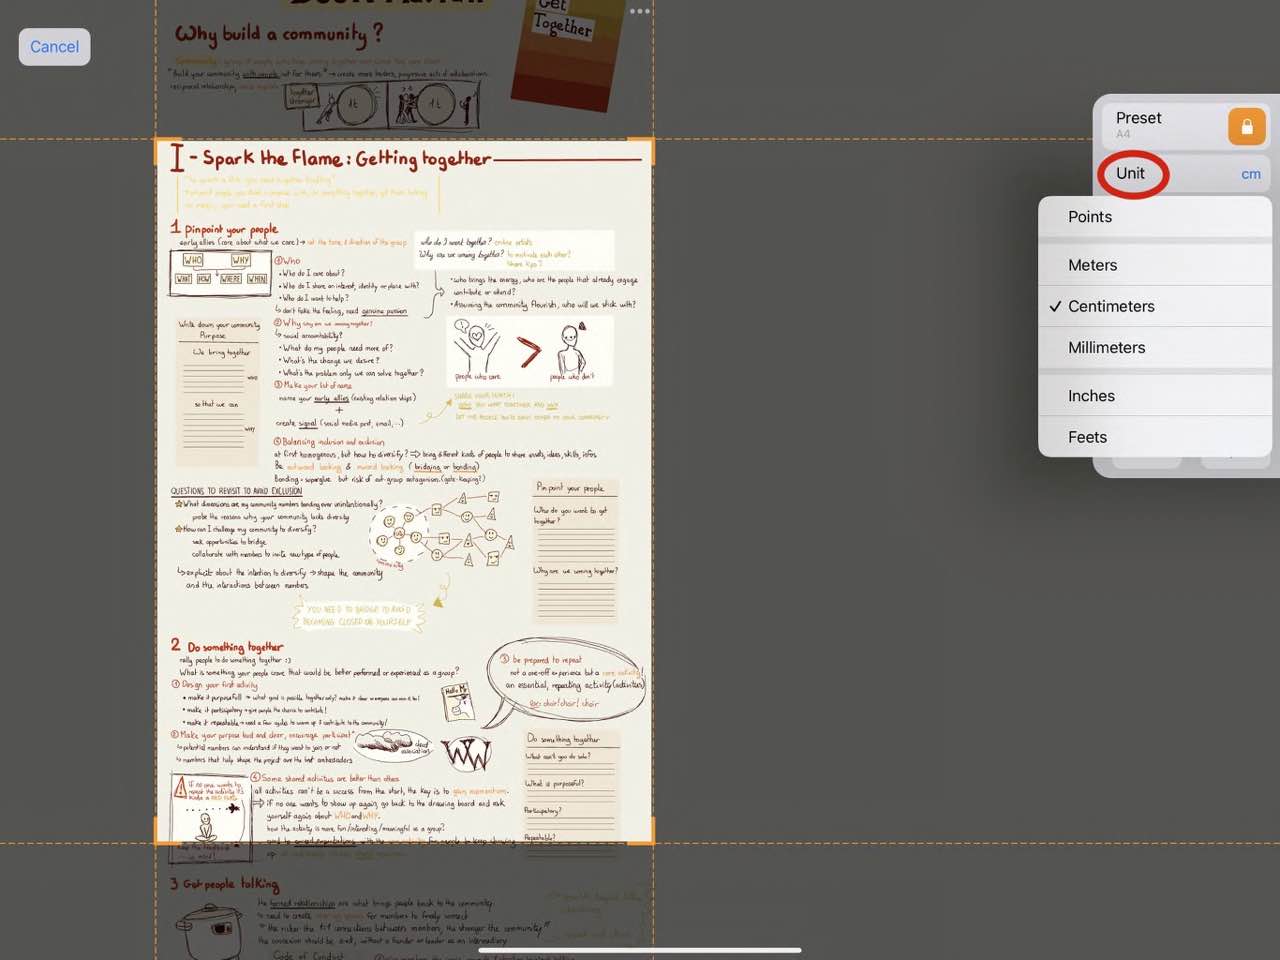
The DPI is the number of pixels per inch. In simple terms, it means that the higher the DPI, the more detailed your image will be. However high DPI also means a heavy file in the end.
You can also choose the type of PDF you wish to have by tapping on the button near the export button. You can either select vector (to keep a vector based picture) or raster (to transform each stroke in pixels, like for an image).
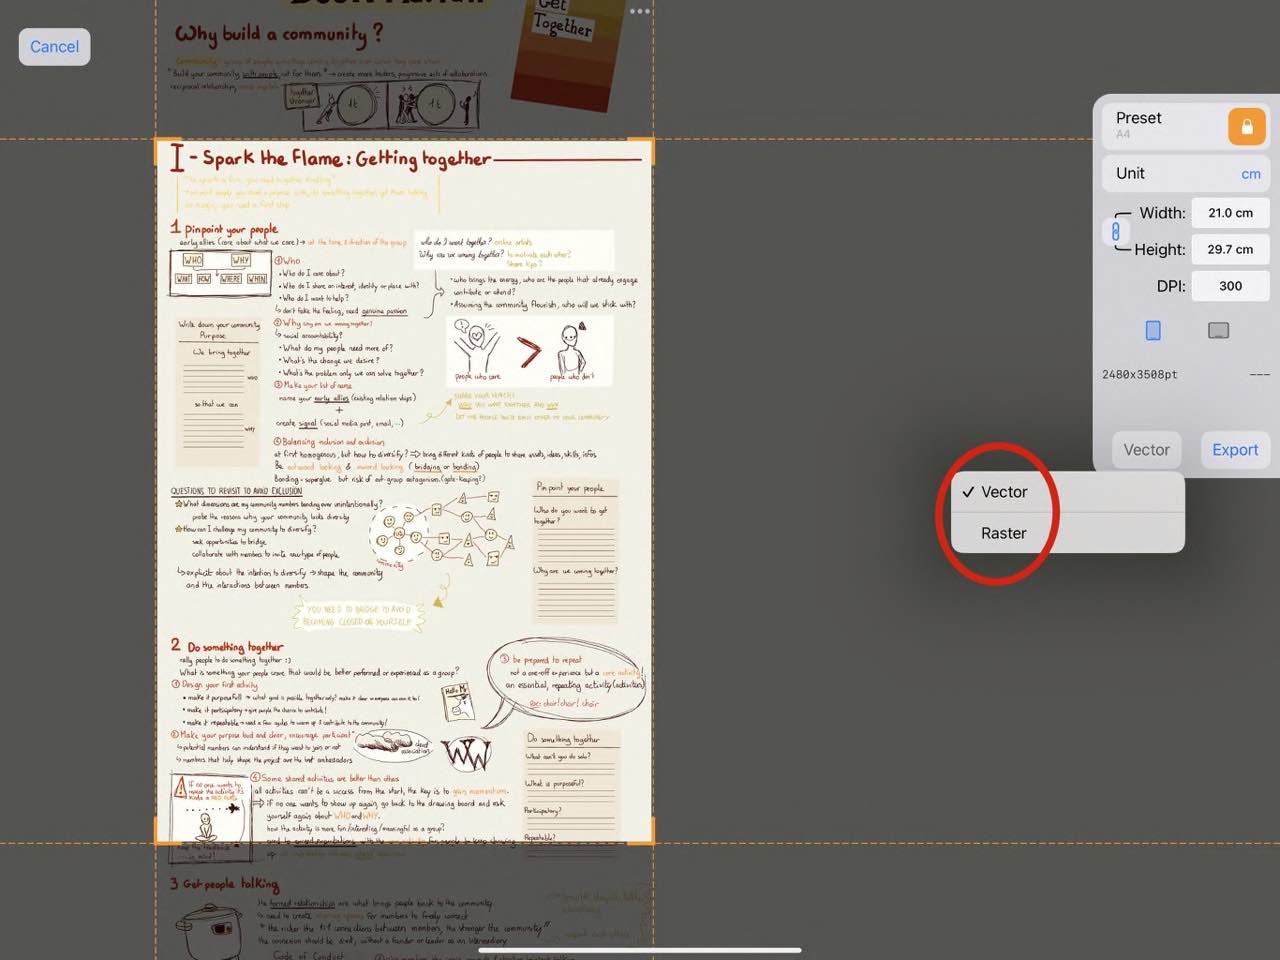
Generate your PDF
You can tap on the export button to generate your pdf. If your device can't handle the size of the pdf you're trying to generate, then the button will be faded in a gray color and the main factor that needs to be changed will be highlighted in red.
Sharing options for your PDF
Once you've generated your pdf you will be presented with a final popover to choose how to export your pdf. You'll have classic quick access to share it with your contacts or on some other app.
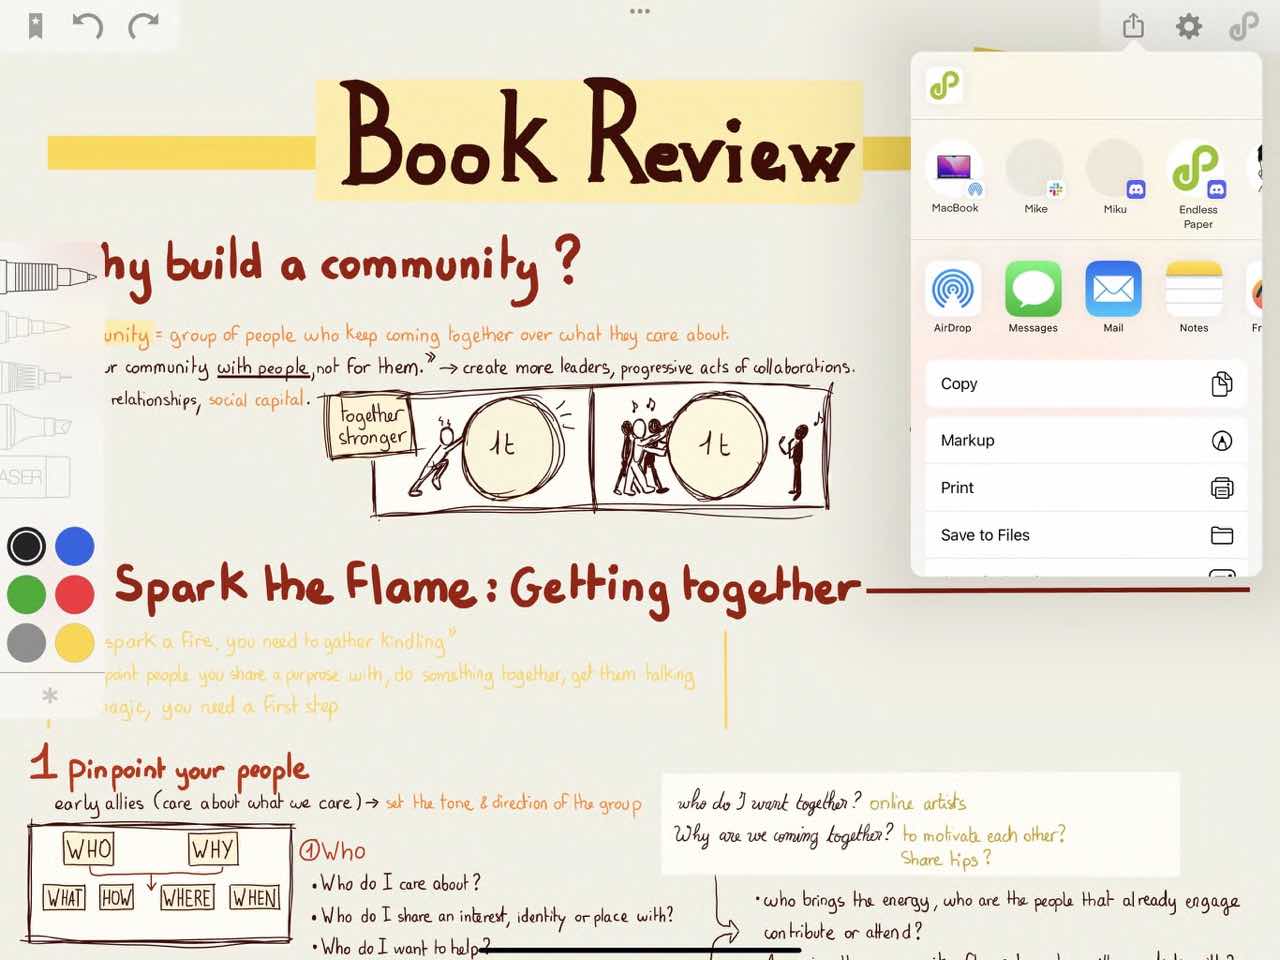
Modify list
You can also modify the list of actions and apps presented in the sharing popover by tapping on either ‘Edit action’ at the bottom of the popover (for the actions) or the three dots at the end of the apps icons (for the apps).
Export as video
You can export parts of your canvas as a smooth travelling video between two set points of your surface, perfect for showcasing your work in a dynamic and breathtaking way.
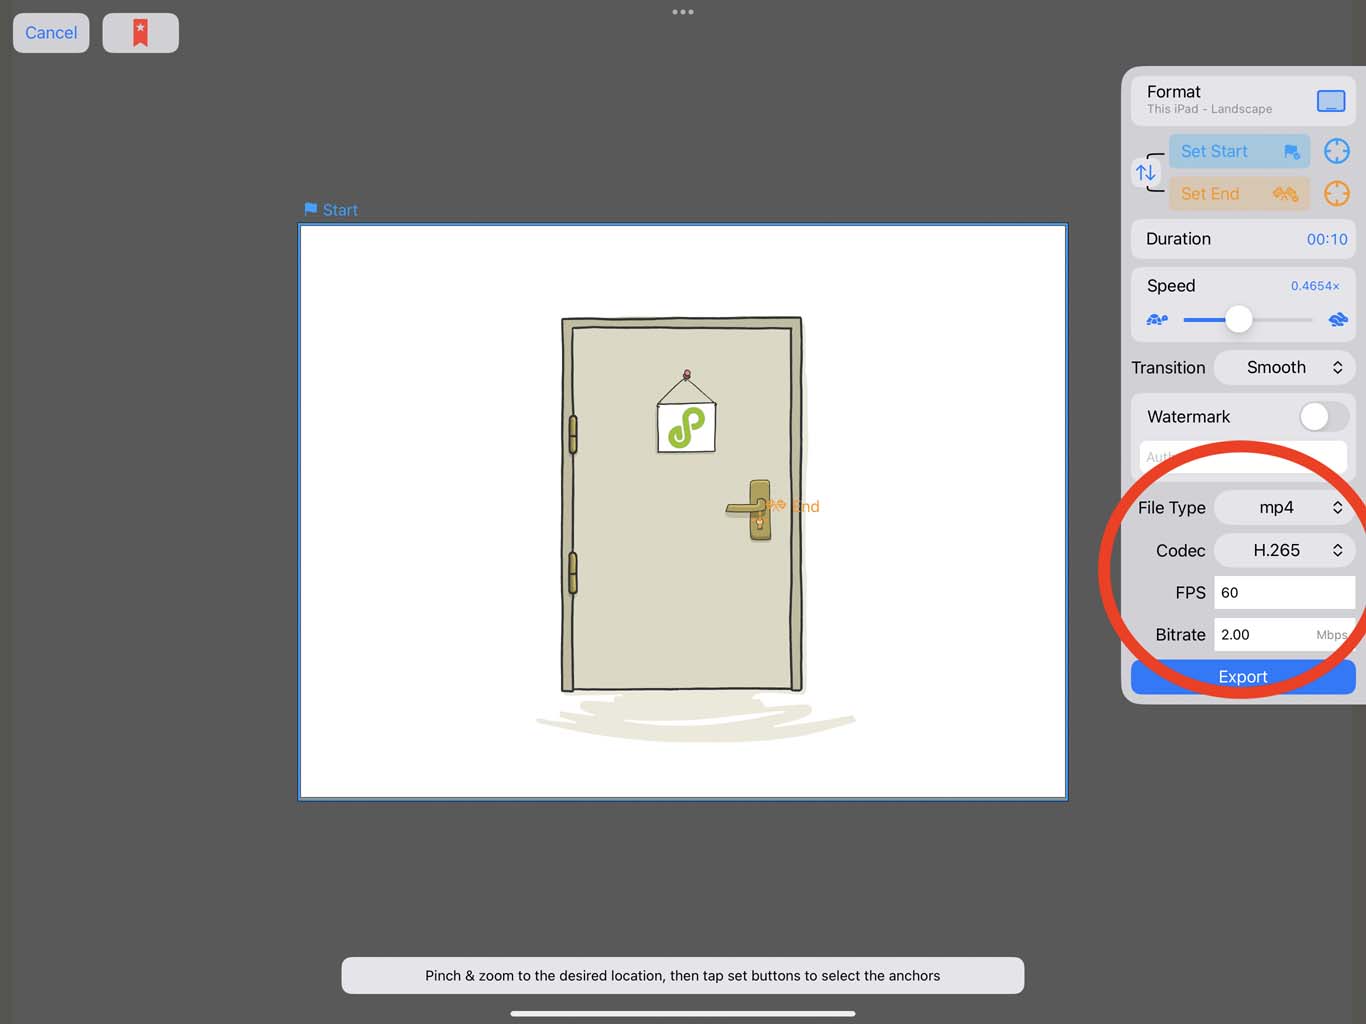
Tap on "Export as Video " in the sharing pop-over to open a video recording interface. There you will be able to frame precisely the starting and ending points of your video and adjust various settings.
Set the start and end frames
To create your video, you need to first set the starting and ending points.
In the middle of your screen you will see a clear rectangle.
Navigate to the desired location by pinching manually or by using a bookmark. Then, frame the area within the clear rectangle, just like you would for an image or PDF export.
Once satisfied, tap "Set Start " or "Set End " in the menu, depending on what you are framing. You can quickly go back to your framed points by tapping on the buttons.
You can also switch the Start and the end by tapping on the button.
Specifics of your video
Aspect Ratio
Choose the aspect ratio for your video from a list of presets by tapping on "Format". Pick your format carefully based on where you plan to post your video.
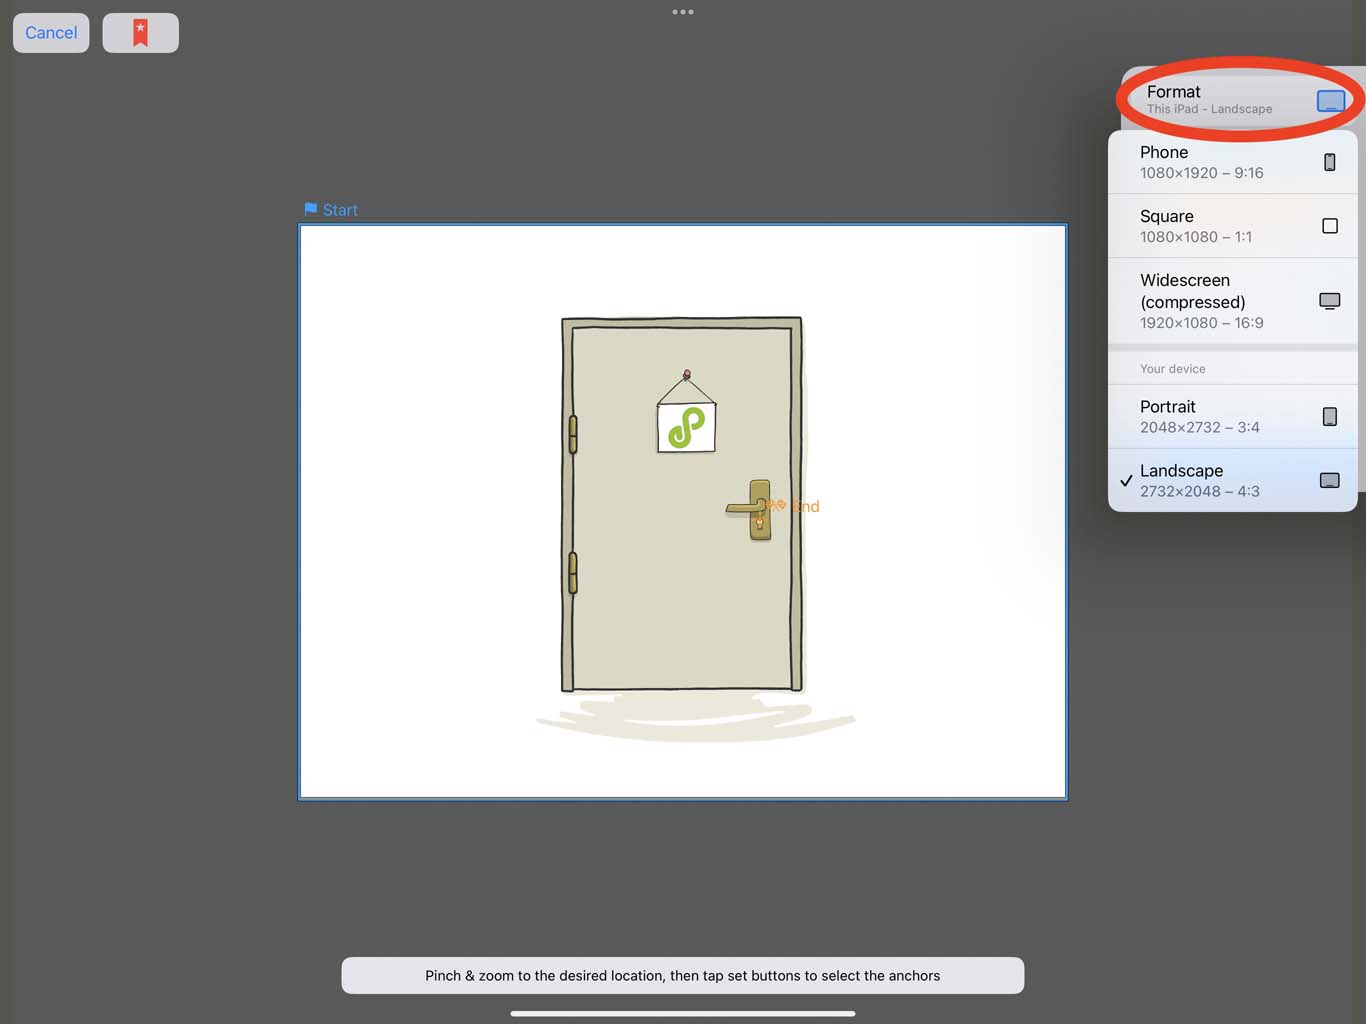
If you have a Pro subscription to Endless Paper, you can access additional presets, including resolutions up to 8K on supported devices. You can also set your own custom format that lets you tailor the video settings to fit your specific needs.
Speed and duration
You can adjust the length of your video by tapping on "Duration".
You can otherwise use directly the speed slider to chose the perfect speed for your video, and automatically set the matching duration. To create multiple videos with the same speed you can directly tap on the value and enter the desired value yourself.
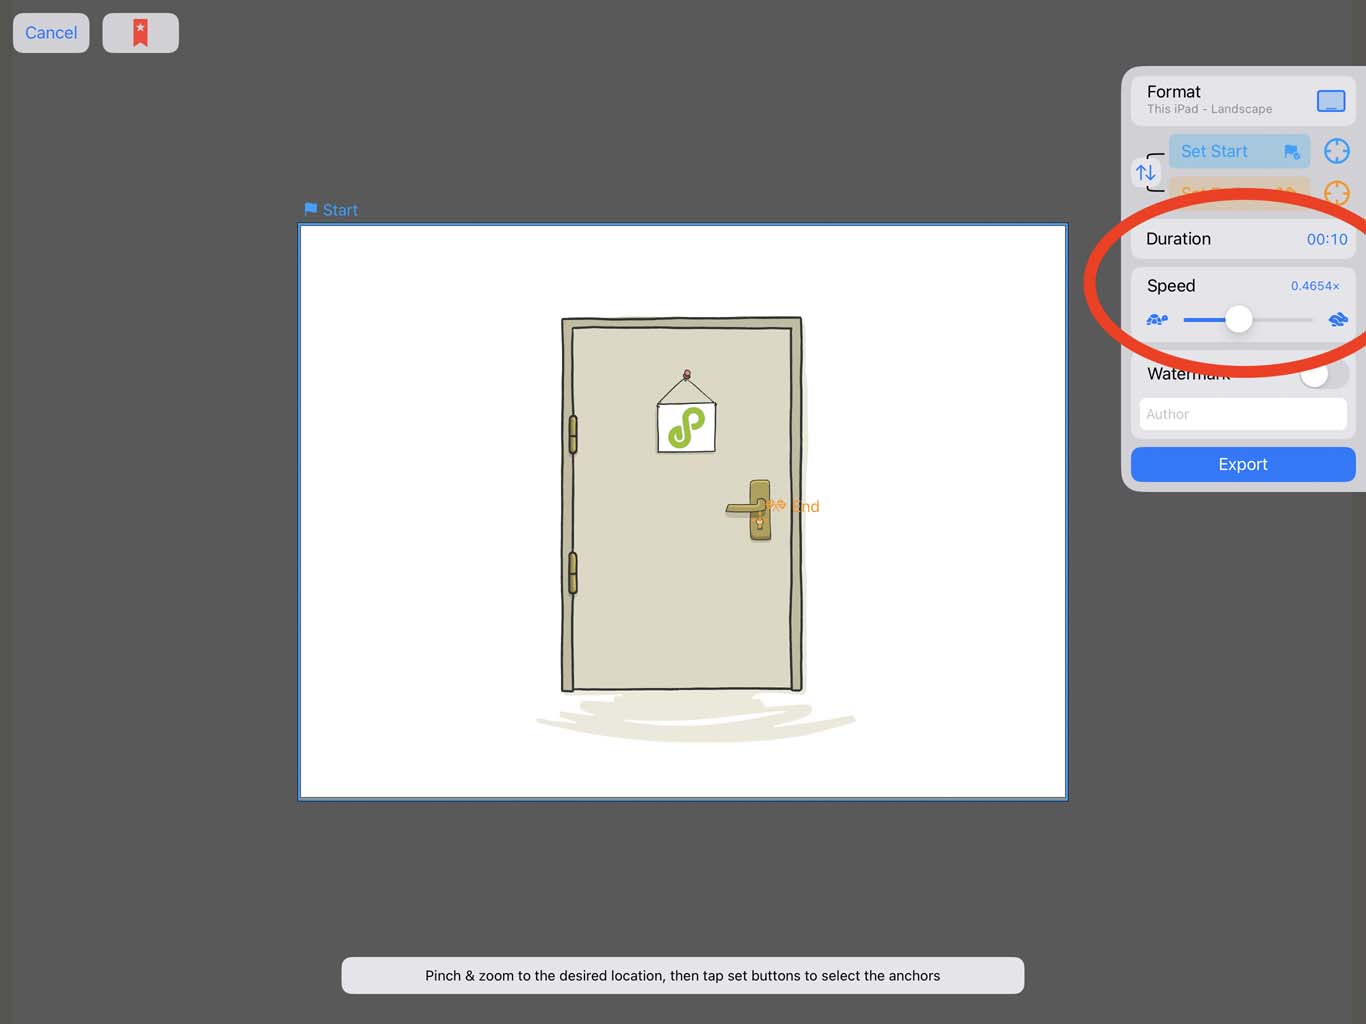
Speed and duration are closely linked; extending the duration will proportionally decrease the speed, and vice versa.
Transition
With a Pro subscription, you can customize the transition style of your videos.
By default, videos apply an ease in and ease out transition that can switch to a linear transition or create a custom curve in the editor.
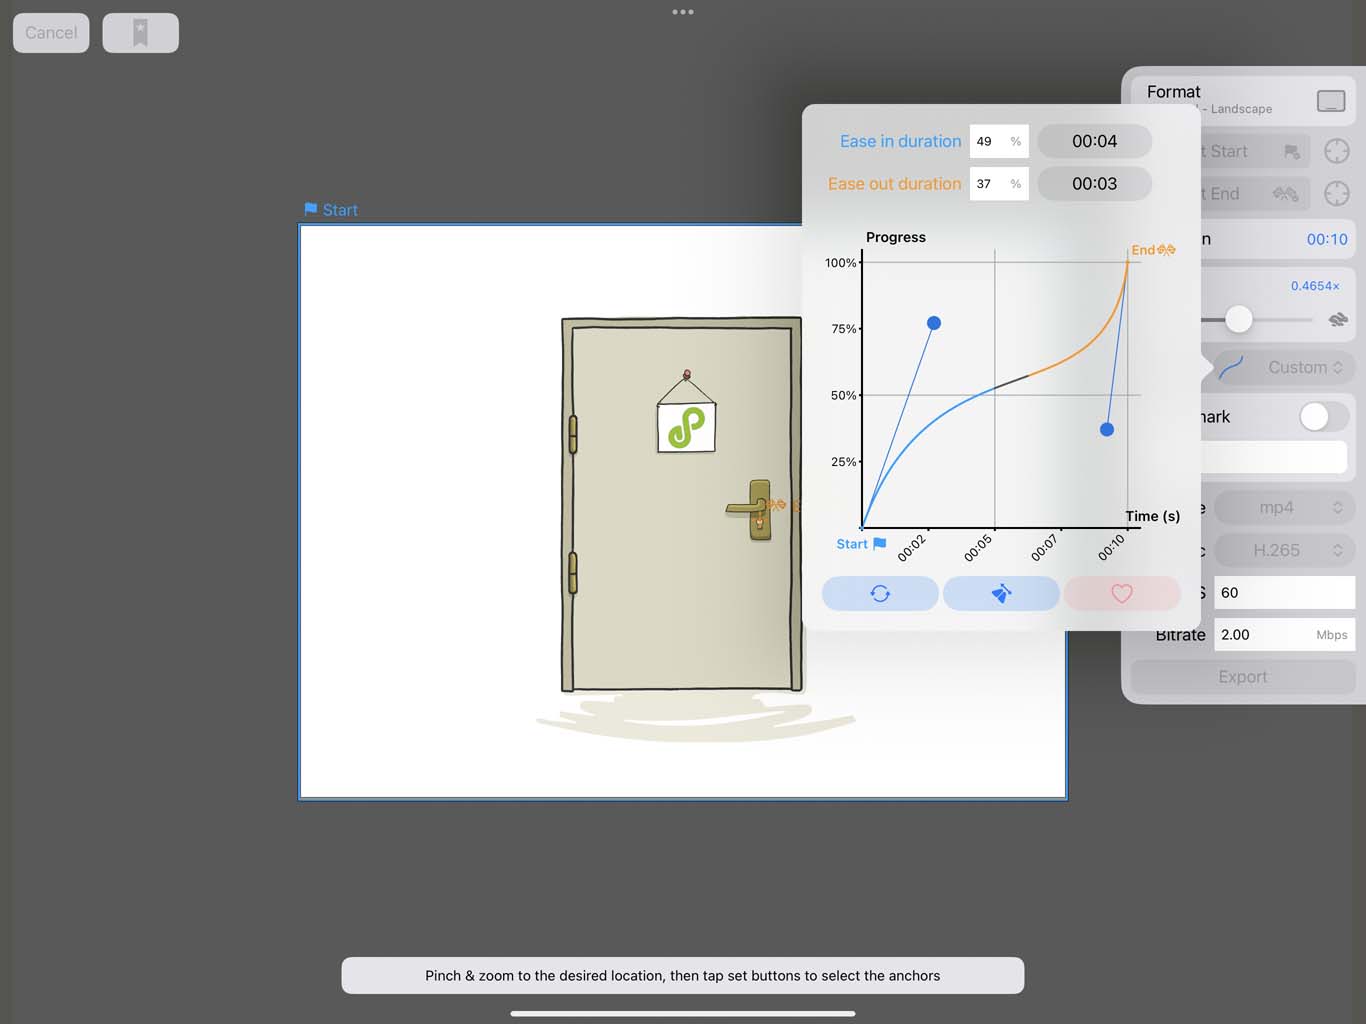
Within the curve editor, you can adjust the curve manually or enter numerical values for precise control. When you are satisfied with the result, exit the editor to apply the transition.
To reuse a transition in future projects, tap the heart button to save it as a favorite. You can store up to four custom transitions. If you reach the limit, delete one before saving a new transition.
Watermark
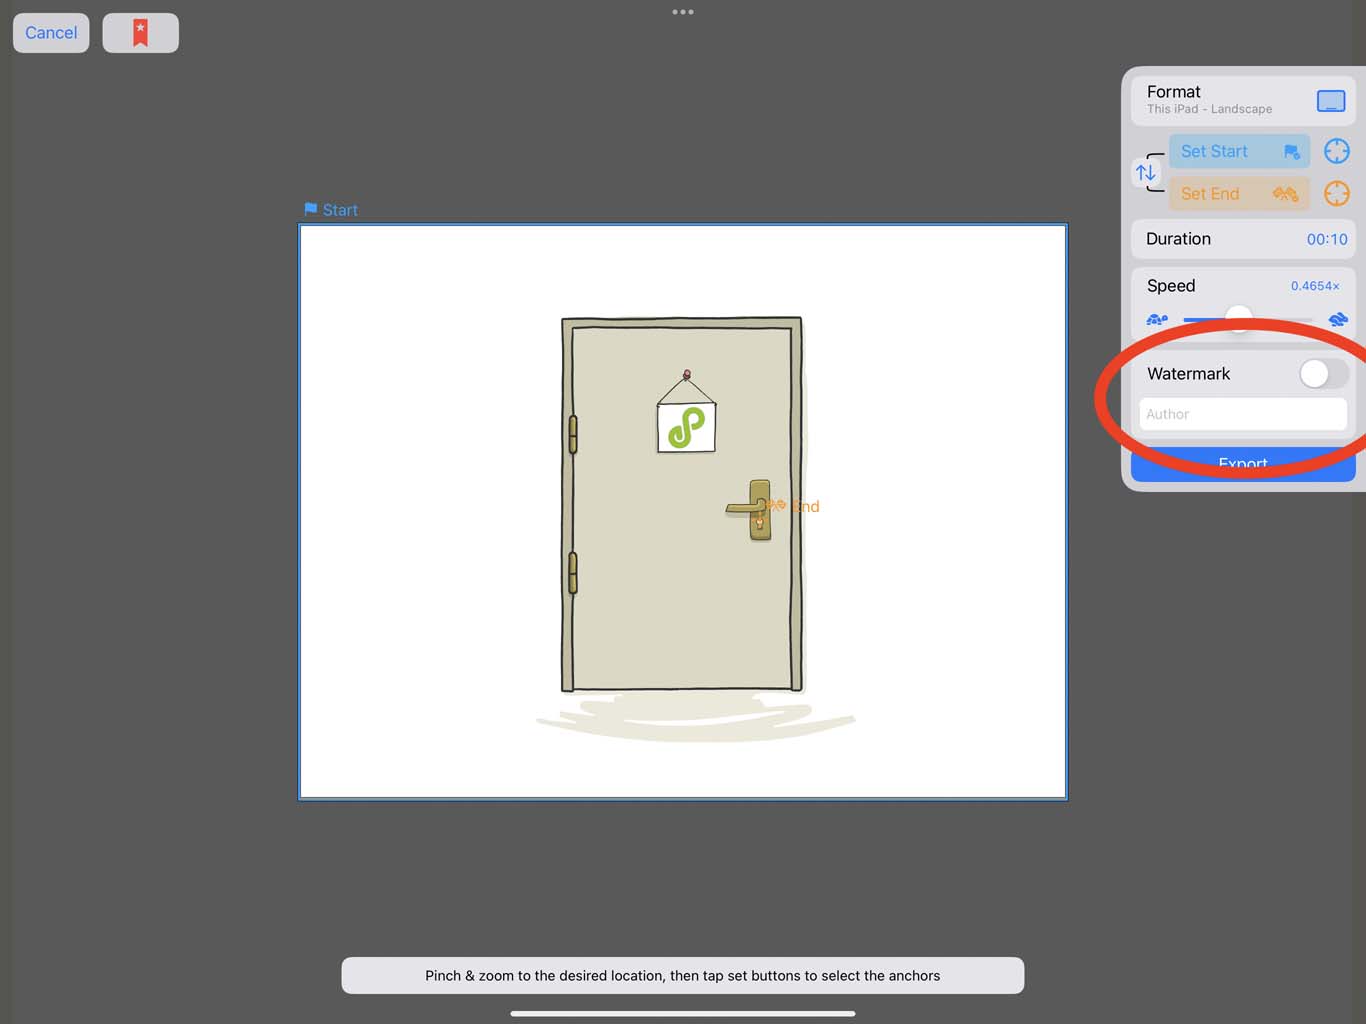
To avoid art theft, you can decide to include or not a watermark, and customize it to display your name. Simply switch on the toggle and enter your preferred name in the "Author" text field.
Advanced settings
If you have a Pro subscription, you can access a dedicated panel of advanced settings, giving full control over the details of video export. This lets you tailor your output to match your desired quality and format.
- Choose a File Type for your export
- Select a Codec to optimize compression and compatibility
- Set the Frames Per Second (FPS) to control smoothness and motion fidelity
- Adjust the Bitrate to balance file size and video quality
Generate your video
Once you're satisfied with all your settings, tap "Export" to generate your video. If your device can't handle the size of the video you're trying to generate, the end result might have some artefacts visible.
When your video is ready, you will be presented with a final popover. Tap on the share button to choose how to export your image. You'll have classic quick access to save it on your device or to share it.
Share on the Web
You can publish you whole canvas as an interactive website that visitors can explore freely. This is called a Web Experience (WebXP for short).
WebXPs can be accessed from any device connected to the internet, and display your content with a level of sharpness very close to what you woud see in the app.
Create a new WebXP
You can create your WebXP directly from the Endless Paper app.
Each subscription includes one WebXP. The WebXP remains active for the entire duration of your subscription. It is intended for personal projects only. Commercial projects require a dedicated commercial WebXP.
Prepare your Canvas
Before sharing your canvas as a WebXP, ensure it is complete and ready.
A WebXP captures your entire canvas, so make sure it contains only the content you want to share. It can also include your bookmarks. If you want to include only a selection of your bookmark, remember to create a folder with all the bookmarks you want to incldue before creating the WebXP.
Generating a WebXP can take anywhere from a few minutes to several hours, so double-check your canvas to avoid generating it multiple times unnecessarily.
Frame your WebXP
Once your canvas is ready, tap "Share on the Web " in the share pop-over to open the WebXP framing interface.
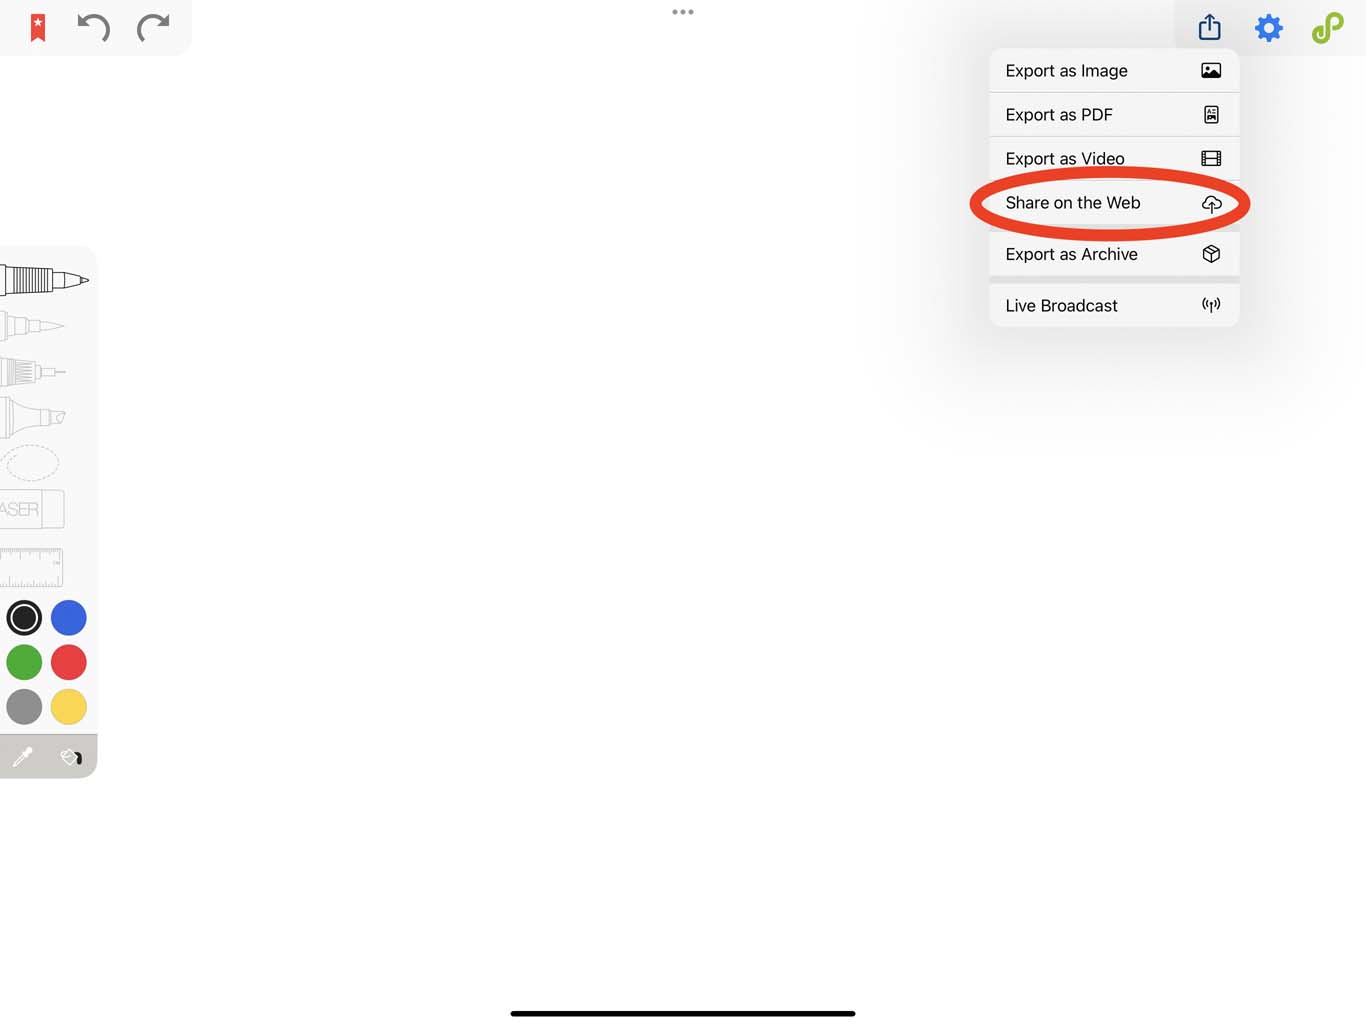
In this interface, you can define the exact starting point of your WebXP. Although the entire canvas will be included, the starting point determines the area visitors see first when they open your WebXP.
The WebXP will be accessible on all screen ratios, so the starting point may not appear exactly the same on every device. You can set the prefered screen ratio for the starting point to either phone screen or wide screen by tapping on the button in the top right corner of the interface. The gray areas on the sides of the frame show how your selected starting point will appear on the other screen format. Make sure to position your starting point in a way that looks harmonious on both main types of screens.
From the control panel, you can also decide which bookmarks to include. Select "All Bookmarks ", "No Bookmarks " or a specific "Bookmark Folder " if you have created one.
These bookmarks can be accessed through the navigation arrows in your WebXP and can also be used for more advanced customization.
When your framing is complete, tap "Export".
Generate your WebXP
The creation of your Web Experience takes place in two main steps:
- Upload
- Generation
During the upload, your canvas is transferred to our servers. This step requires a stable internet connection. If the connection is interrupted, the upload will be canceled and you will need to try again later.
Once the upload is complete, the generation process begins. This step is handled entirely on our end and can take from a few minutes to several hours, depending on the size of your canvas and the number of users currently in the queue.
When the generation is complete, you will receive an email containing the URL of your Web Experience. You can also access the link at any time from the WebXP dashboard in the app.
WebXP Dashboard
The WebXP dashboard lets you access and manage all your WebXP(s). To access it, open the Account tab and tap on "Web Experiences".
The dashboard displays all your currently online WebXPs. For each WebXP, you can access its URL, as well as view the original canvas name and upload date.
To rename a WebXP, tap its title and enter a custom name. To delete a WebXP, tap the bin icon.
To replace an existing WebXP, simply create a new WebXP as usual. Once the new WebXP has finished generating, your previous WebXP will be automatically deleted and replaced with the new one.
Below the list of online WebXPs, you can see any WebXPs that are currently being updated.
The current status of each process is displayed, such as Uploading or Generating. If an issue occurs during the process, it will also be indicated here.
If an issue occurs, the Endless Paper support team will be automatically notified and will work to resolve it as quickly as possible.
Customize your WebXP
Once your WebXP has been generated, you can either view it as is or customize it.
You can remove interface elements such as the navigation arrows and the home button, or modify the appearance of the Endless Paper logo by adding these words at the end of your WebXP's URL:
&showNavBar=falseto hide the whole navbar&showTravelButtons=falseto hide the travel arrows&showNavInstructions=falseto hide the instruction message
You can also embed your WebXP into your own website for even more advanced customizations.
Export as archive
An “Archive” bundles all of your canvas’ (or canvases') data in a single file; it’s a back-up mechanism to move data from one device to another. You can export your canvases as archives or import them in your gallery
Export
To export a canvas, you can either tap on the blue “Export Archive ” button in the sharing pop-over, or by selecting the canvas you want to export in your canvas gallery (by either giving it a long press, or tapping on "Select" in the quick access) and tap on the sharing button. You can then save your archived canvas in your desired location
Import
To import a canvas’s archive to your gallery, go to your canvas gallery and tap on the button, or go to your gallery option pop-over and tap on "Import Archive ".
You can also open the .epa file directly in the Files app, which will launch Endless Paper and automatically add the canvas to your gallery.
Live Broadcast
You can Broadcast your canvas to display it on multiple devices at the same time. You can navigate on your own canvas, and all the viewers will follow.
This is a great tool for teachers to make sure that every student is currently in the same location on the canvas, and to share your notes without having to download the app on all the devices.
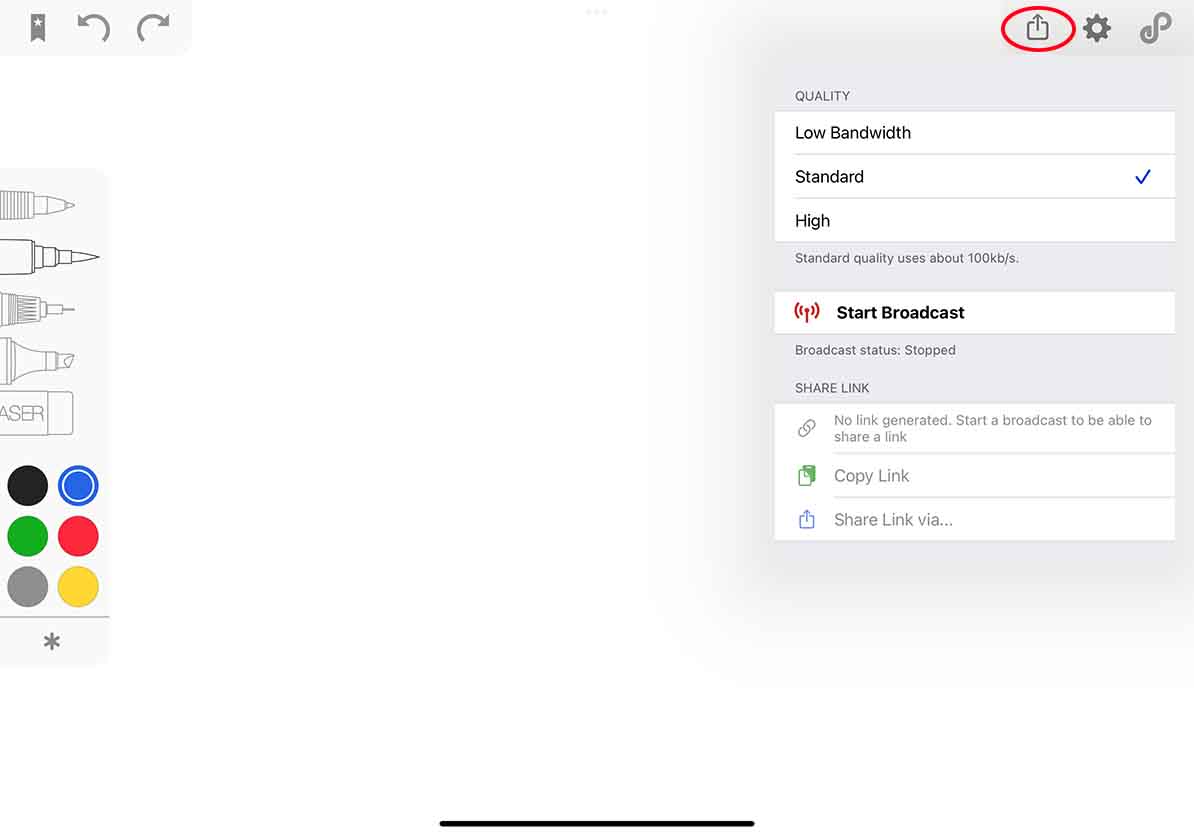
Tap on the ‘Start broadcast’ button to start broadcasting. Tap again to stop (it should be now called “Stop broadcast”).
Quality
You can choose the quality in which you want to broadcast your canvas. A low internet connection will broadcast your screen slowly, to avoid lagging, remember to select an adapted quality.
The better the internet service, the better the quality you can choose.
To share your screen you can either copy the link by tapping on the "copy link " button and pasting it wherever you want, or share it directly in an app.
Presentations
Presentations are a specific kind of folders in which you store bookmarks designed to be used as slides.
Create
To create a presentation, tap on the three dots at the top right corner of the bookmark menu. then, tap on the "New Presentation " button.
You will have to choose the ratio in which your presentation will be seen.
The order in which the bookmarks are classed determines the order in which they will be viewed during the presentation. Just like Folders you can either create new bookmarks directly in the presentation folder, or drag and drop existing bookmarks.
Why and how to specify a presentation’s ratio?
A “ratio” is a way to describe the specific proportions of a screen. Nowadays most devices have a similar screen ratio, however an iPad is a bit different: it has a ratio of 4:3 while most laptops, TV and video projectors have a ratio of 16:9.
You can choose your presentation's ratio by tapping on either 16:9 landscape , device portrait or device landscape when you are creating it. After this, a frame should appear that will show you what the other people will be able to see.
Using a specific ratio is useful for knowing what is visible and what isn't. It is a great way to sneak in personal notes for your presentation that will show on your iPad but not on the screen for the rest of the public.
You can modify any created presentation by doing a long press on the one you are trying to edit.
Presentation mode
The “presentation mode” is an interface to show your notes and/or use them as a presentation.
This mode will make buttons appear that will quickly let you go from one bookmark to another. You will also be able to recenter your screen on a bookmark at any moment, and to keep track of your time!
You will still be able to take notes and add extras to your canvas while in “presentation mode”.
How to do a presentation
To start the presentation mode, you first need to enter one of your presentations and then tap on the play button at the top right corner of the bookmark popover.
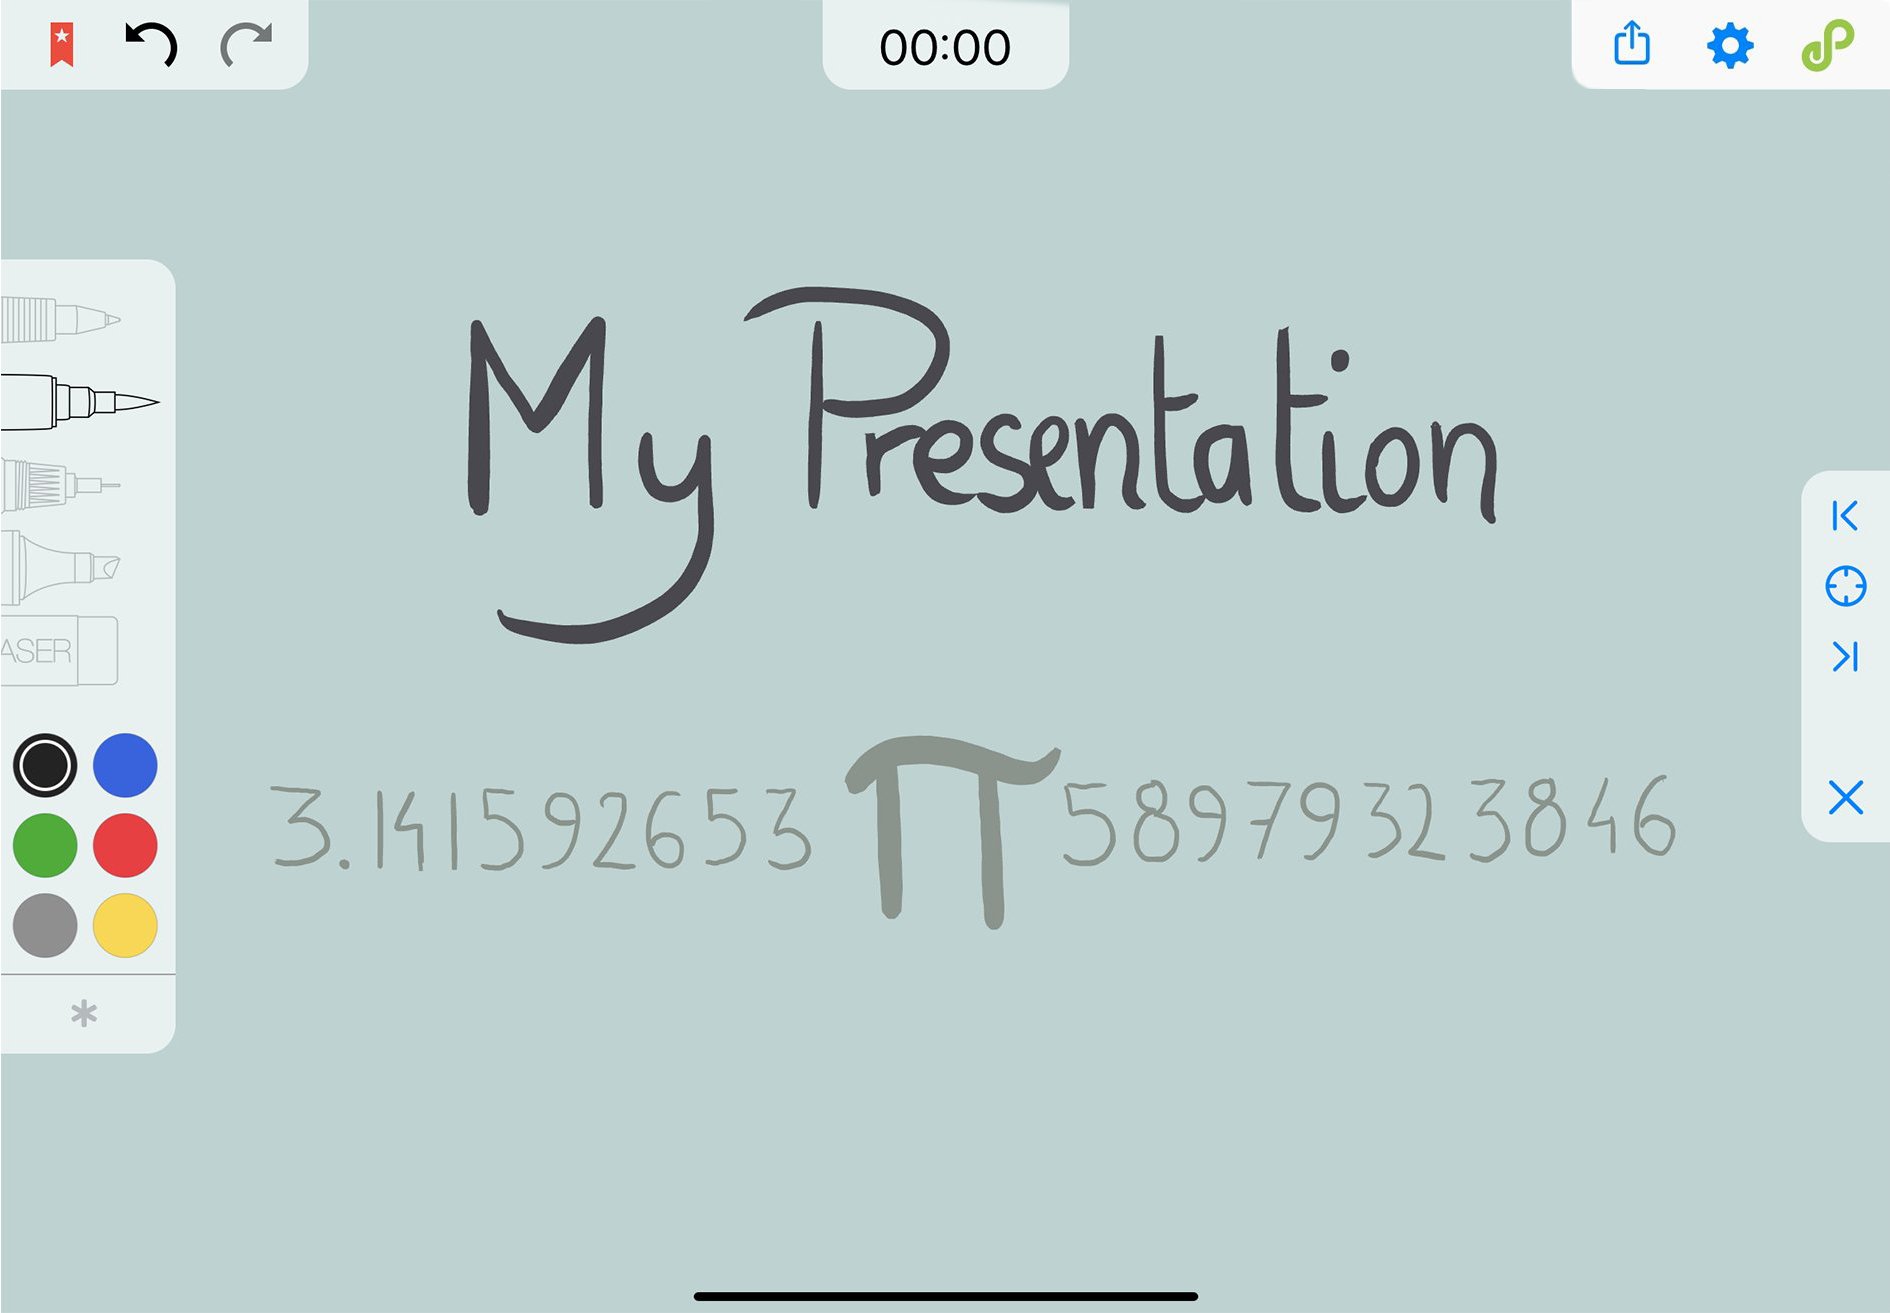
This will make four buttons appear on the right side of the screen, as well as a timer at the top.
Going to the next bookmark
The arrows on the right side of the screen allow you to go from one bookmark to the other, like a slideshow.
The main difference with a standard presentation is that in Endless Paper, you can add notes to your slides at any moment in time, and fully interact with your presentation.
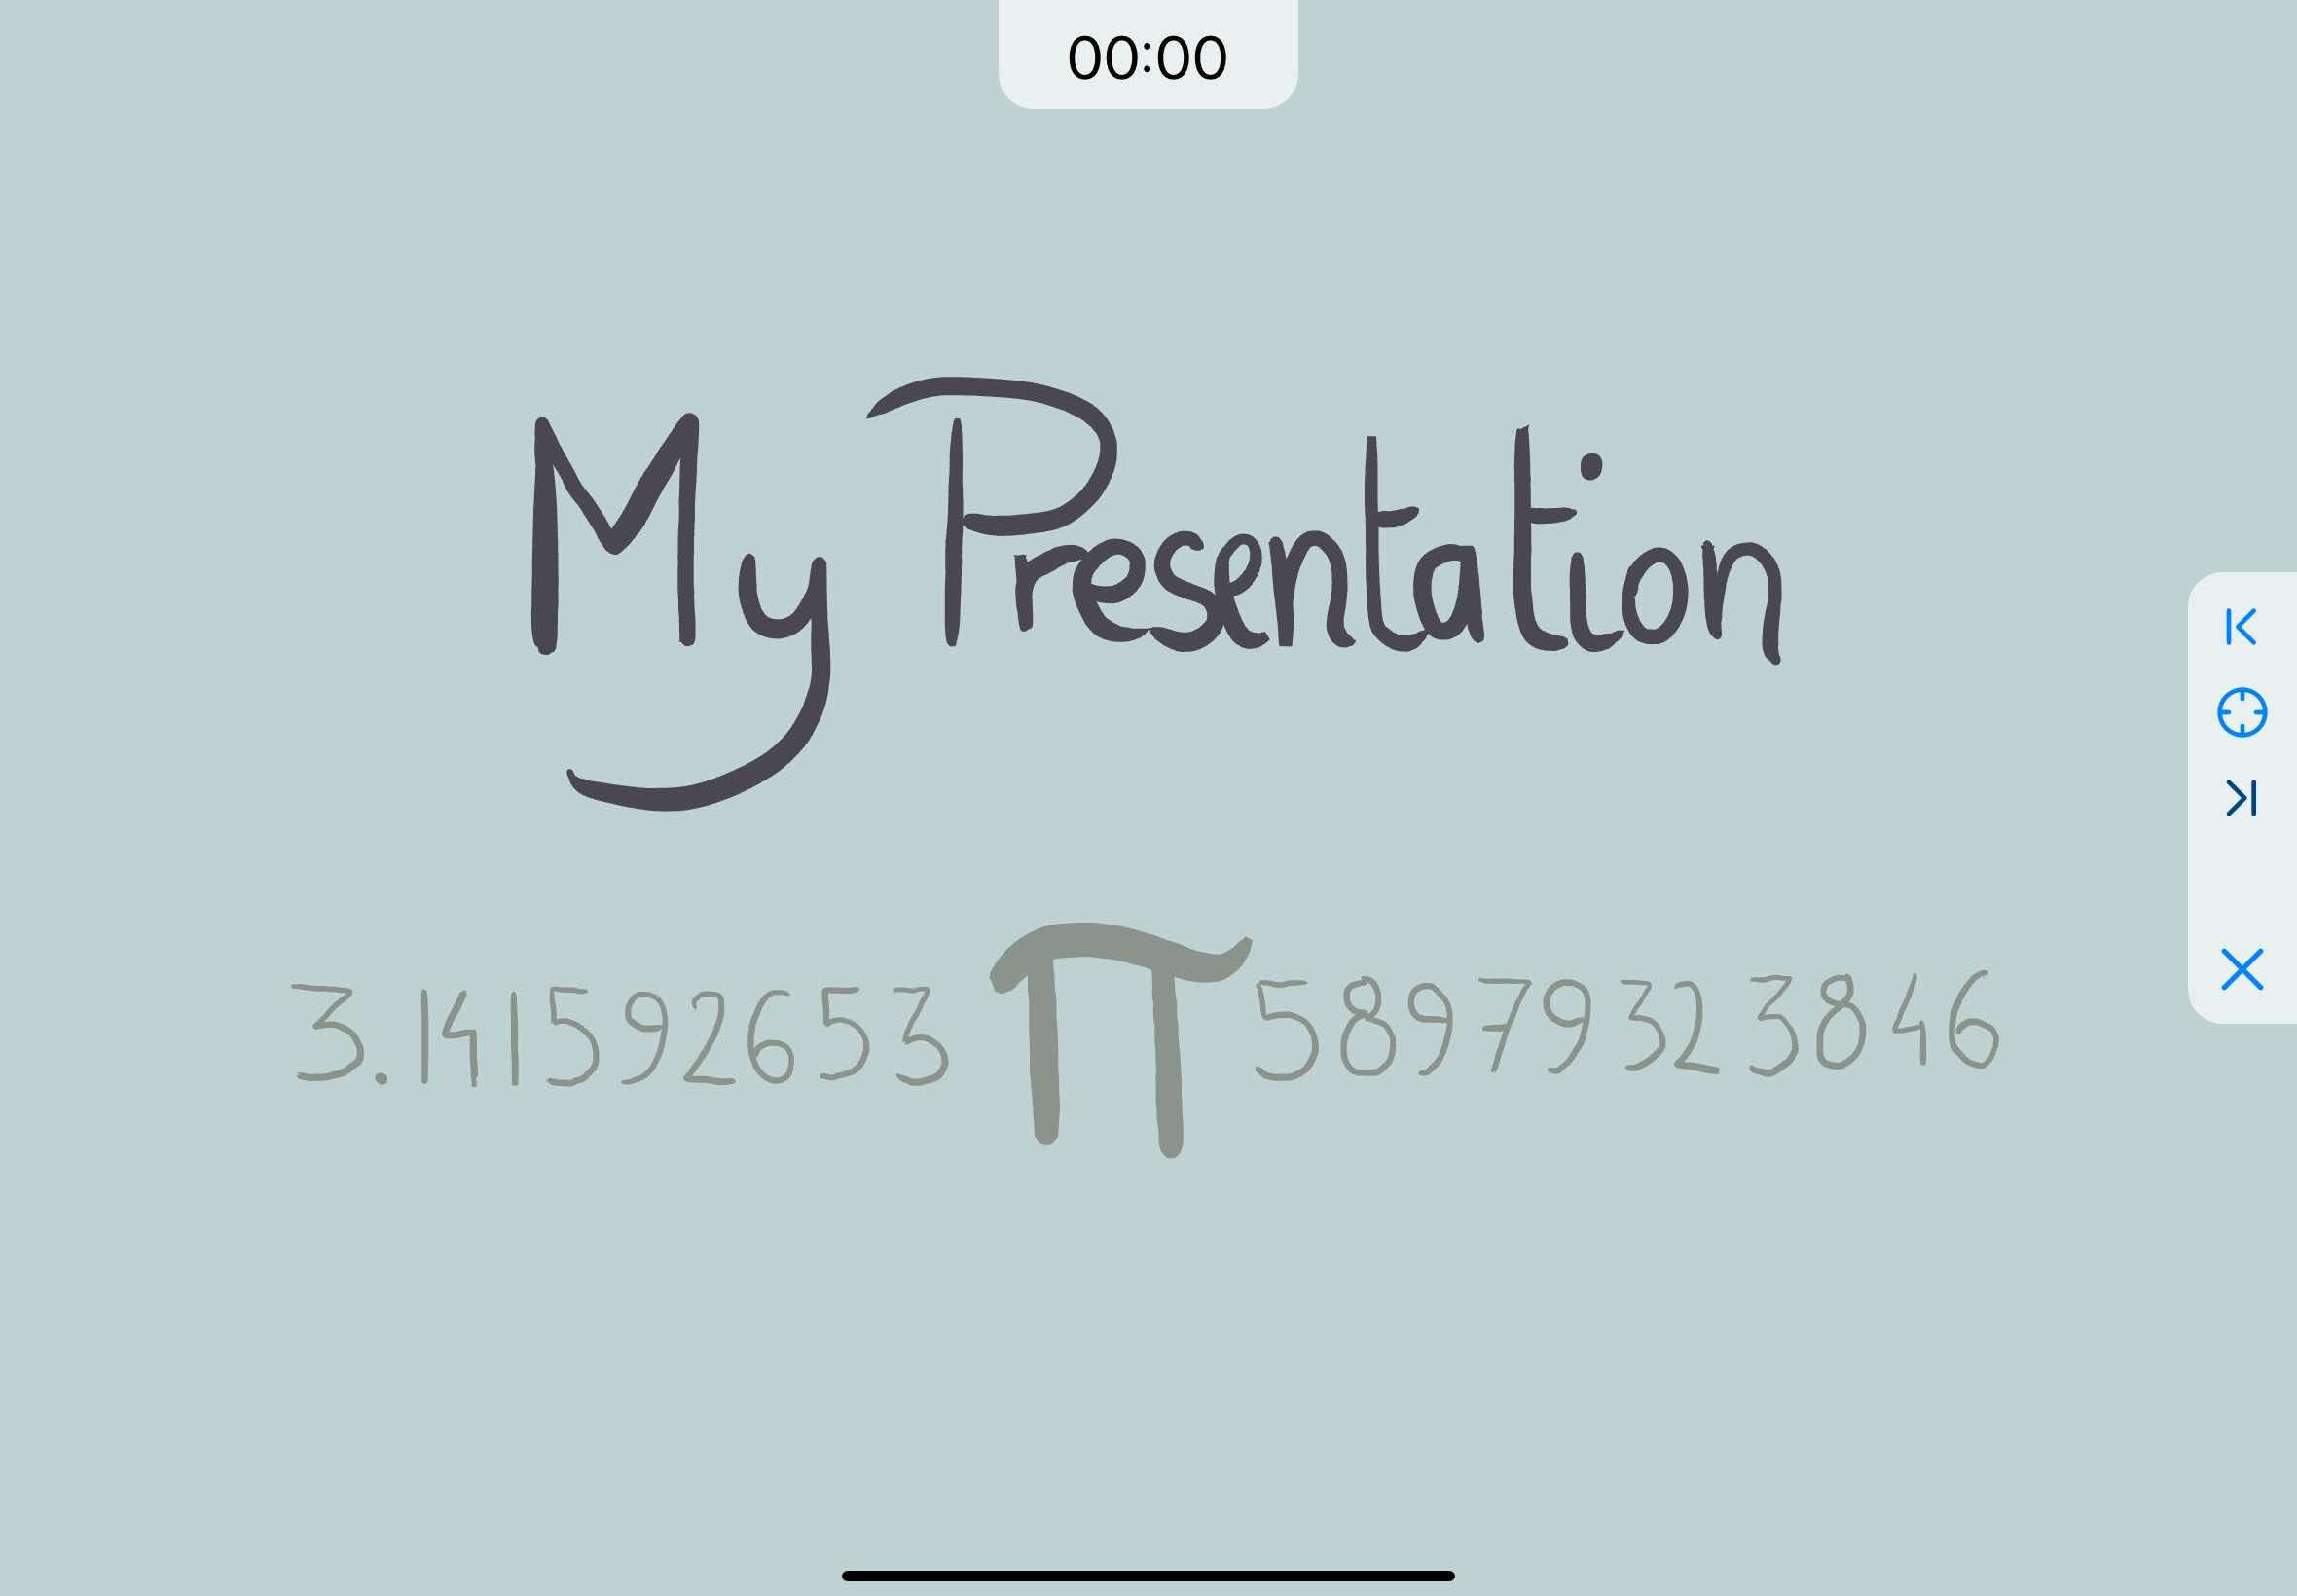
If you are using an Apple Pencil Pro, you can set up the squeeze action as a clicker for your presentations.
Recenter the screen
Between the two arrows on the right side of the screen you will find a target button . This target button will lead you automatically back to your last visited slide, which can be useful if you wandered too far.
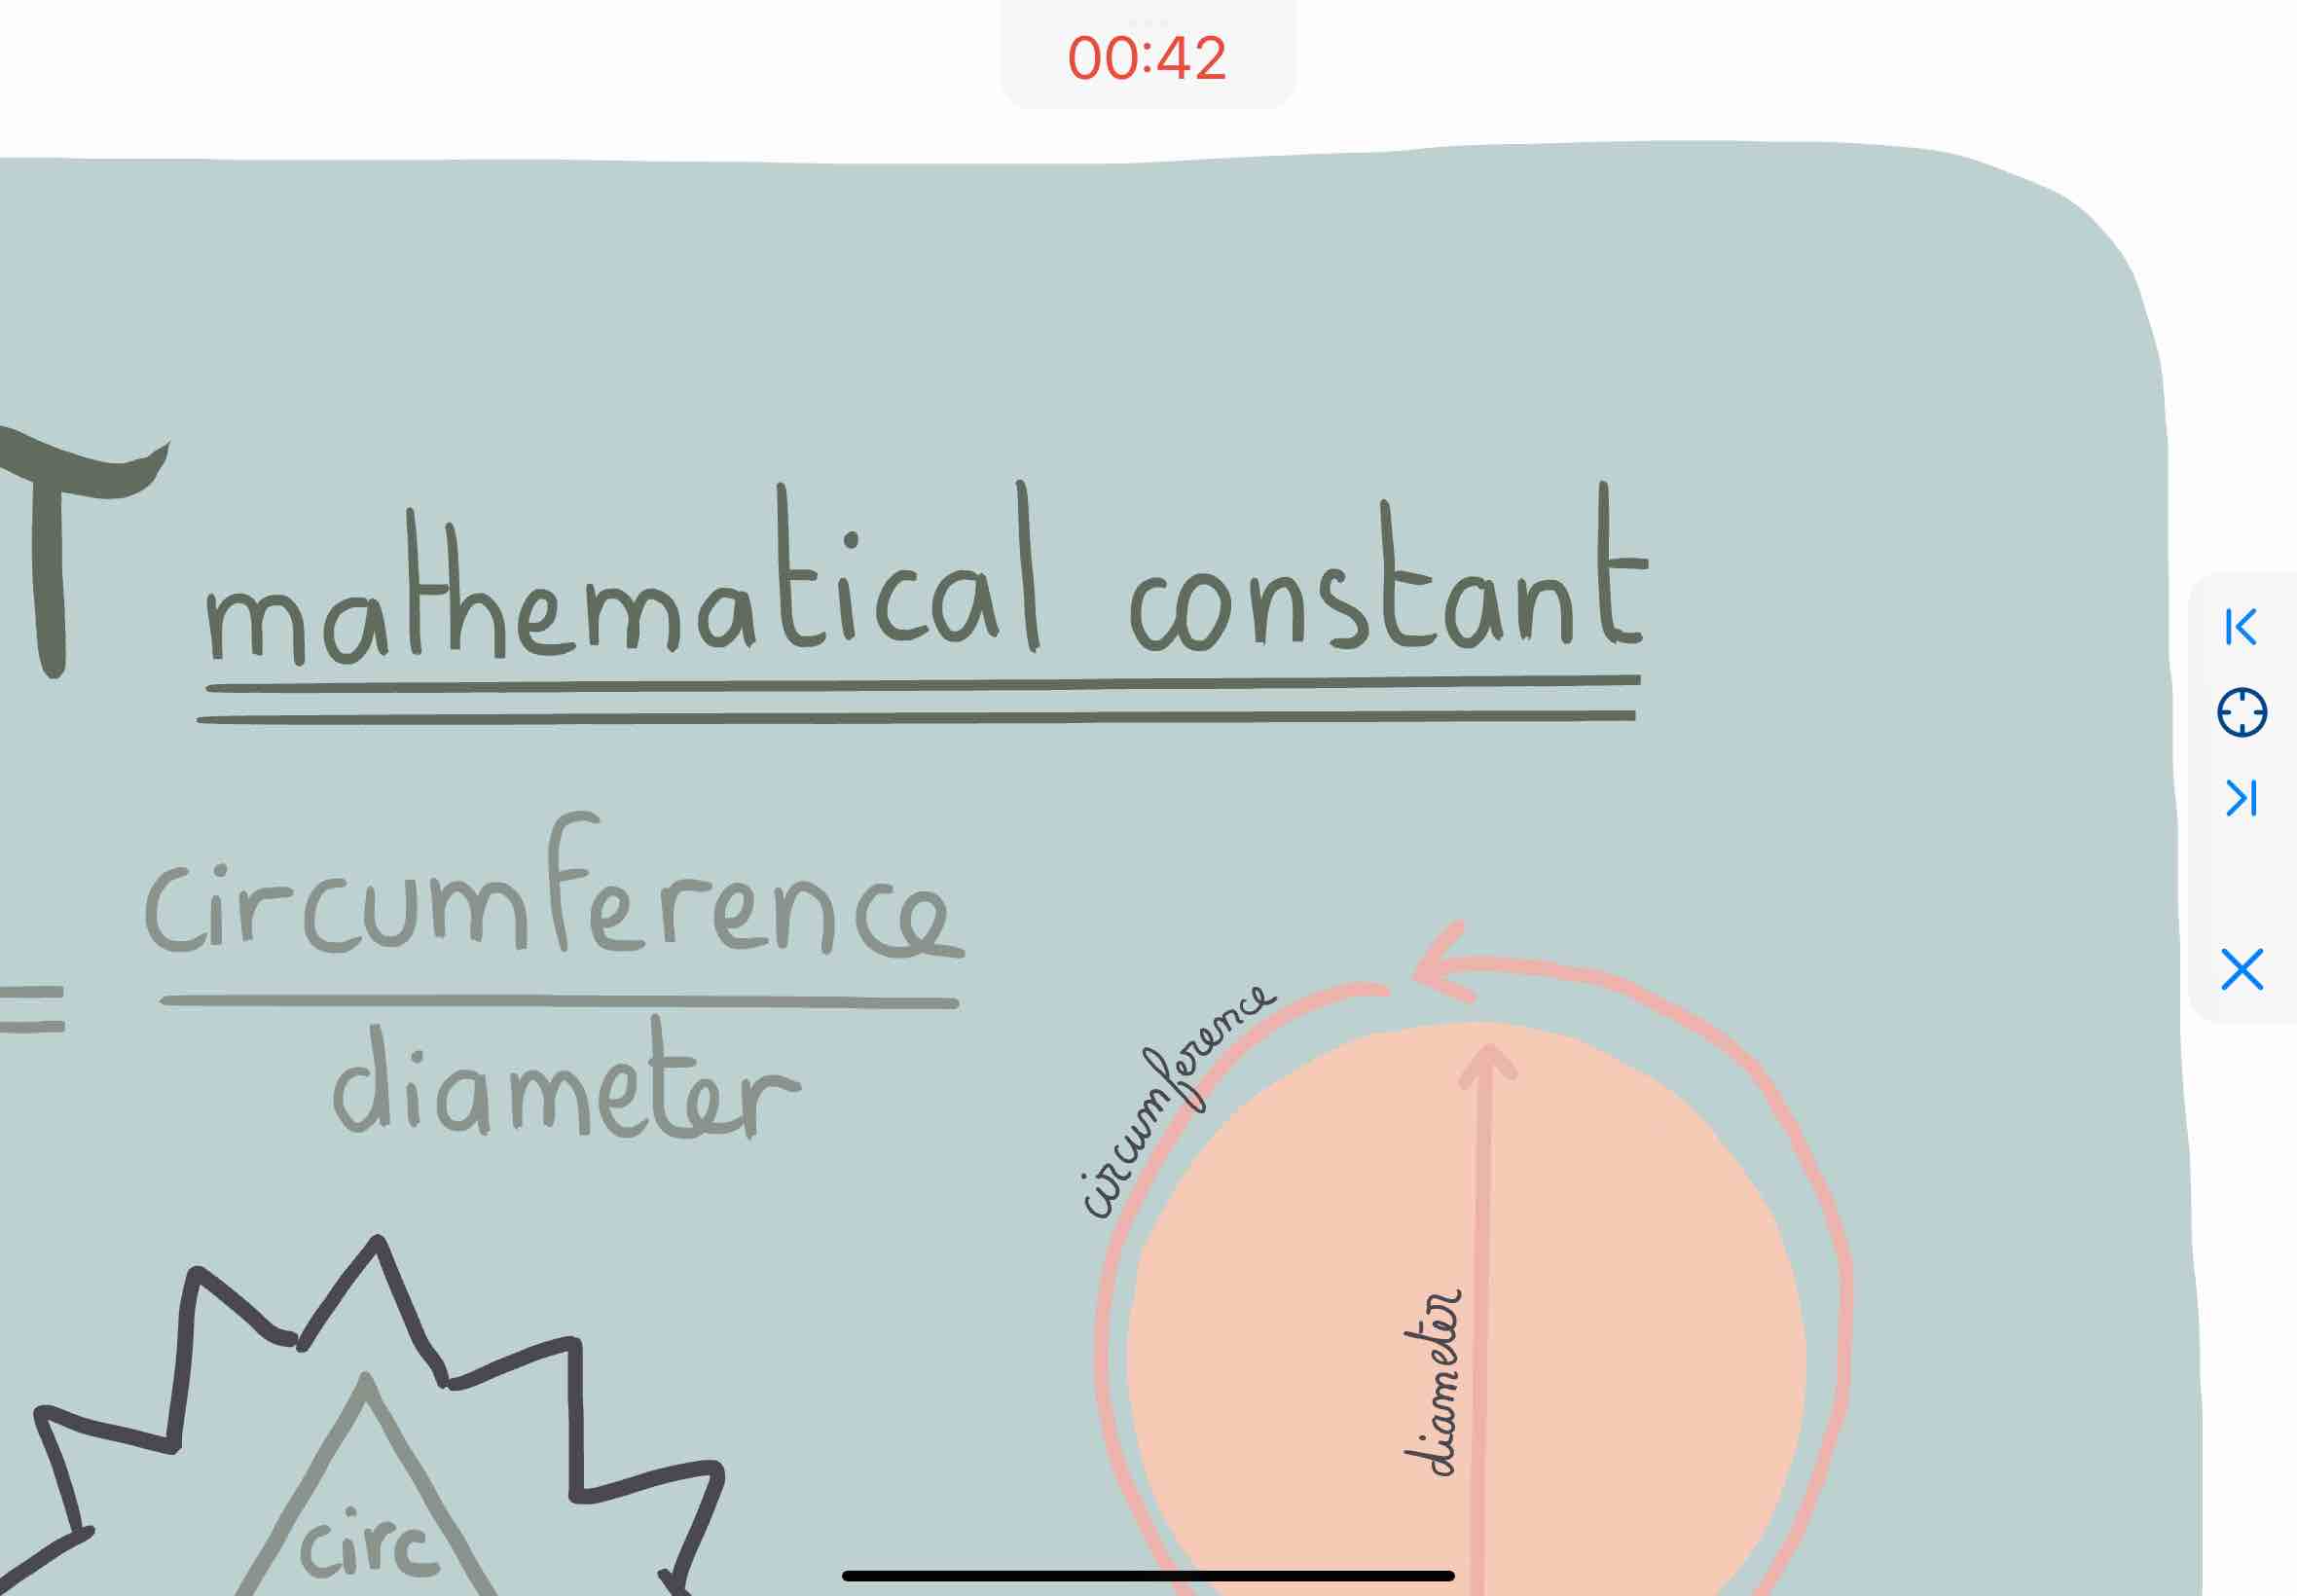
Exit the presentation mode
To exit the presentation mode, and end the presentation, just tap on the blue cross under the arrows and target buttons.
Timer
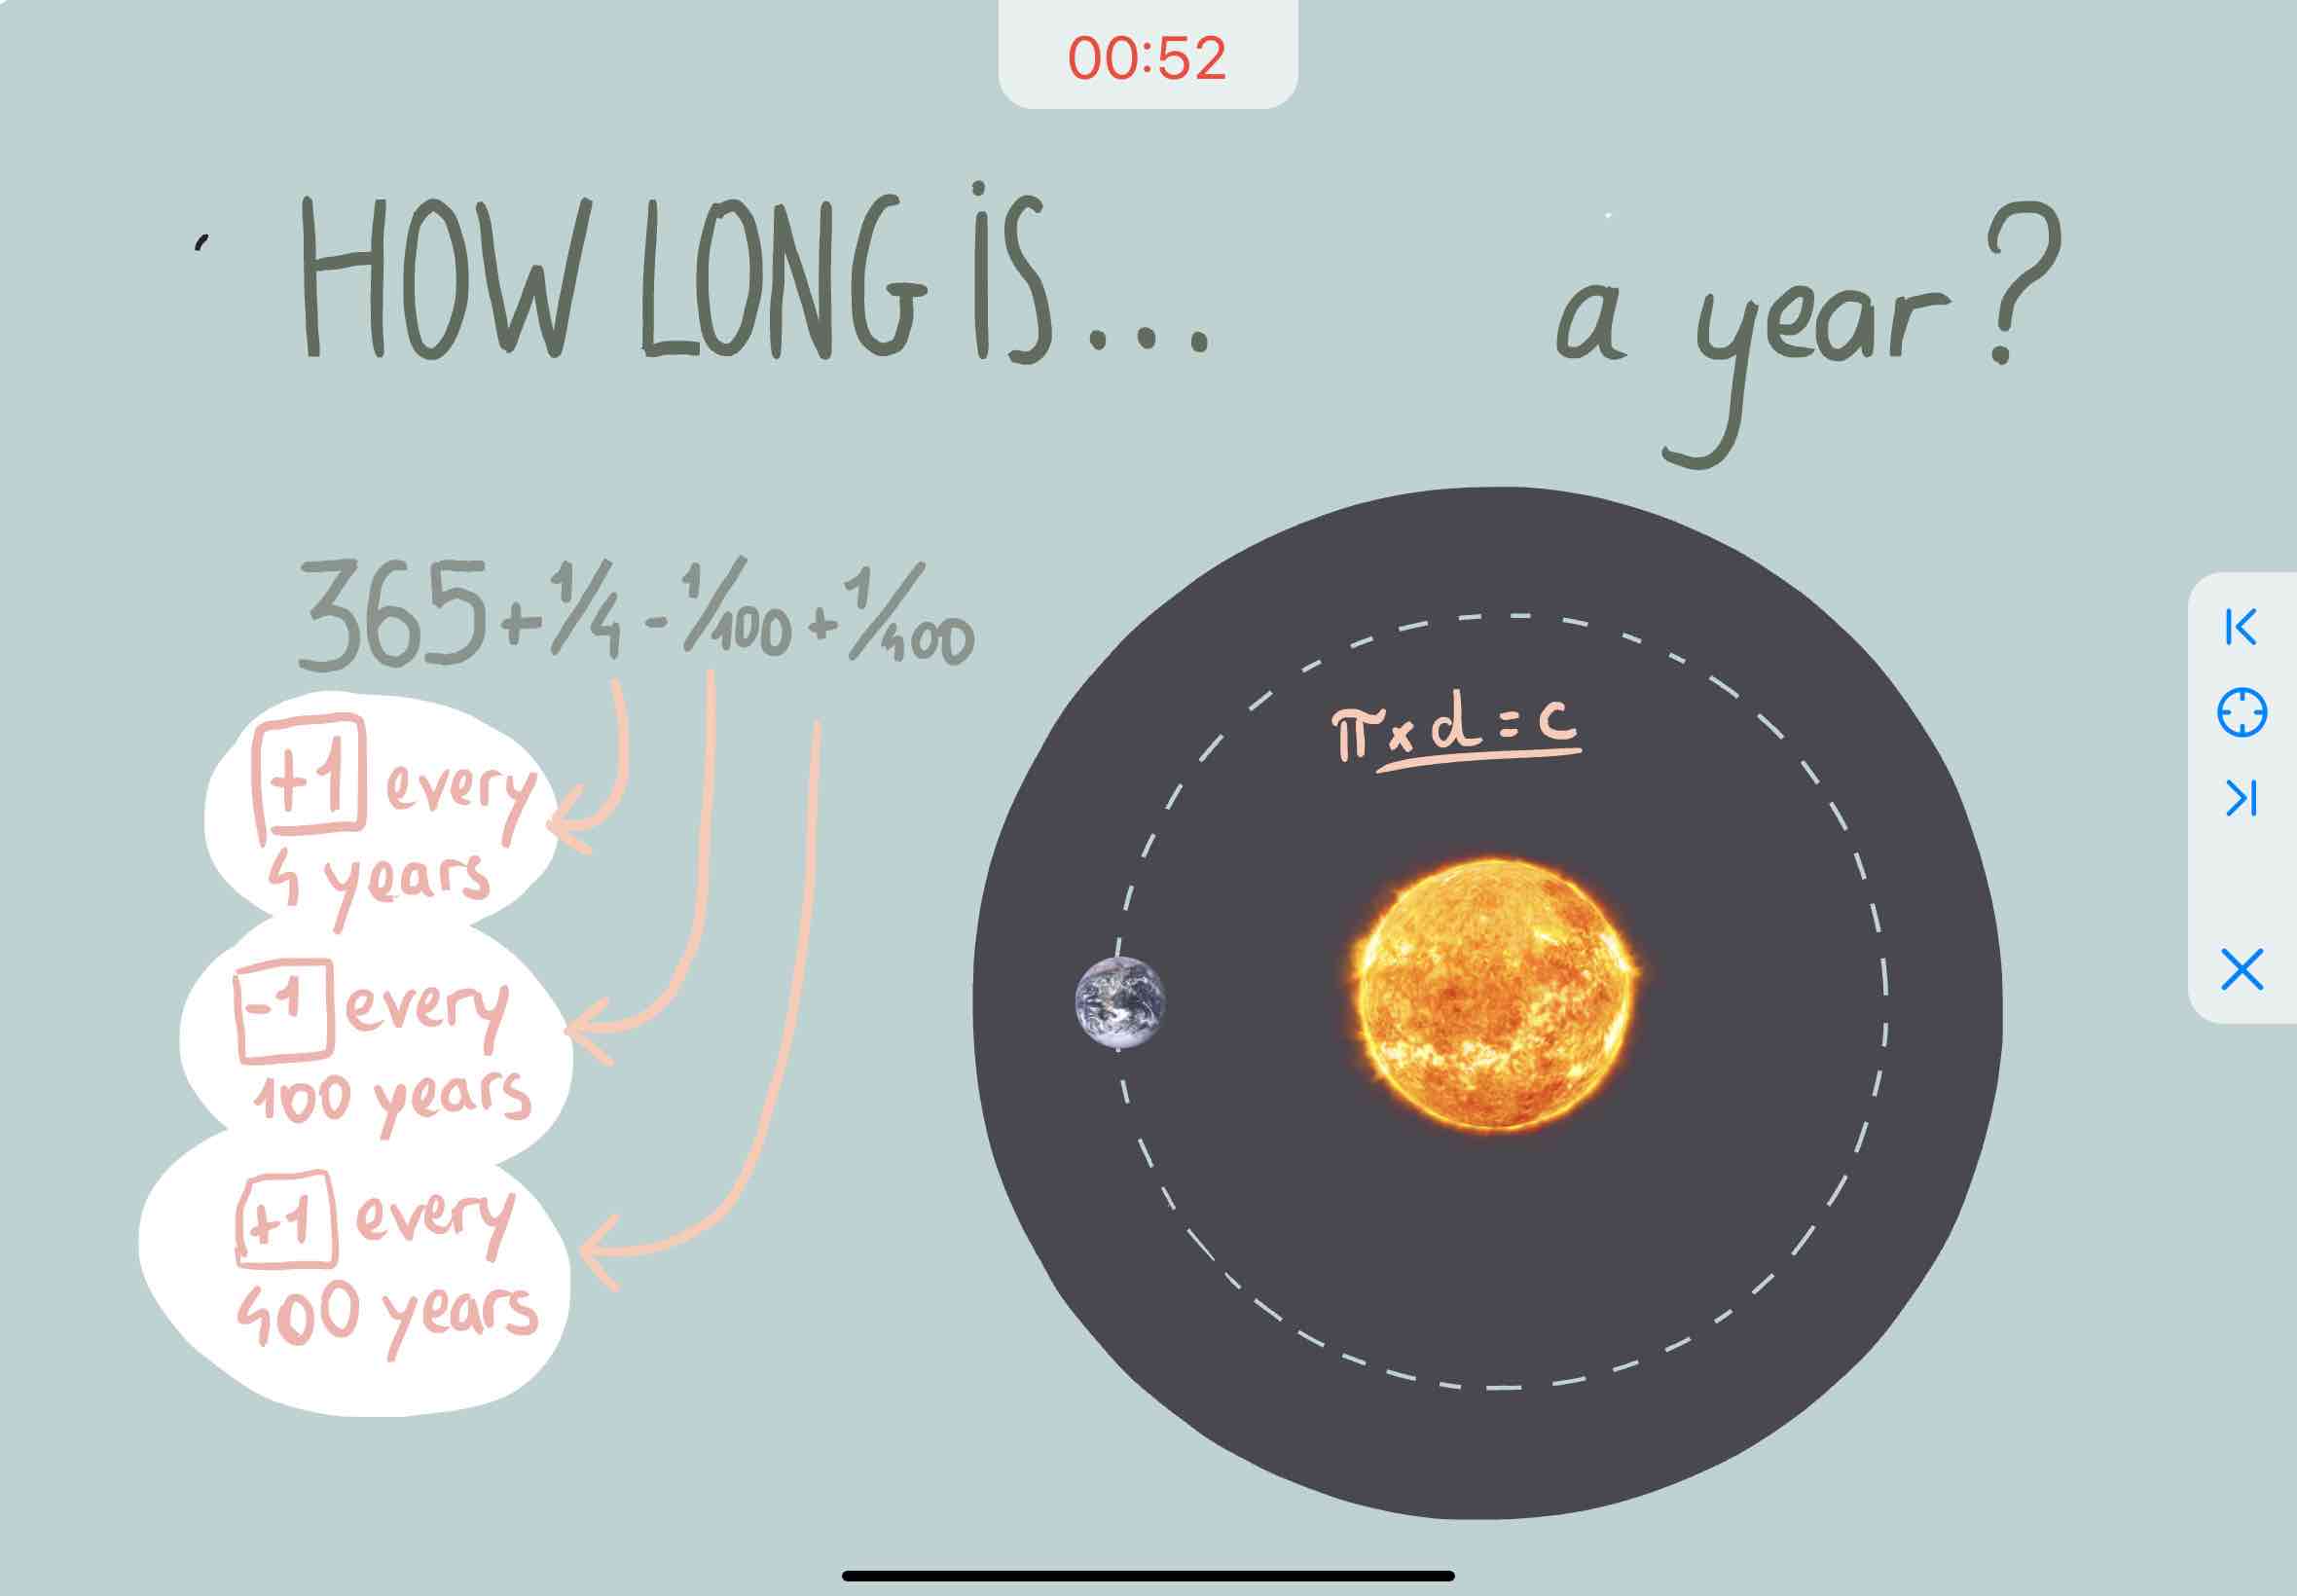
At the top of the screen, when you start a presentation, you will find a white timer. The timer is here to help you keep track of your time during your slideshow, or to show you the time directly.
The “timer” will automatically start when you tap on one of the arrow buttons for the first time. To end the timer, simply leave the ‘presentation mode’.
You can pause the timer by gently tapping on the white part of it once with your finger or your pen. The time will stop and will turn red.
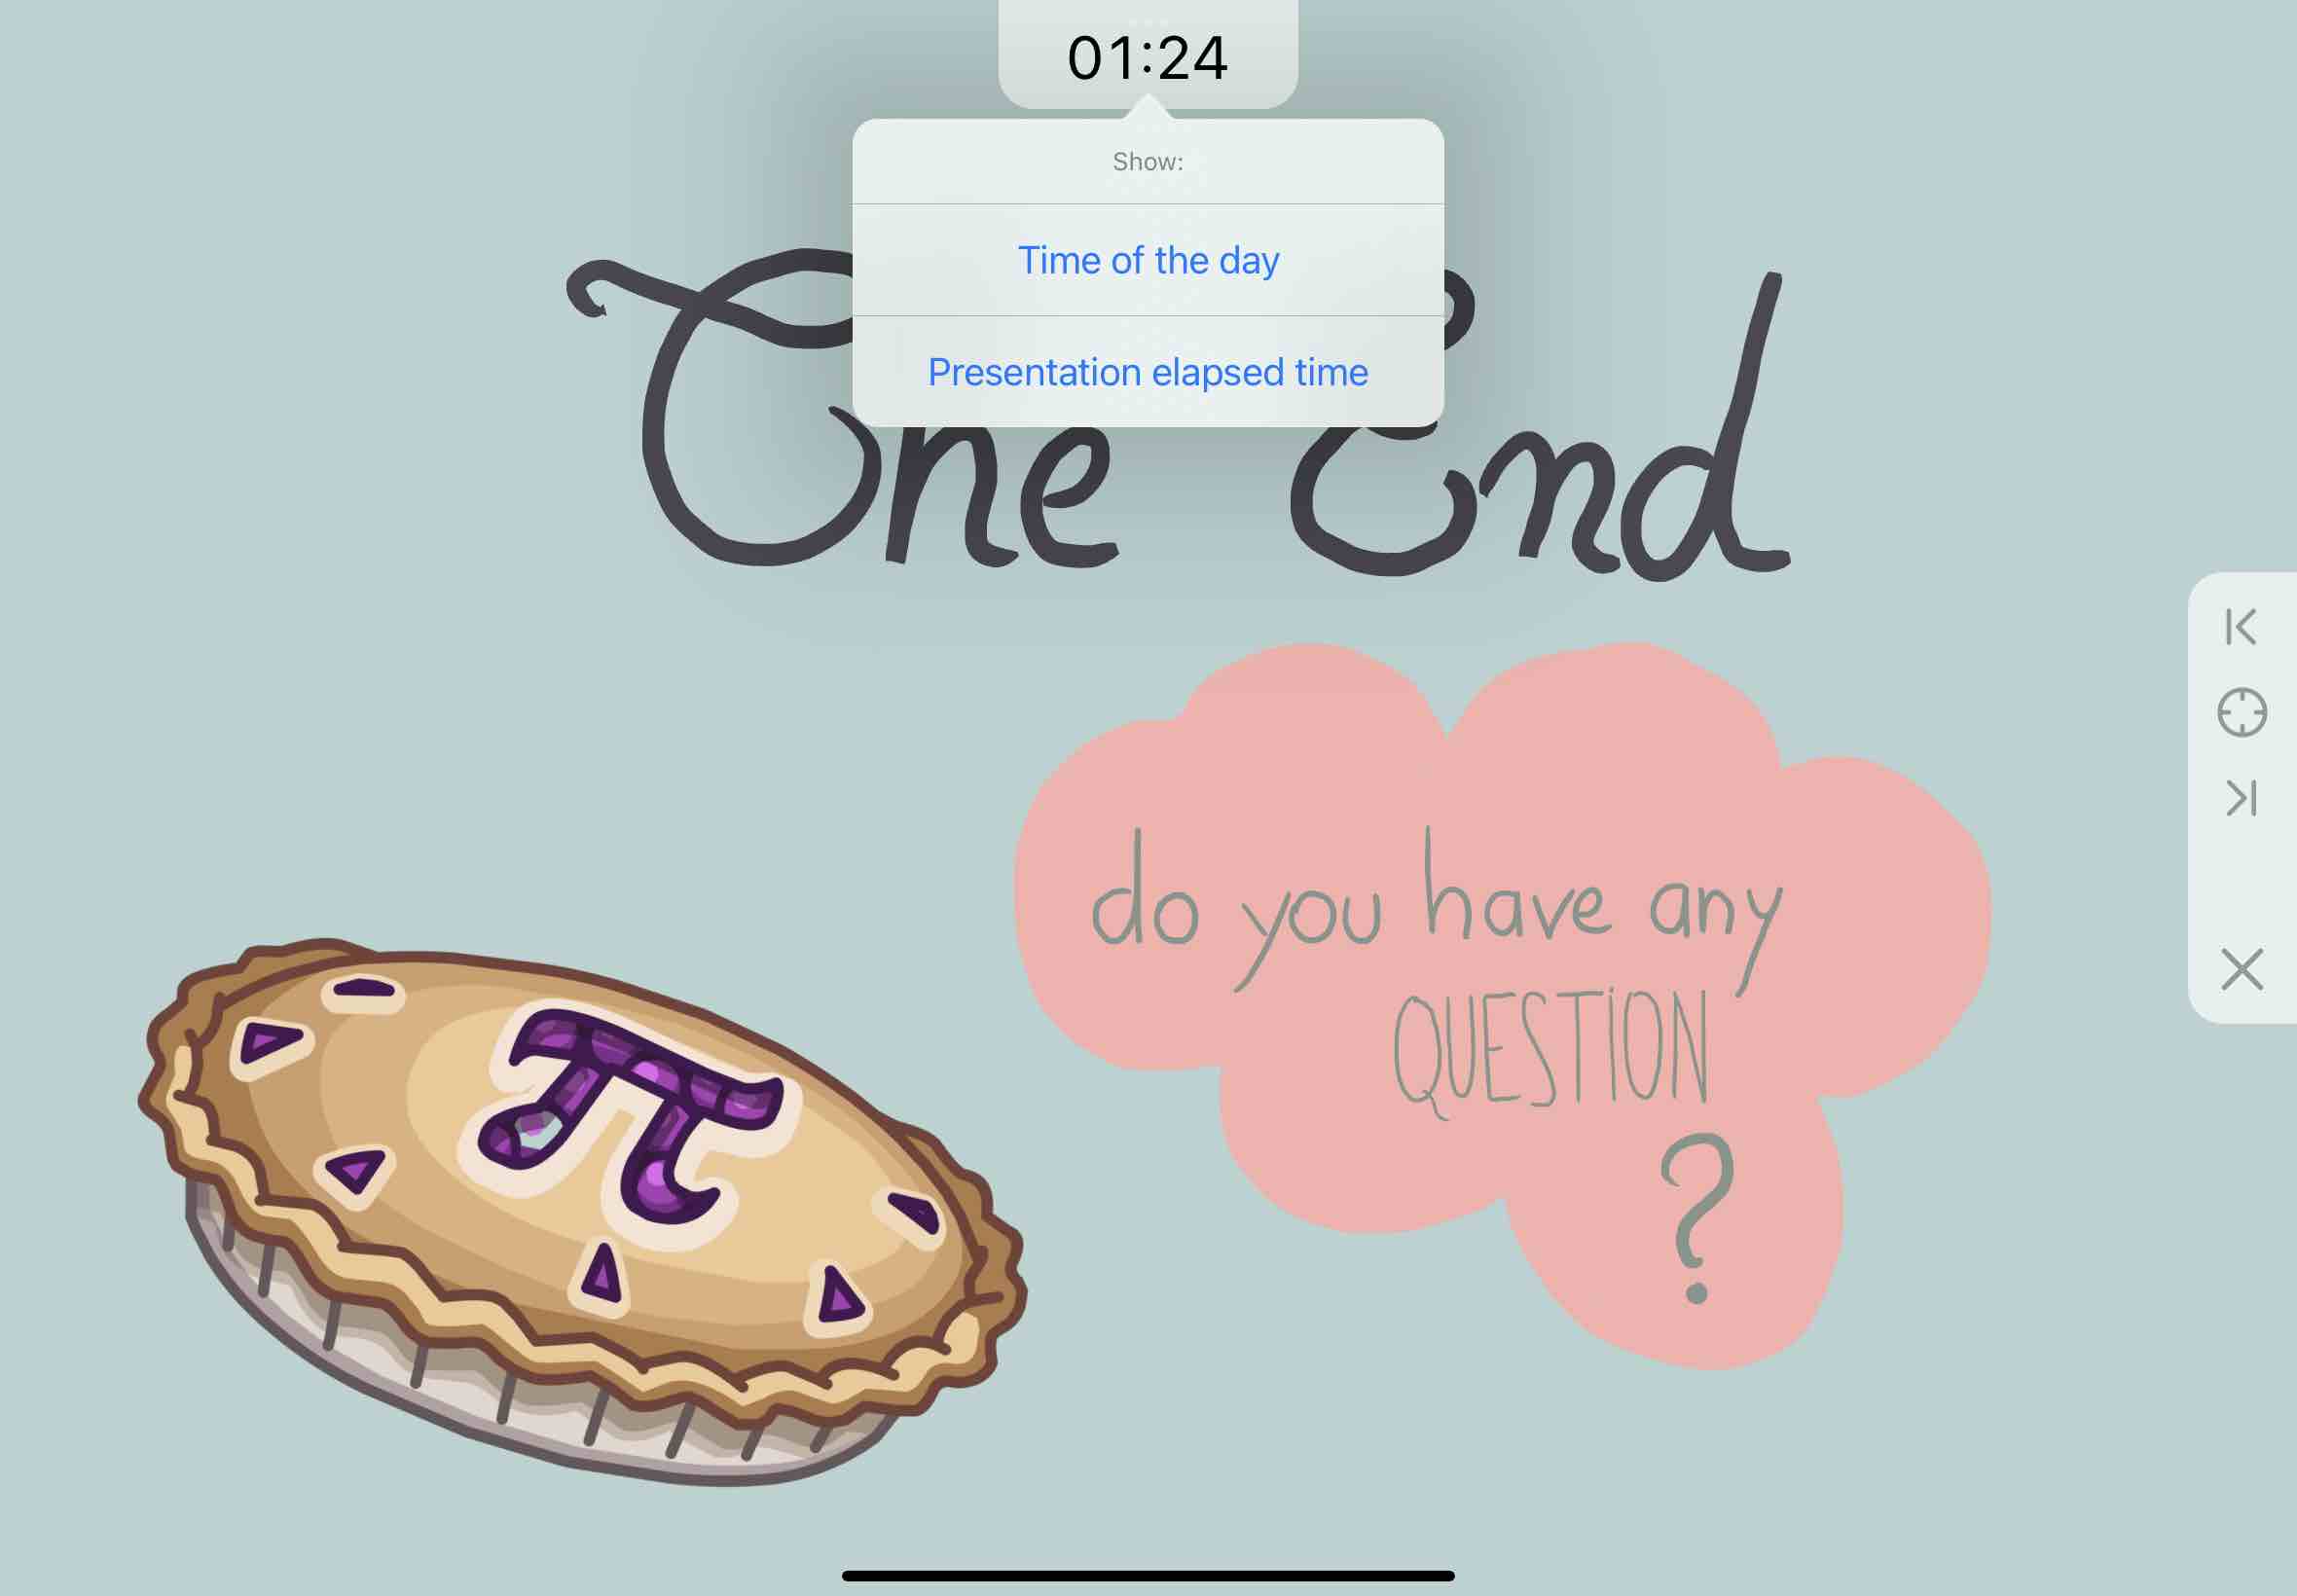
You can switch from a “timer” to a “clock” by pressing a finger or a stylus for a few seconds on the white part of the timer. A window will pop-up and give you 2 choices: “the time of the day” or the “presentation elapsed time”. Just tap on the view you wish to have for your presentation.
Customization
Adaptative Bullets
You can apply a grid like pattern over your surface to help you write and draw neatly, like in a bullet journal. This pattern is anchored and adaptive: it will follow you as you navigate through your canvas and will always remain at the same place when you switch them on and off.
To activate the bullet grid, just tap on "Display Bullets" in the option tab . There you can choose how much space there is between the bullets and modify their size to make them more or less visible depending on your needs.
Canvas Themes
In the option tab you can choose from 6 themes for your canvas, each altering the background color of your surface and adjusting predefined palettes to better suit the new environment.
The 6 themes are:
- Whiteboard the initial, white theme with basic palettes,
- Carbon offers a dark background with flashy color palettes,
- Chill features a soft blue background to reduce eye strain, especially for those with astigmatism. The color palette is subdued and calming,
- Warm creates a paper-like feeling with a light beige background and sunny color palettes,
- Chalkboard ideal for reproducing a school chalkboard, complete with chalk-like colors in the palettes,
- Blueprint for users who want to elevate their schemes with a blue background and white nuances in the palettes.
You can also use your own custom color by tapping on the "Custom" icon below the themes' thumbnails. This will lead you to an advanced color chooser. The last six colors you've selected as a background color are available below the "Custom" button.
Dark mode
The dark mode is a feature that adapts the app's interface and canvas to a darker environment by changing their color schemes. The app automatically follows your device's mode, requiring you to switch your entire device for Endless Paper to also be in dark mode.
In dark mode, your canvas will change its background color as well as the color of all your previous strokes to fit the new appearance.
If you wish to keep your canvas and its strokes in light mode, you can change the dark mode's behavior in the options tab .
- Follow System ensures your canvas reflects your device's settings.
- Always Light maintains the canvas appearance even in dark mode.
- Always Dark keeps your canvas and its strokes in dark mode, regardless of the system setting.
Bookmark Transition
You can set a smooth traveling transition when moving to a nearby bookmark. This transition guides you toward the bookmark, allowing you to see exactly where it is on your canvas relative to your current position.
Scroll down the option tab and toggle “Animate bookmark transition” to choose either a smooth traveling effect or no transition.
This setting also applies to presentations, providing a smooth traveling effect between slides.
Settings
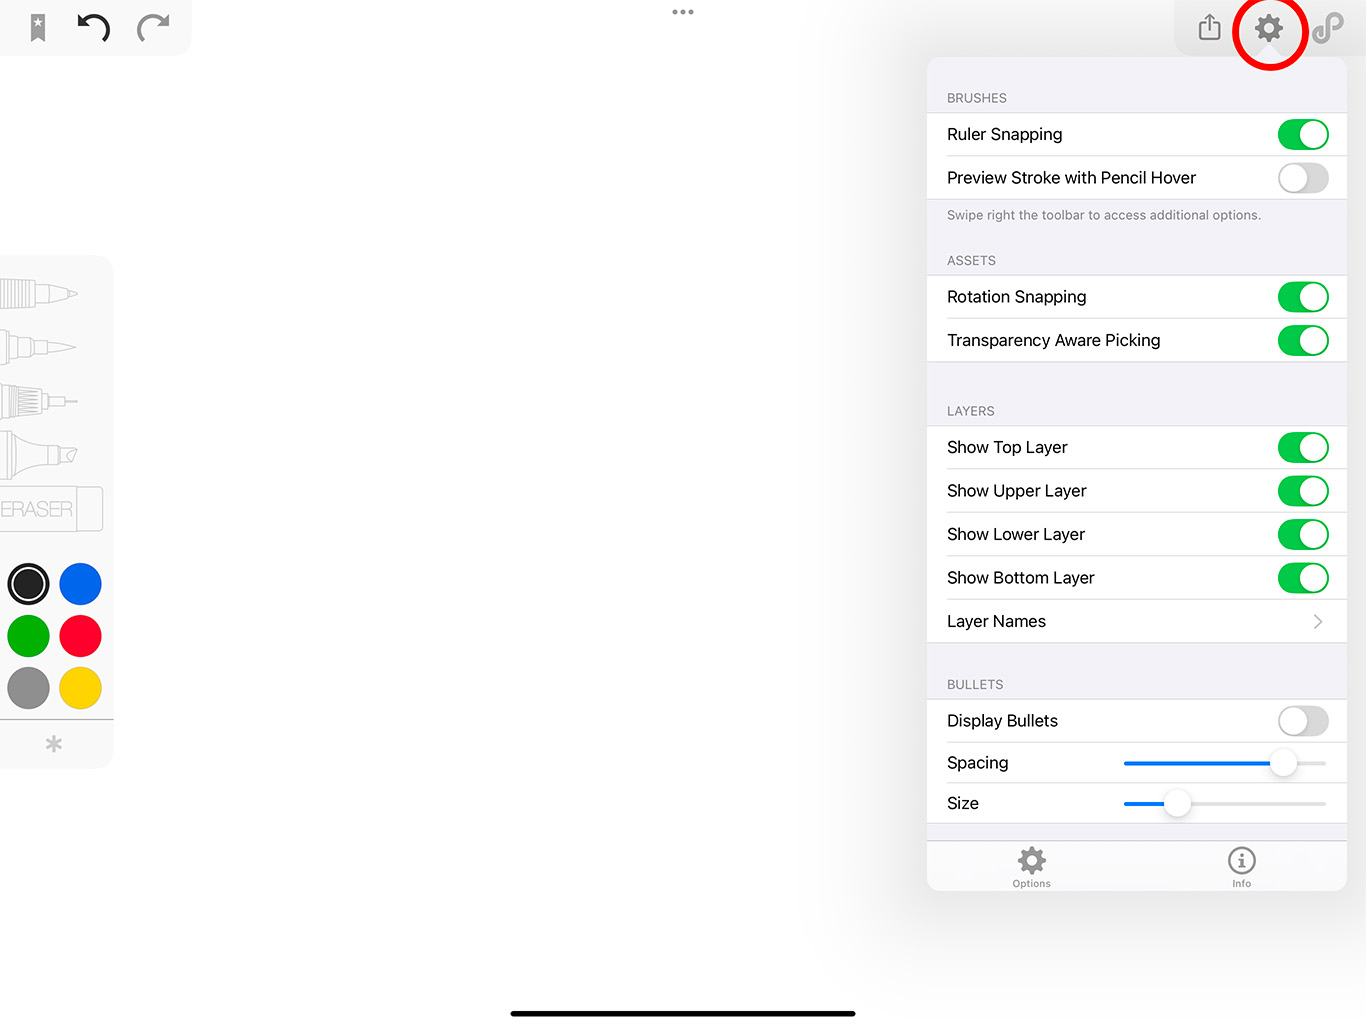
The settings popover is accessible by tapping on the gear button at the top right corner of the screen. It is divided into 3 different tabs: Options, Info and Account. The “Option tab” is mostly about tools settings.
Options
Brushes' settings
Ruler Snap
The ruler snapping helps you connect your straight lines to existing strokes. You can disable it here.
Pencil hover
On supported iPads, the Apple Pencil hover is a feature that enables you to preview exactly where your stroke will fall.
Assets' settings
Rotation Snap
When adding a picture onto your canvas, it will automatically freeze in certain positions. In fact, it will snap the picture’s rotation around 45 degrees increments. This is due to the rotation snapping.
Tap the "Rotation snapping" switch to move your pictures freely or to automatically snap them in place.
Transparency Aware Picking
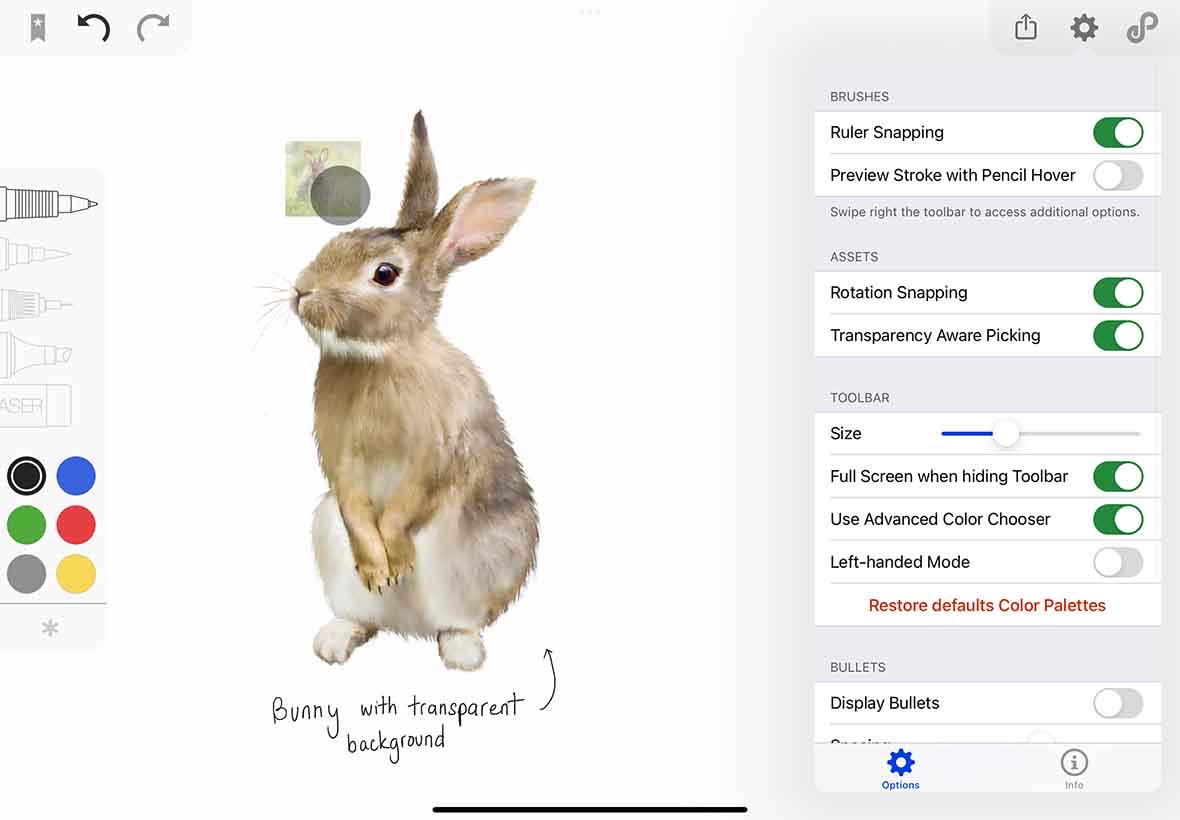
When the "Transparency Aware Picking" button is activated, pictures with transparent areas can be manipulated only by interacting with its visible (non-transparent) parts.
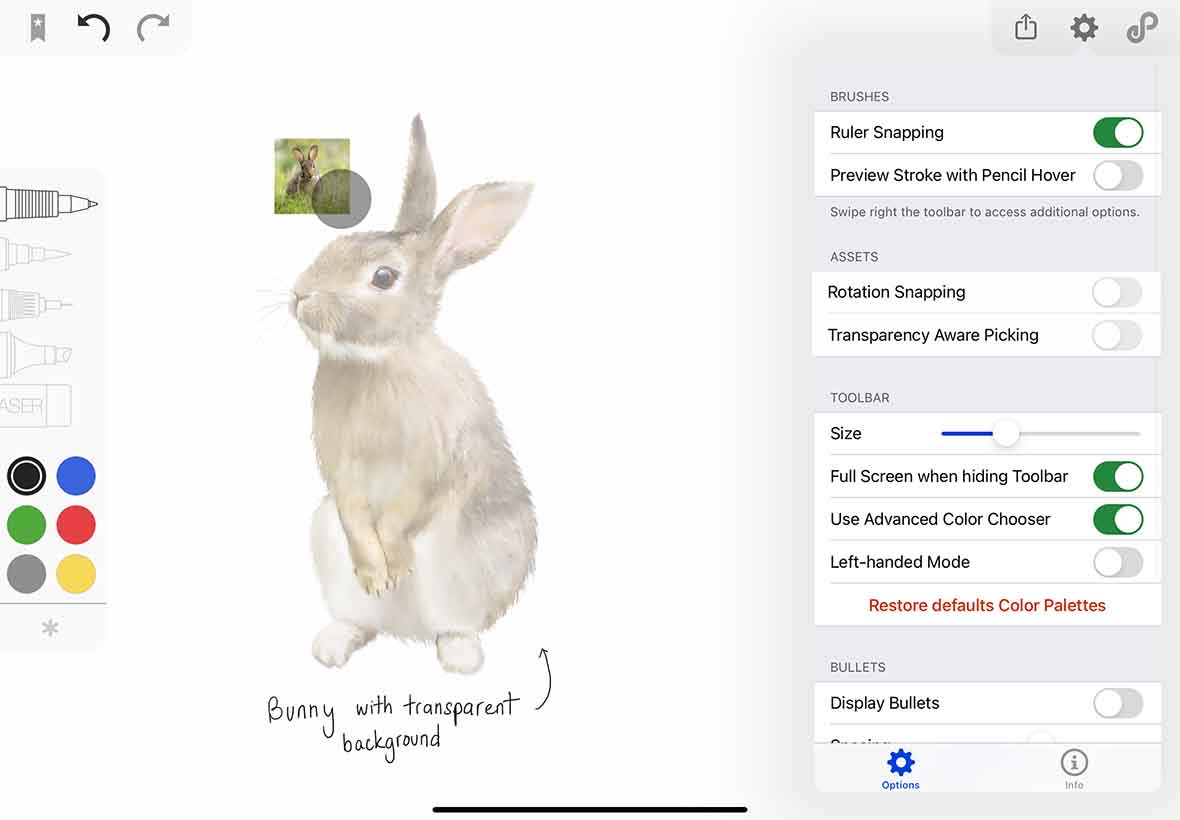
If you disable the Transparency Aware Picking, you won't be able to pick images under the transparent parts as the picture with the transparent part will be selected instead.
Layer settings
There, you can toggle each layer on or off to control their visibility. This can be very useful for temporarily hiding notes or erasing strokes from multiple layers at once.
You can also rename your layers to better align with how you use them.
Toolbar's settings
Toolbar size
You can change the size of your Toolbar by moving the cursor with your finger or your stylus. Drag the white circle along the blue and gray line until you’re satisfied with the toolbar size.
Full Screen mode
When you hide the Toolbar by swiping it to the left the other buttons also disappear. To keep them visible whether or not your toolbar is hidden, tap on the “full screen when hiding toolbar” switch.
Switch color chooser
When modifying a color, you can choose between using a color wheel or the advanced color chooser. To switch from one to the other, tap on the "Use Advanced Color Chooser".
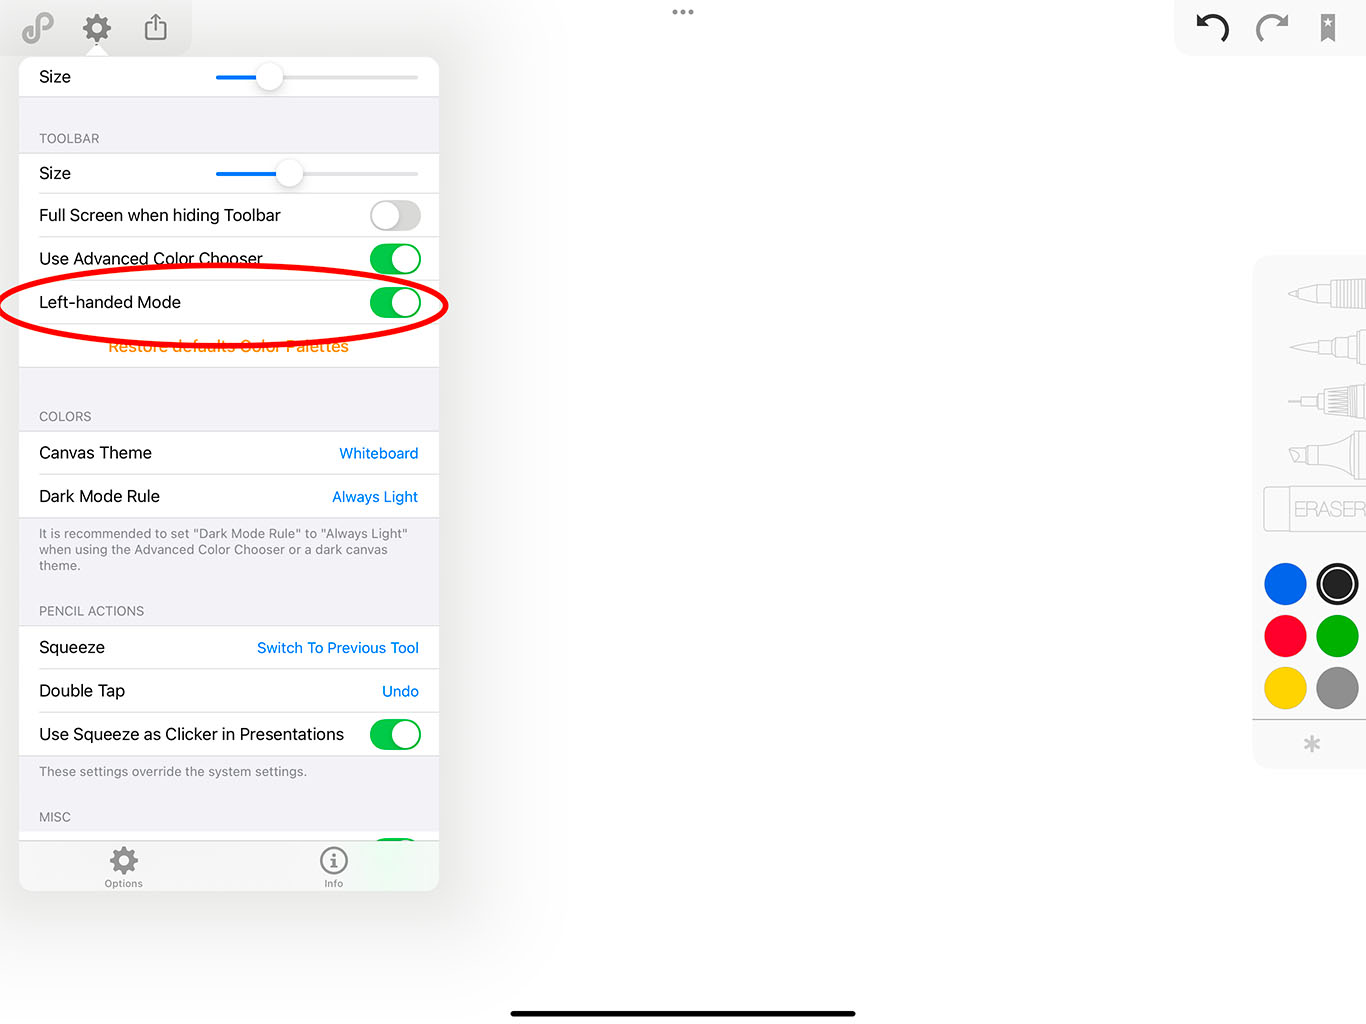
Left-handed mode
By activating the "Left-handed Mode", your toolbar, the red bookmark button and the “undo and redo " buttons will be placed on the right-hand side of the interface, whereas the Sharing , the Settings and the Canvas’ Gallery buttons will be located on the left-hand side of the interface.
These changes in the interface design are optimized for left handers, allowing them to select tools and features with their right hand while drawing and writing with their left hand.
Restore colors
If you have deleted some of the default color palettes you can restore them by tapping on the orange button "Restore default Color Palettes".
Pencil Actions
Squeeze
You can configure the squeeze action of your stylus to quickly access certain features as you work on your canvas. Most of these features can either be set to be activated after a single squeeze or, if you only need to use them occasionally, set to be accessed briefly (i.e. only activated when you are squeezing the pencil).
By default, the squeeze action briefly activates the previous tool. However, you can change this behavior to the eraser, the previous tool, the ruler, undo , redo , the lasso or the eyedropper.
You can also use the squeeze action of your stylus as a remote clicker for your presentations to move from one slide to another without having to tap on your screen.
If you wish to disable the squeeze action, you can select "off" in the drop-down menu.
Double-Tap
You can also set some actions to the double-tap feature of your stylus. By default, the double-tap undoes your last action on your canvas. However, you can change this behavior to either switch to the previous tool, switch to the eraser, switch to the lasso, undo your last action or redo the last action you undid.
If you wish to disable the double-tap, you can select "off" in the drop-down menu.
Touch hotspots
The “Touch hotspots” is a feature that represents your fingers by small gray dots whenever and wherever you touch your screen while screen recording. It is very useful to point elements of your canvas when making a presentation.
If you wish to record your screen without the two dots, deactivate the "Touch hotspots while recording" button.
Use finger to draw
We highly recommend using an Apple Pencil or a Logitech Crayon with Endless Paper, as the app was designed with these styluses in mind. However, if you don't own a stylus from these brands or need to quickly add something without a stylus at all, you can activate the finger mode with this switch.
While in stylus mode, you can draw with your stylus, navigate with one finger, and zoom with two fingers. In finger mode, you can draw with one finger (or a stylus from another brand), navigate, and zoom with two fingers.
Information
The Information tab contains all the important information about your canvas, as well as ways to contact us.
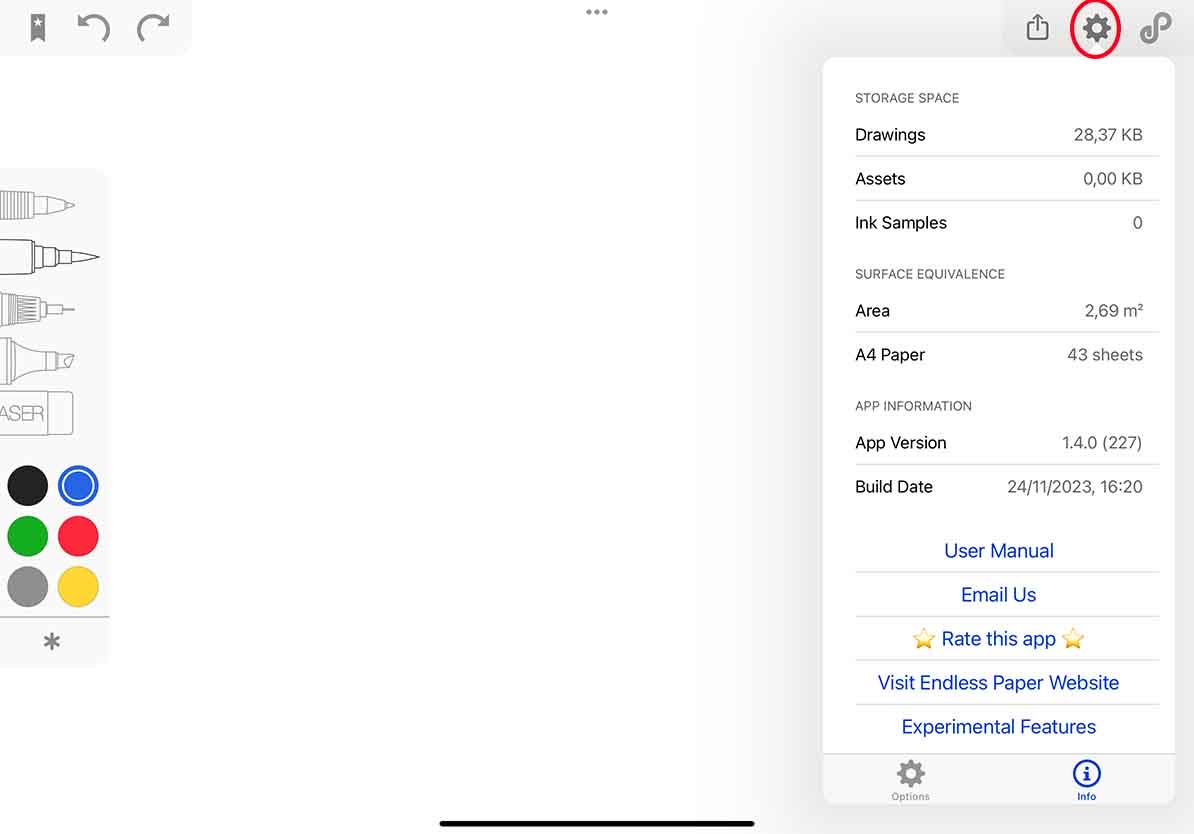
Storage Space
At the top of the tab is the “storage space information”, such as the data size, assets size and the number of ink samples.
Your data size is the strokes’ storage space on your device in megabytes.
The “Assets” size is the storage space of all the assets you added to your canvas. Assets are all the external content you previously dropped to your canvas. It can be pictures in the following formats; jpeg, png, etc .
Lastly the ink samples represent the global number of points of all your strokes done on your canvas.
Surface Equivalence
Below the storage space information is the “surface equivalence”. This section isn’t as important as the others but is a fun gimmick to visualize how much you have written so far.
You can see how big your actual canvas is in square meters or A4 sheets. If you happen to live in a country that uses the imperial system you can change the measurement to square feet and US letter paper sheets by taping once on the ‘results’.
App
Here you can see the current version of your app and the date it was created.
User Manual
This button opens the user manual in your browser, so you can quickly find help with the app and its features.
Email us
Don’t hesitate to contact us with the “Email Us” button!
We are eager to help, whenever you have additional questions or need assistance troubleshooting an issue. Also, we love reading user feedback, so don't hesitate to reach us out!
Rate this app ⭐️
This button lets you rate Endless Paper on the AppStore in a single tap.
Tip Jar 🫙
You love using Endless Paper and want to show your support? Feel free to leave us a tip!
Every bit of support means a lot to us. Thanks to you, we can keep improving the app and building new features.
Contribute to the future of Endless Paper by choosing one of four tip tiers:
- Buy the devs a coffee ☕️
- Buy the devs a croissant 🥐
- Buy the devs a croque monsieur 🥪
- Buy the devs a whole fondue 🫕
Thank you for being part of the adventure!
Visit Endless Paper Website
You can visit our website anytime by tapping on this button, or by visiting this URL in your browser: https://endlesspaper.app
Experimental Features
Are you interested in trying out our new features before anyone else? Tap on this button to learn more about our beta, and to register to become a beta tester!
Copy to clipboard
‘Endless Paper Support’ may need information relative to your configuration to diagnose an issue. Tapping on this button will copy that information to your clipboard, you'll then be able to paste it in an email for example. Here is what this diagnostic information looks like:
Data Size : 32,20 MB
Asset Size : 3,01 MB
Ink Samples : 1 356 487

App Version : 1.3.0 (154)
Build Date : 2023-04-19 17:46:24+0200

Hardware : iPad Pro 12.9 Inch 3rd Generation (iPad8,5)
OS Version : iPadOS 16.3.1
Device : 39CE48BA-87E9-4B6E-8535-381C3772CA7B
VCS Version : fractile-bc95ade-dirty
Account
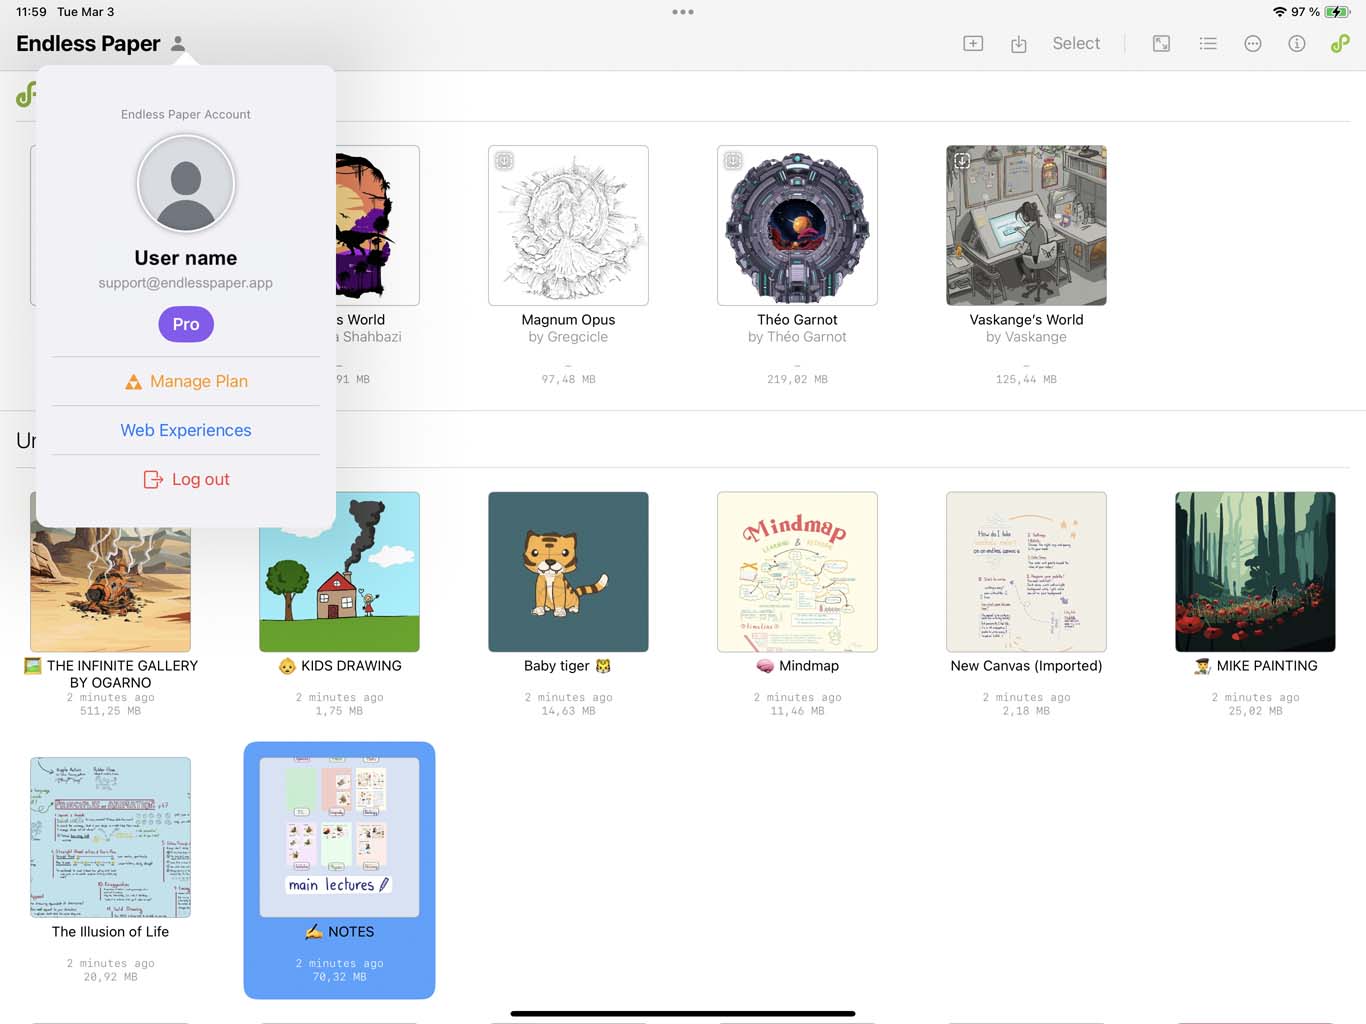
The Account tab allows you to manage your profile, your subscription, and your WebXP content. You can access it directly from the settings pop-over, or from the canvas gallery.
Your Endless Paper account
Creating an Endless Paper account gives you access to additional features, such as downloading featured canvases. It is also required to create WebXPs.
In the Account tab, you can create your Endless Paper account for free and update your information at any time. To change your username, simply tap on it in this tab. To update your profile picture, tap on it as well.
To log out, tap the "Log out" button at the bottom of the tab.
Your subscription
The Account tab also allows you to manage your subscription. Here, you can view your current subscription, whether you are on Free plan, Legacy plan, Premium plan, or Pro plan.
To subscribe or update your current plan, tap " Subscriptions" or " Manage Plan".
If you upgrade your subscription, the change will be effective upon purchase, and any unused time from your previous plan will be automatically credited back to you.
If you downgrade your subscription, the change will be effective upon the terminstaion of your current subscription.
If you originally purchased Endless Paper as a one time purchase, you should continue to have access to the features you paid for through the Legacy plan. If you no longer have access to the app, tap "New device? Restore purchases”" to regain access and activate your lifetime Legacy plan.
Your Web Experiences
You can access your WebXP Dashboard by tapping on the "Web Experience" button.
The WebXP Dashboard gives you access to all the WebXPs linked to your account, allowing you to manage and monitor them easily.
Shortcuts
Ruler
You can keep your finger pressed on the ruler to create straight lines. Removing your finger will make it go back to normal strokes. This allows a quicker interaction, perfect when you only need to add a single straight line to your canvas!
Paint Bucket
If you drag and drop a color pill from the quick access palette onto the area you want to fill, it will apply a fill according to your current bucket settings, including layer, expansion, and tolerance.
Eyedropper
To quickly access the eyedropper, press and hold a finger on the color you want to change in the palette. While keeping your finger pressed, tap the desired color on your canvas with the pencil to pick it.
Create a new bookmark
To quickly create a new bookmark without a name, simply keep your finger on the red bookmark menu icon , this will save your current location.
FAQ
I lost my work and can’t find it back, what do I do?
To go back to where it all started for you, you can open the bookmark menu and visit the « predefined » folder. Here you’ll find:
- the '🐣 Origin' bookmark that will lead you back to the first place you’ve been on this canvas
- The '🏠 Session' bookmark, that will lead you back to the beginning of your current session
- The '🌍 Global View' bookmark will show you your whole canvas so far (the closest view to still fit all your strokes)
Bookmarks are really useful to avoid being lost in our own canvas! You can create multiple ones to ‘save’ the localisation of your different works. For example: a bookmark for each project, one for your drawings, another for some notes taken during an interview, etc.
If you've truly lost your work and can't find it by tapping on any of the predefined bookmarks, you'll have to contact us. We’ll run a special tool that will find hidden content (deeply nested drawings) and tag them with a bookmark so that you can easily jump back to it.
This process might take a few days.
How to do a presentation ?
To create a presentation you need to tap on the three dot at the top right corner of the bookmark menu , and select « New Presentation ».
You’ll then need to choose the aspect ratio you wish to use for your presentation, and then add bookmarks that will serve as slides into your newly created presentation folder.
The order of the slides in the presentation folder reflect the order of the slides during the presentation. To start the presentation, go in the presentation folder and tap on the play button . You can go to the next or previous slide with the arrow buttons on the right side of your screen, and exit with the cross button .
The app is compatible with Bluetooth remotes/clickers.
You can also go to the next/previous slide using the keyboard arrows if you have one.
Can I have a refund?
We are sorry to hear that our app wasn't up to your standards.
Subscriptions purchased through the Apple App Store, including free trials that convert to paid plans, are billed and refunded exclusively by Apple.
To cancel your subscription, please follow Apple’s process here: https://support.apple.com/en-us/118428?device-type=ipad
As the developers, we do not have the ability to issue refunds or override Apple’s refund decisions once a request has been reviewed in their system. If your refund request was already submitted to Apple and not approved, there is unfortunately nothing further we can do on our side regarding this charge.
For any additional review, we recommend contacting Apple Support directly, as they are the only party able to reassess App Store billing decisions.
The app doesn’t let me draw/doesn’t work!
If you don't have an Apple Pencil you will have to switch on the "Use Finger to Draw" feature at the bottom of the option tab in the setting pop-over.
If you have an Apple Pencil but the app still doesn’t work, make sure your Apple Pencil is connected and functions properly.You can test those things by following these links:
https://support.apple.com/en-us/HT205236
https://support.apple.com/en-gb/guide/ipad/ipadc9c41abb/ipados
If your Apple Pencil (or a Logitech Crayon) is properly connected but still doesn't let you draw, you may have a pressure sensitivity problem on your pencil. It can be both a software or hardware problem.
First, to rule out a software issue:
Try unpairing the ‘pencil’ in the iPad Settings under Bluetooth, then hard reboot the iPad and then re-pair the ‘pencil’ to see if this helps.
To hard reboot the new iPad Pros:
-
press then release the volume up button (1 second)
-
press then release the volume down button (1 second)
-
then hold on the Lock (Power) button at the top (about 5 seconds)
You’ll see the ‘slide to power off’ message, but keep holding a few more seconds until the Apple logo comes up first.
When you see the Apple logo, release the ‘power button’ and wait while the device powers up and the Lock screen appears.
If this doesn’t help, it might be a hardware issue with your particular ‘Pencil’. We have seen this issue before and so we made a diagnostic tool integrated into the App.
First of all you need to send us an email explaining your issue with your diagnostic information. We will then send you a special link to run a pencil pressure diagnostic in Endless Paper.
Once we receive the diagnostic data, we’ll get back to you to tell you if it is a hardware issue. If it is a hardware issue, you’ll have to contact the Apple Store/reseller to get a replacement.
Is there a left-handed mode?
Left-handed mode flips the position of the toolbar and interface elements, making the app easier to use with your left hand and helping prevent accidental taps. To enable it, open the Options tab , scroll to the bottom, and turn on the Left handed mode switch.
Is there a layer system ?
Because of its note taking roots, Endless Paper currently has 4 layers system (bottom / lower / upper / top ).
You can select the layer you want to interact with by tapping on on the layer selector in the extended toolbar, and hide or show each layer in the Option Tab .
With the eraser, you can choose to erase on specific layers or on all visible layers .
What is the scale limit?
At the scale of human existence, Endless Paper is pretty much infinite: so no limit.
On the very first piece of Vaskange, an artist that uses our app, we estimated a canvas size 16x the Earth → Sun distance. It has grown a lot since…
Which iPads are supported by Endles Paper?
Endless Paper is compatible with the following iPad models:
- iPad mini (5th generation and later)
- iPad (6th generation and later)
- iPad Air (3rd generation and later)
- iPad Pro 12.9-inch (1st generation and later)
- iPad Pro 11-inch (1st generation and later)
- iPad Pro 10.5-inch
- iPad Pro 9.7-inch
Essentially every iPad compatible with Apple Pencil.
To identify your iPad model:
https://support.apple.com/en-us/HT201471
We are planning on offering an iPhone support in the future, and hoping that one day we’ll be able to be on androids and computers.
How to make my toolbar reappear?
To make your toolbar reappear, swipe from the edge of the screen toward the center. Swipe again to open the extended toolbar, which gives you access to additional options for your brushes, palettes, and eraser.
If the toolbar does not appear after swiping, check your subscription status. The toolbar is only available to users with an active subscription or a Legacy License. If you previously purchased the app and cannot see the toolbar, you can restore your purchase from the in app shop.
Can I type in text?
Endless Paper does not currently support typed text. However, you can use images , screenshots, or PDF files as a workaround.
You can collect and arrange text excerpts from books or other apps as screenshots, or import the text directly as a PDF file onto your canvas.
How to get rid of the frame on my canvas?
While inside a presentation folder you might have noticed a black frame on your canvas no matter where you go.
This is here only to represent what would be visible during a presentation based on the aspect ratio you chose when creating it.
If you aren’t presenting and wish to get rid of this frame, you just have to exit your presentation folder in the bookmark menu . Return to the general bookmark menu or enter another folder.
How to create a backup of my canvas/move my data to another device ?
You can bundle all of your canvas’ (or canvases') data in a single Archive ; it’s a back-up mechanism to move data from one device to another. You can export your canvases as archives or import them in your gallery.
Is there a folder system for my bookmarks ?
While your surface in infinite in Endless Paper, you can still organize your bookmarks in folders in the bookmark menu . Simply tap on the three dots at the top of the pop-over, and then select « New folder ». You can then drag and drop your existing bookmarks in this folder, or create new bookmarks directly in it.
If you wish for a more tangible separation between your different project, you can go in your canvas gallery to create a new canvas. Tap on the Endless Paper logo at the top right corner of your screen and then tap on the plus button at the top of your gallery to create a new empty surface.
What are your social media? I’d like to tag you in my posts!
Thank you for wanting to credit us!
The preferred way to feature Endless Paper in a social post is (Instagram example here):
Created with @endlesspaper.app
Here are the different handles:
- Youtube @endlesspaper-app
- LinkedIn Endless Paper
- Twitter @endlesspaper
- Instagram @endlesspaper.app
- TikTok @endlesspaper
- Website https://endlesspaper.app
We can’t wait to see your art online!
Can I rotate my canvas?
No you can't, we tested canvas rotation on early versions of the app, but feedback was that it is extremely disorienting and detrimental to spatial awareness so we disabled it.
We still think it can be useful in certain scenarios, but we need to come up with a good user experience for that and prevent accidental rotations.
Why are my strokes uneven or invisible?
If your strokes aren’t showing or are messy even while using an Apple Pen, there might be a pressure sensitivity issue with your stylus.
Fortunately there is a diagnostic tool integrated into the app. First you need to send us an email with your diagnostic information. We will then send you a special link to run a pencil pressure diagnostic in Endless Paper.
Once we receive the diagnostic data, we’ll get back to you to tell you if it is a hardware issue. If it is a hardware issue, you’ll have to contact the Apple Store/reseller to get a replacement.
Can I draw without an Apple Pen?
You can draw without an Apple Pencil; however, we highly recommend using one for the best user experience. We believe that utilizing a physical stylus allows for effortless use of our app and enables you to create with a low cognitive load. Simply tap on the "Use Finger to Draw" switch in the option tab to start drawing without an Apple Pencil.
Can I export my canvas in a pdf format ?
You can export sections of your canvas as a PDF file. To do this, go to the sharing pop-over and tap on "Export as PDF ". You'll access an interface where you can crop your canvas and export the selected area as a PDF file. You can also long press a bookmark folder and select “Export as PDF ” from the action menu to export all the bookmarks it contains as a single PDF file.
While this format has its limitations, it is more versatile than exporting as an image. Although you won't be able to zoom in indefinitely, you can zoom in much more compared to an image, especially if you choose a vector PDF file.
How to keep the same brush size when I zoom in and out ?
To keep the same brush size whether you’re zooming in or out of your canvas, simply pull the toolbar like a drawer and try the lock pen thickness option .
Normally when you write in Endless Paper, the pen thickness is constant relative to the screen: No matter the zoom level, when you write on the screen it will always be the same thickness.This is the right behavior most of the time but it means that if you write something, zoom in and write again, the new text will appear smaller relative to the previous one… This might be annoying when you want to have uniform pen thickness on a piece.
The Lock thickness feature is designed to solve this exact problem. When you activate it, pen thickness is no longer affected by zoom. Conceptually, activating this option is like adding a landmark, a scale reference to your canvas. It works with all writing tools & we recommend using it in conjunction with bookmarks so that you can always go back to the reference point.
How to draw a straight line?
To draw straight lines, select a drawing tool in the toolbar and tap the ruler tool to enable straight line mode. Tap the ruler again to return to normal strokes.
You can also press and hold the ruler with your finger while drawing for quicker access. As soon as you release the ruler, the tool switches back to normal strokes.
Is there a lasso tool?
Yes there is! You can now move, duplicate, rotate, resize, or delete any element on your canvas in just a few seconds. Tap the Lasso tool in the toolbar, then draw around the elements you want to select using your stylus.
Can I add an image to my canvas ?
To add images to your Endless Paper canvas, simply drag & drop the image from any other compatible app to Endless Paper.
How can I remove the gray dots that appear when I touch the screen while recording?
This feature was originally requested by teachers who felt that visible touch points could help students see what was happening on screen. However, we understand that in other contexts it may not be useful.
If you want to record your screen without the gray dots, disable “Touch hotspots while recording” at the bottom of the Option Tab in the settings popover .
If you plan to share your recording online, here are a few tips that might help:
- Videos filmed from above, with your hands visible as you zoom, tend to perform better online. They generally are more spectacular to the viewers and attract more likes and comments.
- For a cleaner and more professional result, you can also create a smooth traveling video directly in the app by tapping “Share as Video ” in the sharing popover .
Whatever recording technique you’ll choose to use, we’ll be eager to see your art online!
Are you allowed to sell my data to third parties? Can you see everything I draw in my canvas?
Your privacy is very important for us!
Everything that you create is yours and yours only.
We do not have access to any of it, it is stored locally into your iPad. The only case scenario in which we could see your content is if you reach us and send us an archive of your canvas.
We won’t and can’t, deliberately, sell any of your content to anyone nor publish it, even if you give us access one day.
The only data that we have from our users is anonymized data about your use of our app (which tool are you using the most, how big your canvas is, have you ever used the presentation mode…). We are only using it for statistics in order to improve Endless Paper.
We are currently working on ways to create backups for the users, but once again we won’t have any access to it. Those backups will be stored locally on your iPad if you choose so and you will be the only one to own it.
You can show your canvas to others by using the sharing option or the broadcast button. Other than that, no one can see any of your work. No matter what happens, you have the ability to stop the broadcast at any given moment.
Can I have a discount?
If you purchased the app before version 2.0.0, a special discount will automatically appear in the in app shop for your first year of subscription, reimbursing approximately the price you originally paid for the app.
Is there a free trial?
Yes, new users can try Endless Paper free for 7 days starting from the Premium Yearly plan.
Can I lose my data?
In most cases, no. Endless Paper relies on an automatic saving procedure (which happens automatically every few minutes) that will save your data in a specific backup folder where it will examine the data closely to avoid any error and then read it to ensure its proper functioning. Then and only then will this new save go to its final destination in your folder.
To avoid any corruption, Endless Paper waits until your whole canvas is saved to rewrite over your last save. That way no matter what happens, may it be a dying battery, a crash, or even a cosmic ray, your canvas will be safe and the app won’t keep a broken file (which could then lead to data loss or even crashes).
If you encounter any kind of issue nonetheless, don't hesitate to reach out to our support team at support@endlesspaper.app including your diagnostic informations and stop using the app for the time being. We'll do our best to help you!
Feedback
If you have any suggestions or comments about this manual, don’t hesitate to contact us at: support@endlesspaper.app
We value your feedback!